
Noise Reduction Shims — how they reduce brake noise
Noise Reduction Shims Dampen Braking Vibrations and Reduce Brake Noise

Different styles of brake pad shims
Noise reduction shims install between the backing plate and the brake caliper piston on the inboard side and the backing plate and the outer caliper fingers on the outboard side. In simple terms, they “decouple” the steel backing plate from the caliper.
They’re a very important part of a vehicle’s brake system because they reduce objectionable brake noise.
It’s is made from a noise-dampening material and is designed to stop the transmission of normal braking vibrations to the caliper.
All brakes produce vibration while braking. Without a shim, the vibrations transfer from the friction material to the metal backing plate, and from there to the caliper, steering knuckle and strut and spring. Those suspension components amplify the vibrations, causing unpleasant squeal and screech.
Single versus multiple layered noise reduction designs
A single layer shim is made from a soft metal that has a high degree of vibration dampening ability. A multi-layer design, on the other hand, often contains two thin outer metal plates and an inner elastomeric core, or an inner metal core with two outer sheets of noise dampening material. In some cases, the design of the inboard shim may be different than the outboard shim. In those cases, proper placement is critical to achieve maximum noise reduction.
Multi-layered shims are far more effective at noise reduction than single layer shims.
Attachment methods
Shims can be attached with adhesive, mechanical tabs and holes or be permanently riveted to the brake pad backing plate. The adhesive method isn’t designed to hold the shim in place over the life of the brake pad. Instead, the adhesive is used for first-time placement. Tabs and holes and rivets keep the shim in place over the life of the pad.
Pressure sensitive adhesive
Some noise reduction shims come separate from the brake pads and attach with pressure sensitive adhesive to the brake pad backing plate. The adhesive’s role is to secure the shim only during installation. Normal brake heat will degrade the pressure sensitive adhesive after a short period and the shim must stay in place due to its shape and placement in the caliper.
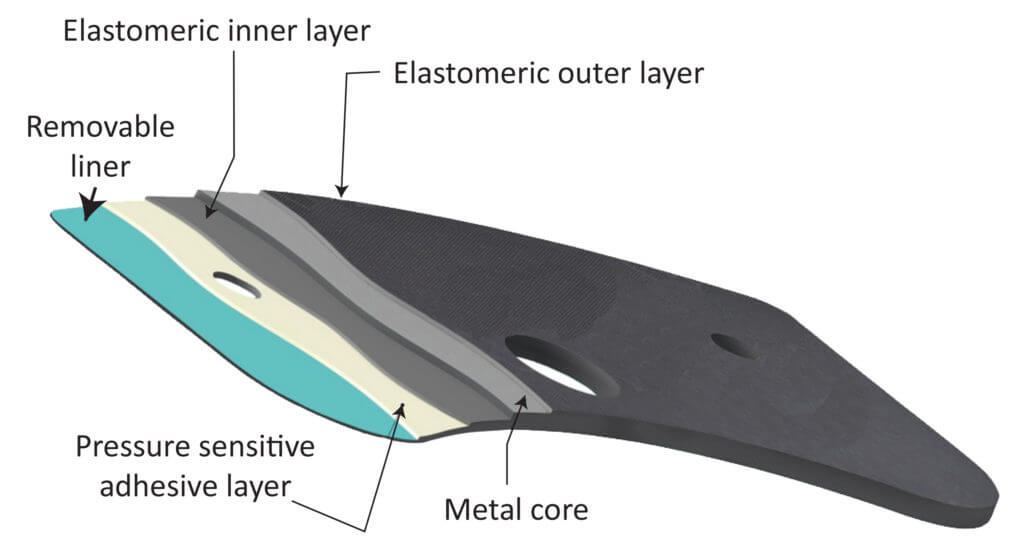
Here’s an example of a high quality multi-layer noise reduction shim showing outer rubber layers with a metal core. Other designs have an inner rubber layer with two outer metal layers
Tabs and holes
Other shim designs incorporate tabs or holes that mate to the brake pad’s backing plate to hold the shim in place.

Noise reduction shims can be attached to the brake pad with tabs and holes
Rivets
Still other shims are designed to be permanently installed to the brake pad’s backing plate during pad manufacturing. This method ensures the shim will never migrate and also ensures the shim will never be reused.
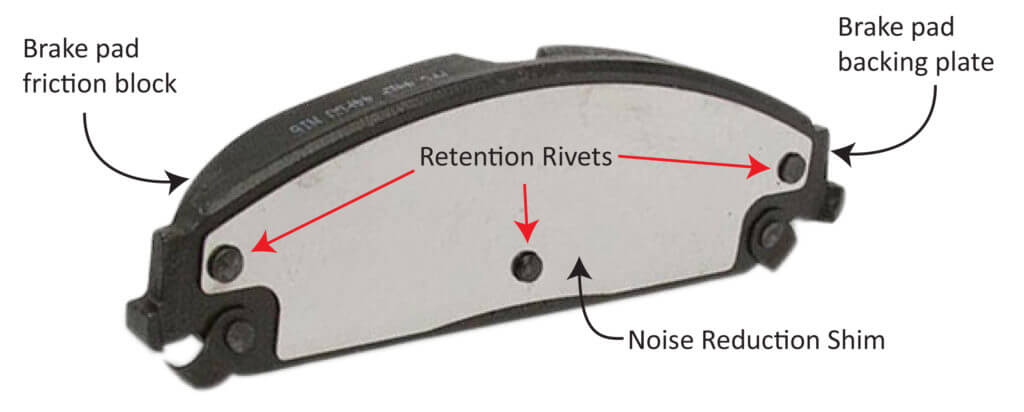
Riveted brake pad shim
They shouldn’t be reused
Hust like anti-rattle/abutment
clips should never be reused, you shouldn’t reuse noise reduction shims. Over their life, the shims lose their ability to reduce noise. Reusing them will result in a brake job that produces noise, vibration and harshness (NVH).
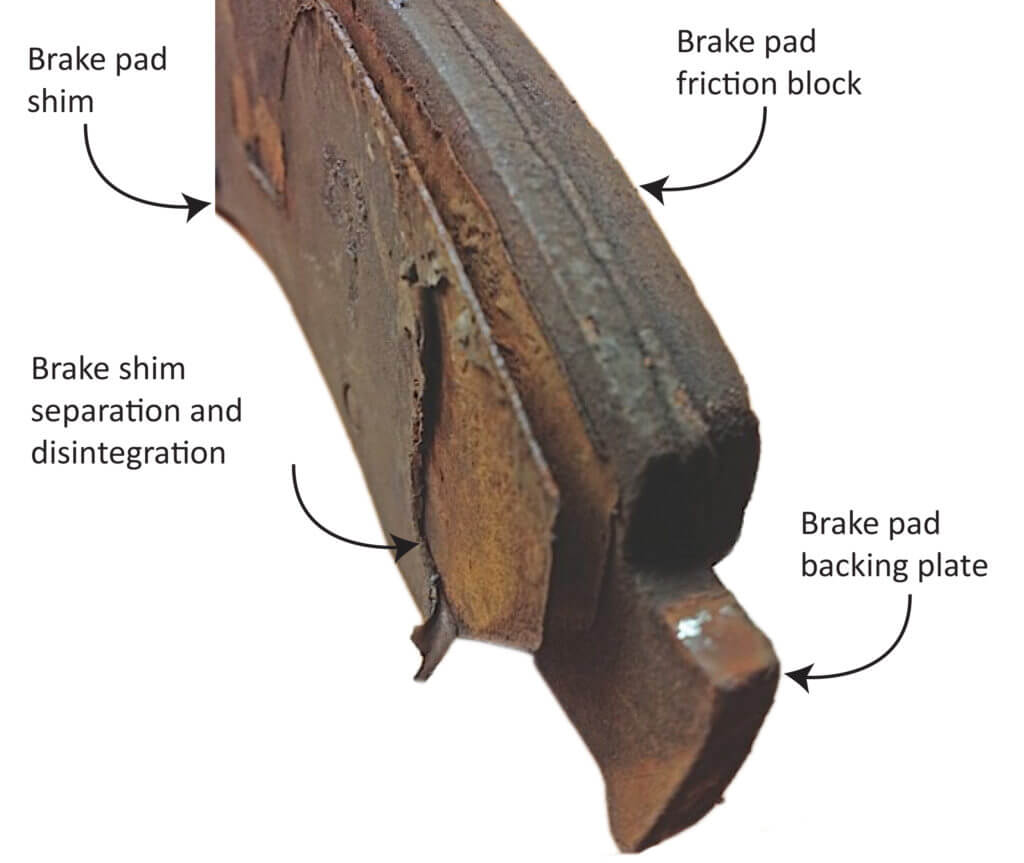
Notice how a rusted backing plate has caused the noise reduction shim to separate from the brake pad
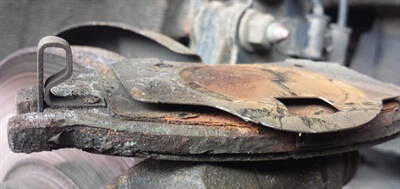
Corroded backing plate and shim
For more information on how noise reduction shims work, see this video at ADVICS Brakes
© 2019 Rick Muscoplat