
P1456 code: What it means and how to fix it
Learn how to diagnose and fix a P1456 code —Leak detected in EVAP Control system
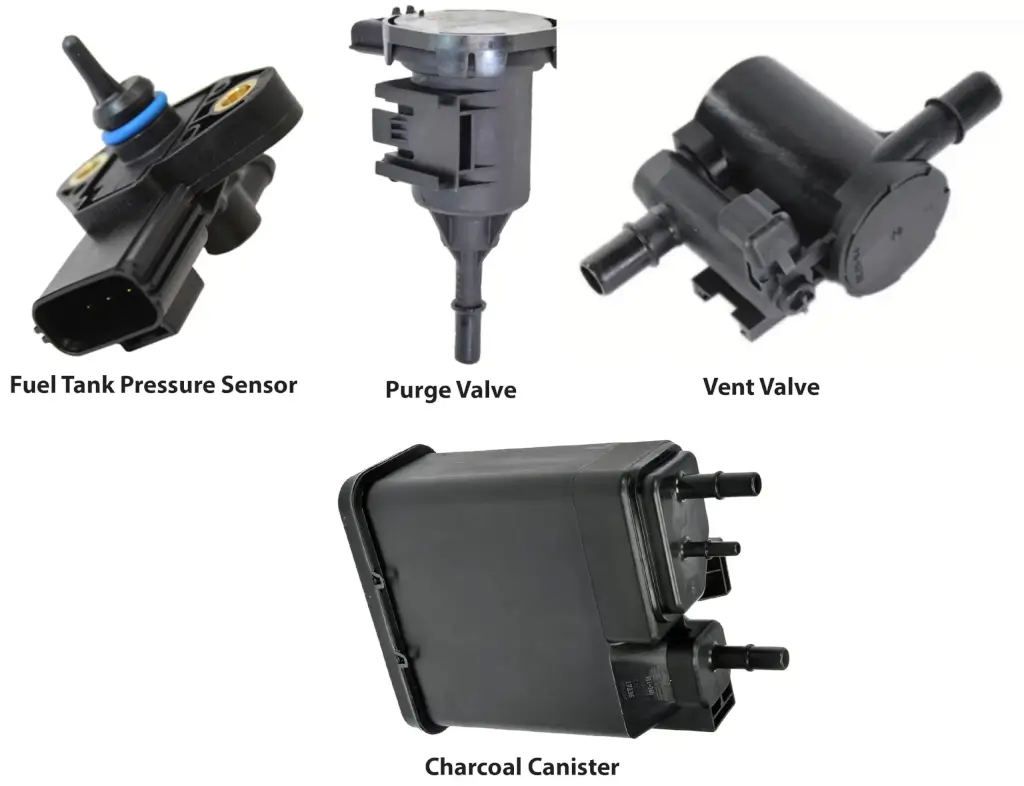
The evaporative emission control system checks to make sure there are no fuel vapor leaks in the lines that run from the gas tank to the charcoal canister and up to the engine. It also checks to make sure the gas cap is sealing correctly. If you get a P1456 code, it means the EVAP system has detected a leak somewhere in the system.
How the EVAP system knows there’s a leak
After fueling up, the ECM orders a leak check of the entire fuel system. The exact method varies by carmaker. GM, for example orders the purge valve and vent valves to open. The engine vacuum sucks the fuel vapors from the charcoal canister to purge it while letting fresh air in through the vent valve. The ECM knows everything is working because the extra fuel vapors increase engine RPM. Once the canister is purged, the ECM sees a leaner mixture due to fresh air coming into the engine. At that point, it closes the vent valve but not the purge valve, effectively putting the entire EVAP and fuel system under a vacuum. Once it’s holding vacuum, it closes the purge valve and watches the fuel tank pressure sensor to see if the vacuum decays and how fast. That’s how it knows whether the leak is large or small; by how fast the vacuum decays.
Symptoms of a P1456 trouble code
Check Engine Light is on
Fuel Odor: You might notice a gasoline smell around your vehicle.
The most common causes of a P1456 code
The system can leak from any of the following components:
Minor causes
• A Loose or missing fuel filler cap: Sometimes, it’s as simple as forgetting to tighten the gas cap after refueling.
• Debris or rust on the fuel filler neck that prevents a good seal between the filler cap and the neck. .
• Stuck open or clogged purge or vent solenoid valves
• Cracked vapor hoses from the tank to the canister or from the canister to the purge valve. Also, a cracked hose from to the vent valve.
More expensive causes
• Damaged charcoal canister that’s allowing air into the system. In a worst case scenario where the charcoal container is breached, charcoal particles can spread through the vapor hose and clog the purge valve.
• Leaking or damaged fuel tank pressure sensor
• Leaking fuel tank
How to diagnose an EVAP leak
Shops use a smoke machine and nitrogen, along with a bright light to find the leak. Normal smoke machines can’t be used to locate EVAP leaks due to the danger of explosive from the fuel vapors. Unfortunately, DIYers don’t have access to smoke machines, so you have to rely on the testing methods listed below. Or, you can fire the parts cannon and replace the most likely parts in order of probability: Gas cap, purge valve, vent valve.
Perform a visual check
• Examine the O-ring seal on the gas cap. Look for signs of wear or rubbing on the O-ring
• Examine the flange on the fuel filler neck. Look for signs of rust that might prevent a good seal. If you find rust, stuff the filler neck with a rag and use a fine grit sandpaper to remove the rust. Clear the code and then add fuel and drive it to see if the code returns.
• Check the condition of the hoses from the gas tank to the charcoal canister, from the canister to the purge valve, and from the canister to the vent valve. Look for signs of cracks or tears. Replace any sections that appear damaged
• Check the condition of the charcoal canister. Looks for signs of cracks in the plastic case.
Test the purge valve and vent valves
To test the valves, you’ll need a handheld vacuum pump and jumper leads
• Disconnect the hoses to the purge valve. Check for signs of charcoal particles. If you find them, then the charcoal canister is damaged. Replace the canister, flush the lines, and replace the purge valve.
• Connect the vacuum pump to the engine manifold side of the purge valve. Apply a vacuum and see if the valve holds the vacuum. If it doesn’t, replace the valve. If it does, connect the jumper leads to provide power and ground to the purge valve to see if it opens and closes. If so, repeat the vacuum test to see if it holds vacuum again.
• Repeat the above test with the vent valve.
© 2012 Rick Muscoplat
Posted on by Rick Muscoplat