
Replace a window regulator — Step by step guide
Learn how to replace a window regulator with this DIY guide
Window regulators fail quite often in vehicles and a replacement can cost up to $800 on some vehicles. If you’re handy and have a half-day free, you can replace a window regulator yourself using this guide.
Why a window regulator fails
To reduce weight, carmakers switched away from heavy scissor-style regulators to lighter and cheaper cable-operated window regulators. They work fine as long as the window channels are clean and lubricated and you never force the window down in sleet or freezing conditions. However, if there’s dirt in the window channels or the window freezes and you try to lower it, the cable mechanism can break. In some cases, the regulator pulls down on the stuck window and breaks the plastic sash clips that connect the glass to the regulator. Once either of those breaks, the regulator or sash clips must be replaced.
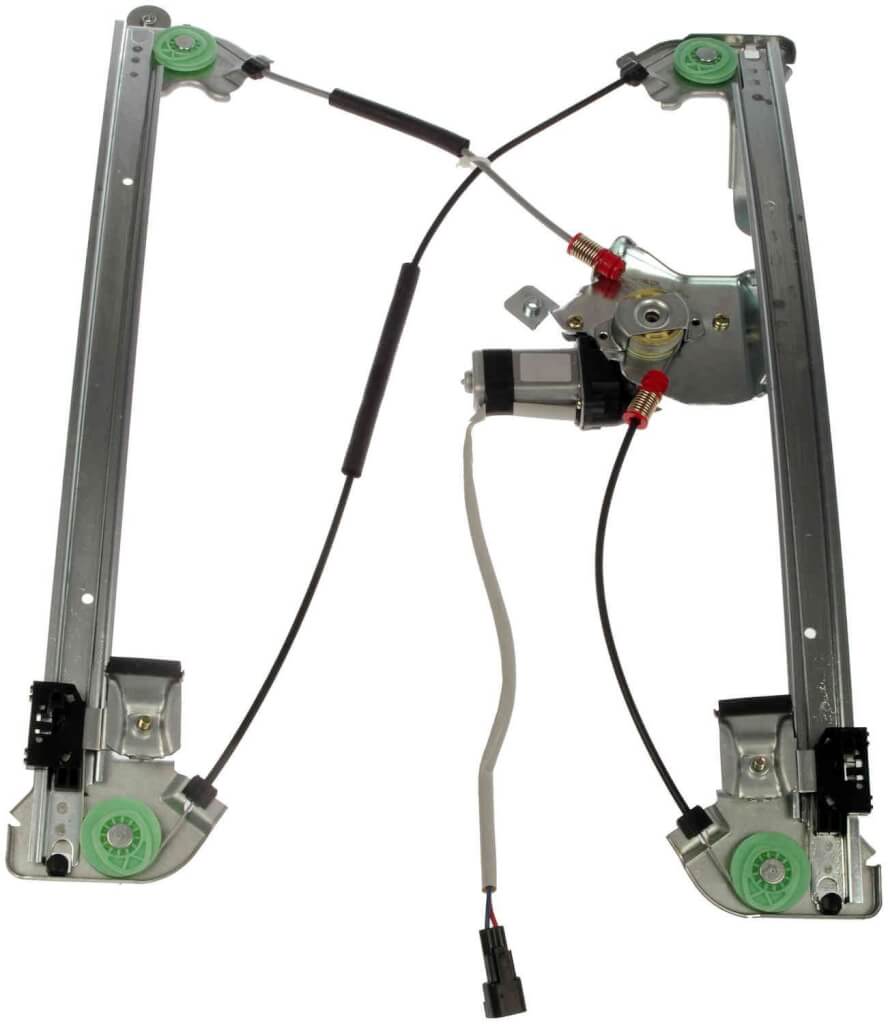
Typical window regulator. Notice the tracks and cables
You can replace it yourself with this step-by-step guide
Tools you’ll need to replace a window regulator:
Door trim panel remover tools
Screwdrivers and socket set
 Rather than pay a shop $350 – $600 to replace a window regulator, do it yourself.
Knowing where the door trim panel’s hidden fasteners are will save a LOT of wasted time and frustration. So be a sport and buy a subscription to either the manufacturer’s online manual or Alldatadiy.com—after all, you’re saving several hundred dollars by doing it yourself.
Next, go to www.rockauto.com to buy a new regulator
TYC is my favorite brand for replacement. But there are a few other companies making aftermarket window regulators. I have no experience with those other companies, so I can’t vouch for their quality.
Steps to remove the door trim panel
• Start by removing the visible screws. Then pop off any plastic “vanity” caps that appear to serve no useful purpose. You’ll find they’re covering screws. Almost every car I’ve ever worked on has screws or bolts holding the armrest to a bracket. Once again, look for plastic “vanity” covers if you can’t find those fasteners. (See the photo)
• Once the screws are out, start at the lower portion of the trim panel and begin popping out the plastic “Christmas tree” fasteners.  They’re usually located along the perimeter of the door. (See photo)
• Lift the trim panel up and off the door.
• Then disconnect the electrical connectors
to the window and door lock switches. (See photo) With the trim panel now removed, peel off the vapor barrier. (It has to go back on, so be careful while removing it)
Now that the trim panel is off, you can replace the window regulator

• You can see that the regulator is a very simple mechanism. The window sill gets pulled up and down by the cable.
Your next step is to remove the window glass. To do that, you’ll need to move the sill down so you can reach it with your sockets. Remember, you’re doing this from the inside (unless you too want to cut a hole in your door).
Can’t get the window into position  so you can remove the glass? Reach around the regulator track from the inside and cut one of the cables with a wire cutter. BUT MAKE SURE you’ve got someone holding the glass! Then lower the glass, remove the bolts, and pull the glass up and out. The glass pulls out by tilting it towards the outside of the door.
Next, disconnect the electrical connector from the motor. Then you can remove the fasteners holding the regulator in place. Tip the regulator and feed it out through a hole in the door panel. If you can’t get it out and you haven’t already snipped a cable, do that now. That will allow you to move the sill up or down.
Here’s a tip: The inside of your door contains s harp metal edges. WEAR LEATHER GLOVES!
Dorman sells  replacement motors. But if you have a cable regulator, you may find that the old motor is riveted in place. If you want to spend the time to drill out those rivets, be my guest. But once you remove the motor, you may find a stripped cable spool. That’s why I recommend replacing the entire regulator. That, plus the fact that Dorman has fixed the problems that plague the OEM models.
It’s rarely the motor, so test it before you replace it
Not sure if the problem is in the regulator? Here’s how to check. Window motors only have two wires going to them. The window  switch alternates the power and ground connections to power the motor up and down. So, attach the positive and negative probes of your digital volt meter to the electrical connector going to the motor. Then flip the window switch in both directions. You should see the voltage change from +12 volts to -12 volts. If you see that, it means the motor is getting power from the switches. Switches good. Motor bad.
Hope this saves you hundreds of dollars. Good luck!
 If the new regulator isn’t operating smoothly, either there’s an obstruction in the track, or the regulator is not aligned properly. To eliminate the track as a possibility, run a flat-blade screwdriver down each side channel to clear out any debris. Then spray each channel with either spray silicone or dry Teflon lube (it’s a spray that dries).
© 2012 Rick Muscoplat
Posted on by Rick Muscoplat