
Replace headlight connector
Correct way to replace a headlight connector
Some car makers have made serious mistakes sizing the wires and
Check the condition of the headlight socket. If you find corrosion, clean or replace it
connectors for headlights. As a result, owners are finding melted a melted headlight connector as the cause of a no headlight condition. If your headlight connector socket is burned or melted, replace the headlight socket yourself by following these simple instructions.
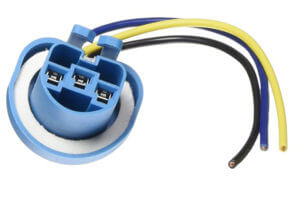
Purchase a new headlight connector pigtail
Auto parts stores carry a full assortment of headlight pigtails. A headlight pigtail contains the right socket for your headlight type and a short length of wire to splice onto the existing wiring harness. Just tell the auto parts store the year, make, model of your vehicle and they’ll find the right headlight pigtail for you.
Purchase butt-splice connectors with hot melt heat shrinkable tubing
An ordinary butt-splice connector won’t cut it for this application because
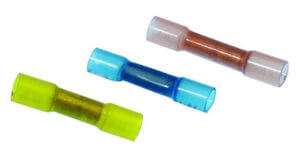
Butt connectors with heat shrinkable tubing and hot melt glue
these connectors are subjected to rain, salt and all kinds of corrosive materials. You MUST protect this splice from the elements for it to last. Do NOT think you can wrap the splice with electrical tape and call it a day. And don’t buy heat shrinkable butt-splice connectors that don’t contain hot melt glue inside. They won’t last
Use a ratcheting crimp connector pliers
You can’t make a good headlight connector crimp using an ordinary pliers or side cutters. Headlights draw about 15-25 amps and a poor crimp will cause the splice to overheat and fail. You must apply an oval crimp to the crimp connector and it must be performed at just the right pressure to achieve a “cold weld” connection.
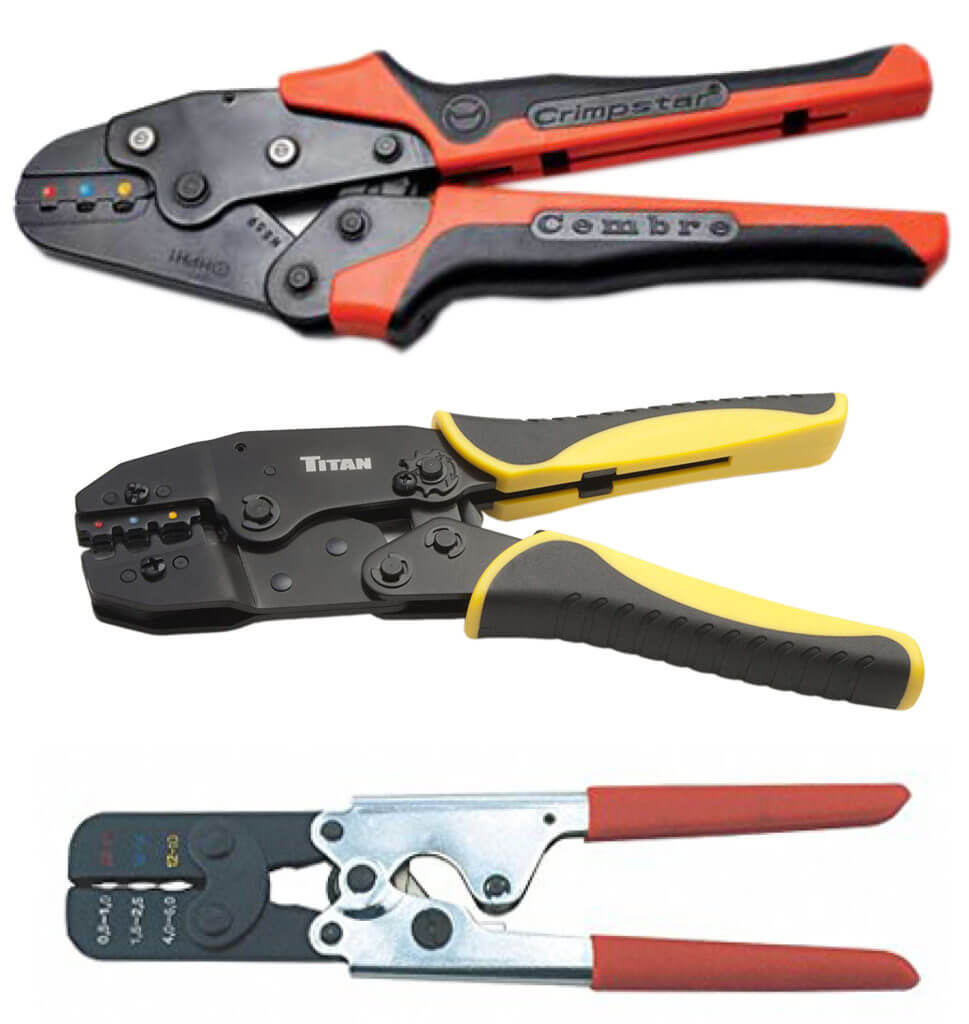
Ratcheting crimping tools
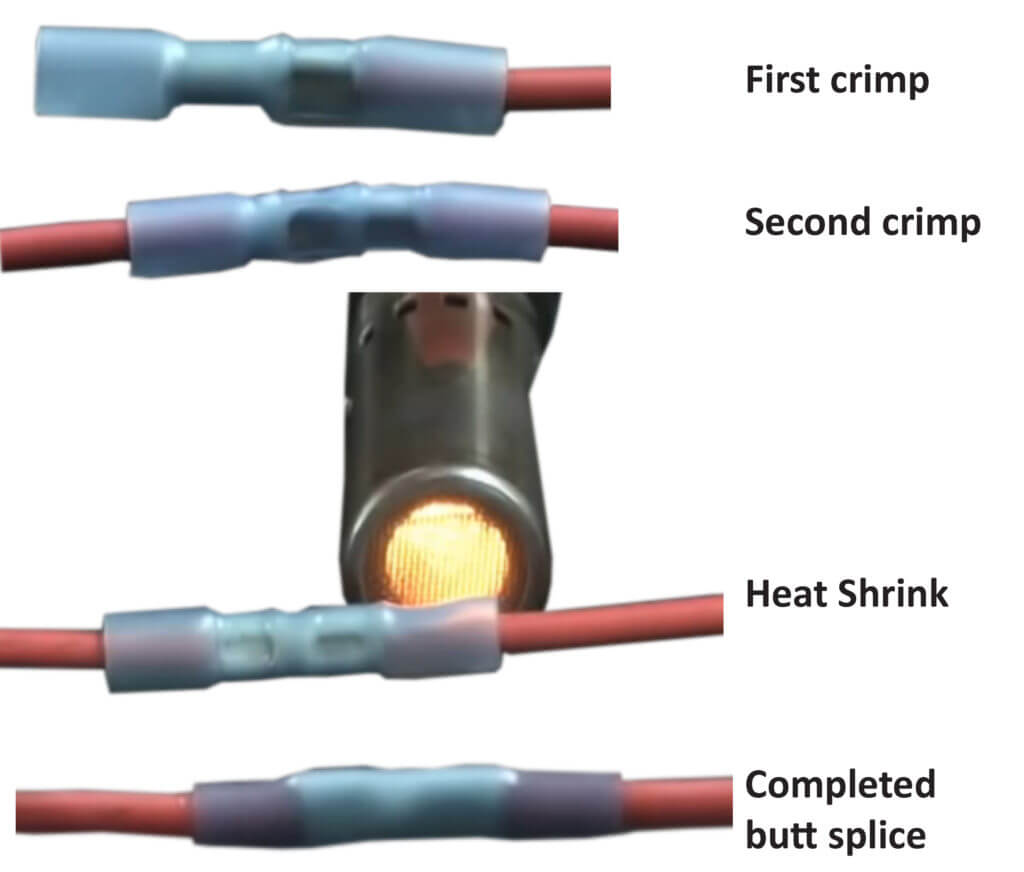
How to make a good crimp on the new headlight connector
A cold weld connection is made when all the wire strands are compressed to the point where you achieve maximum surface area AND the wires are squeezed to the point where they almost achieve a solid core.
A ratcheting crimping tool applies enough pressure so the metal in the wire strands stretches and flows. That movement scrapes off surface oxidation that could increase resistance. The proper pressure literally fuses the wires together, resulting in a cold weld.
You can NEVER get that kind of crimp using an ordinary pliers or side cutter.
Match the crimp connector to the wire size.
All crimp connectors state the wire size they’re made for. Red- 22 to 16 gauge, Blue- 16-14 gauge, Yellow- 12-10 gauge
Perform the splice
Strip the wires to allow for full insertion into the butt connector. Insert the wiring harness portion and the headlight pigtail portion into the butt connector. Hold the butt connector in the ratcheting crimp tool and apply pressure until the crimp tool releases. Repeat on the second crimp on the opposite end of the butt connector
Apply heat to the heat shrinkable tubing
The reason you want to buy heat shrinkable butt connector with hot melt glue is so the hot melt blue liquefies and flows out of the butt connector to seal out moisture. Heat shrinkable butt connectors without hot melt glue WON’T seal out moisture. The connectors will eventually corrode.
With the splice fully protected and a new headlight connector in place, you’ll have light on the road again.
©, 2019 Rick Muscoplat
Posted on by Rick Muscoplat