
Replace oil pressure sensor
How to replace an oil pressure sensor yourself
How an oil pressure sensor works
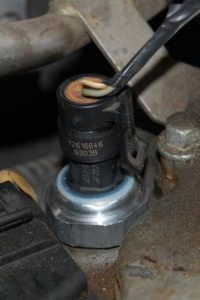
An oil pressure sensor can fail as it ages. They screw into an oil passage in the engine and the oil pressure pushes against a rubber diaphragm, moving it against a spring loaded switch. Most are calibrated to turn on your oil pressure light when the oil pressure falls below 7-psi.

An oil pressure sensor has a diaphragm and a set of electrical contacts. The contacts can be open or closed when the engine isn’t running, depending on the car makers. In this image you see an oil pressure sensor that’s closed until oil pressure pushes the diaphragm up far enough to open the contacts.
How oil pressure sensors fail
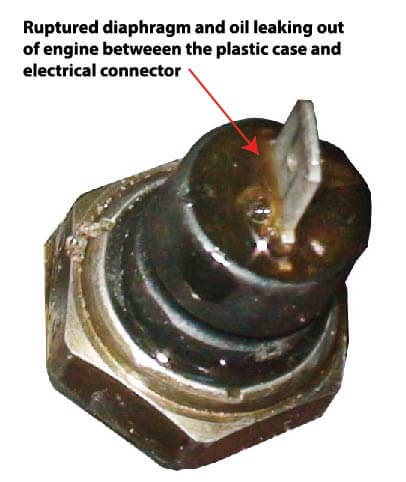
Oil pressure sensors, also called oil pressure sending units, can fail in two ways; the diaphragm, spring or switch age and lose calibration and provide false indications, or the diaphragm or plastic housing cracks, allowing oil pressure to leak and cause a false pressure reading.
What tools do you need to replace an oil pressure sensor?
Most oil pressure sensors require a special socket for removal and installation. In some cases you can remove the sensor using an adjustable jaw wrench, but that rarely works on newer engines where you have little clearance.
You can buy a new oil pressure sensor online, along with a set of oil pressure sensor sockets, but chances are you’ll never use those sockets again. So it pays to buy a new oil pressure sensor locally from an auto parts store that also rents the proper tools. Choosing a rental socket to fit the replacement sensor can be a mistake because the factory sensor may require a different socket. So it pays to rent the entire kit.
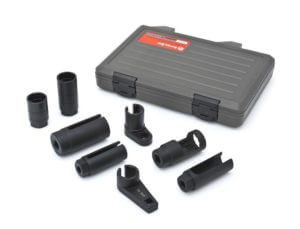
Gearwrench brand oi pressue sensor socket set
Disconnect the electrical connector
Late model vehicles use locking electrical connectors with an internal silicone seal to keep out water and road
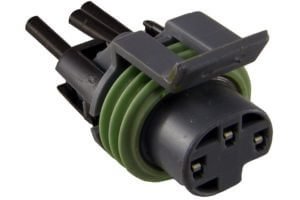
Oil pressure sensor electrical connector with silicone seal and plastic latch
grit. These connectors often have locking devices that must be removed or slid to the side to allow removal. Or, the connector may have a spring loaded catch. Over time the plastic connector can become brittle and crack, so exercise caution when removing the connector.
Unscrew the old oil pressure sensor
Lefty loosey, righty tighty on these units.
Install the new oil pressure sensor
Oil pressure sensors have tapered threads that help seal pressure. You can wrap the threads with Teflon tape as long as you don’t wrap tape past the end of the threads and clog the opening. Start installing the first few threads by hand. Then use the socket and ratchet to tighten snuggly. Lefty loosey, righty tighty on these units.
Reconnect the electrical connector
Then start the engine and check for leaks.
©. 2017 Rick Muscoplat
Posted on by Rick Muscoplat