
Brake Pad Bedding: What it does and why it’s important
The Importance of the Brake Pad Bedding Procedure
Brake pad bedding, also known as brake pad break-in or “burnishing” is the process of conditioning new brake pads and rotors to ensure optimal performance.
The brake pad bedding procedure is a critical step after installing new brake pads. Simply put, the brake pad bedding procedure deposits a thin transfer layer of brake pad friction material onto the face of the rotor. Adherent style brake pads need this transfer layer to work properly.
Once the bedding procedure is performed it’s the brake pad contact with the transfer layer that converts rotary motion into friction heat, and that’s what stops your vehicle. So it’s critically important that the transfer layer is applied evenly. If you skip the bedding procedure or perform it improperly, you’ll still get a transfer layer, but it can form unevenly, causing vibration and noise when braking.
Other advantages of using the proper bedding procedure
During the bedding process, the pad’s friction material reaches a high temperature that stabilizes the coefficient of friction across the pad surface, which allows the pads to operate at their designed and tested friction levels. More stable and predictable friction performance translates into a more controlled braking feel and stopping distances.
How to perform a brake pad bedding procedure
Each brake pad manufacturer has their own recommended bedding procedure, and for each product line. The procedure is based on the friction material formula. There is no universal bedding procedure; it varies by brake pad manufacturer and the style of the brake pad.
Some brake pad manufacturers require a hard brake application from a high speed without coming to a complete stop, while others require a moderate brake application from a moderate speed (30-MPH) with a complete stop and a cooling-off period between each stop. Also, the number of braking attempts varies by manufacturer. So consult the instructions that come with your new brake pads.
What happens if you don’t perform the brake pad bedding procedure?
You’ll wind up with brake noise, pedal pulsation, and less stopping power.
Why does brake pad bedding create smoke and smell?
That’s a “maturing” or curing of the resins used during the manufacturing process. A smell and some smoke are normal and will go away after a short while.
What are the signs of improper brake pad bedding?
Brake pedal pulsation
An uneven transfer layer can cause a slip-stick condition resulting in brake pedal pulsation.
Rotor discoloration
If you slam on the brakes during bedding and overheat the rotor, you’ll see a bluish tinge and possibly a grey tint where the brake pads are touching the rotor. The grey tint is a sign that the brake pad material has built up above the rest of the film layer.
How you can screw up a brake pad installation, aside from improperly bedding the pads
1) Not cleaning new rotors before installation
New rotors must be washed with hot water and Dawn. Yes, you read that correctly. Most DIYers and even many old-time pros skip this step, thinking that a shot of aerosol brake cleaner does the job. But it doesn’t. If you skip the soap and water, you’ll be leaving metal machining debris on the face of the rotor and that metallic debris will embed itself into the pad. Don’t believe me? See this article where new rotors where cleaned with just brake cleaner and then washed with soapy water. You’ll see how much additional metallic debris came off with the soapy water.
2) Not removing all surface rust from the wheel hub is the #1 cause of brake pedal pulsation, improperly blamed on rotor warp
The rotor must sit perfectly parallel with the wheel hub. If you don’t clean the rust off the hub, you’ll wind up with lateral runout and that will cause disc thickness variation and brake pedal pulsation. All it takes is .002″ lack of parallelism to cause this.
Many people blame the pulsation on rotor warp, but that’s not a real thing. There isn’t a street vehicle on the planet that could generate the 2.000°F needed to warp cast iron. The brake pads would turn to ash at 800°F. So stop blaming rotor warp. If you didn’t clean the rust off the wheel hub, YOU caused the problem.
3) Not using a torque wrench to tighten lug nuts
Rotors are held in place with clamping force from the lug nuts. If you don’t use a torque wrench to tighten the lug nuts, you’ll get uneven clamping force, causing lateral runout and disc thickness variation. Not using a torque wrench is the #2 cause of brake pedal pulsation.
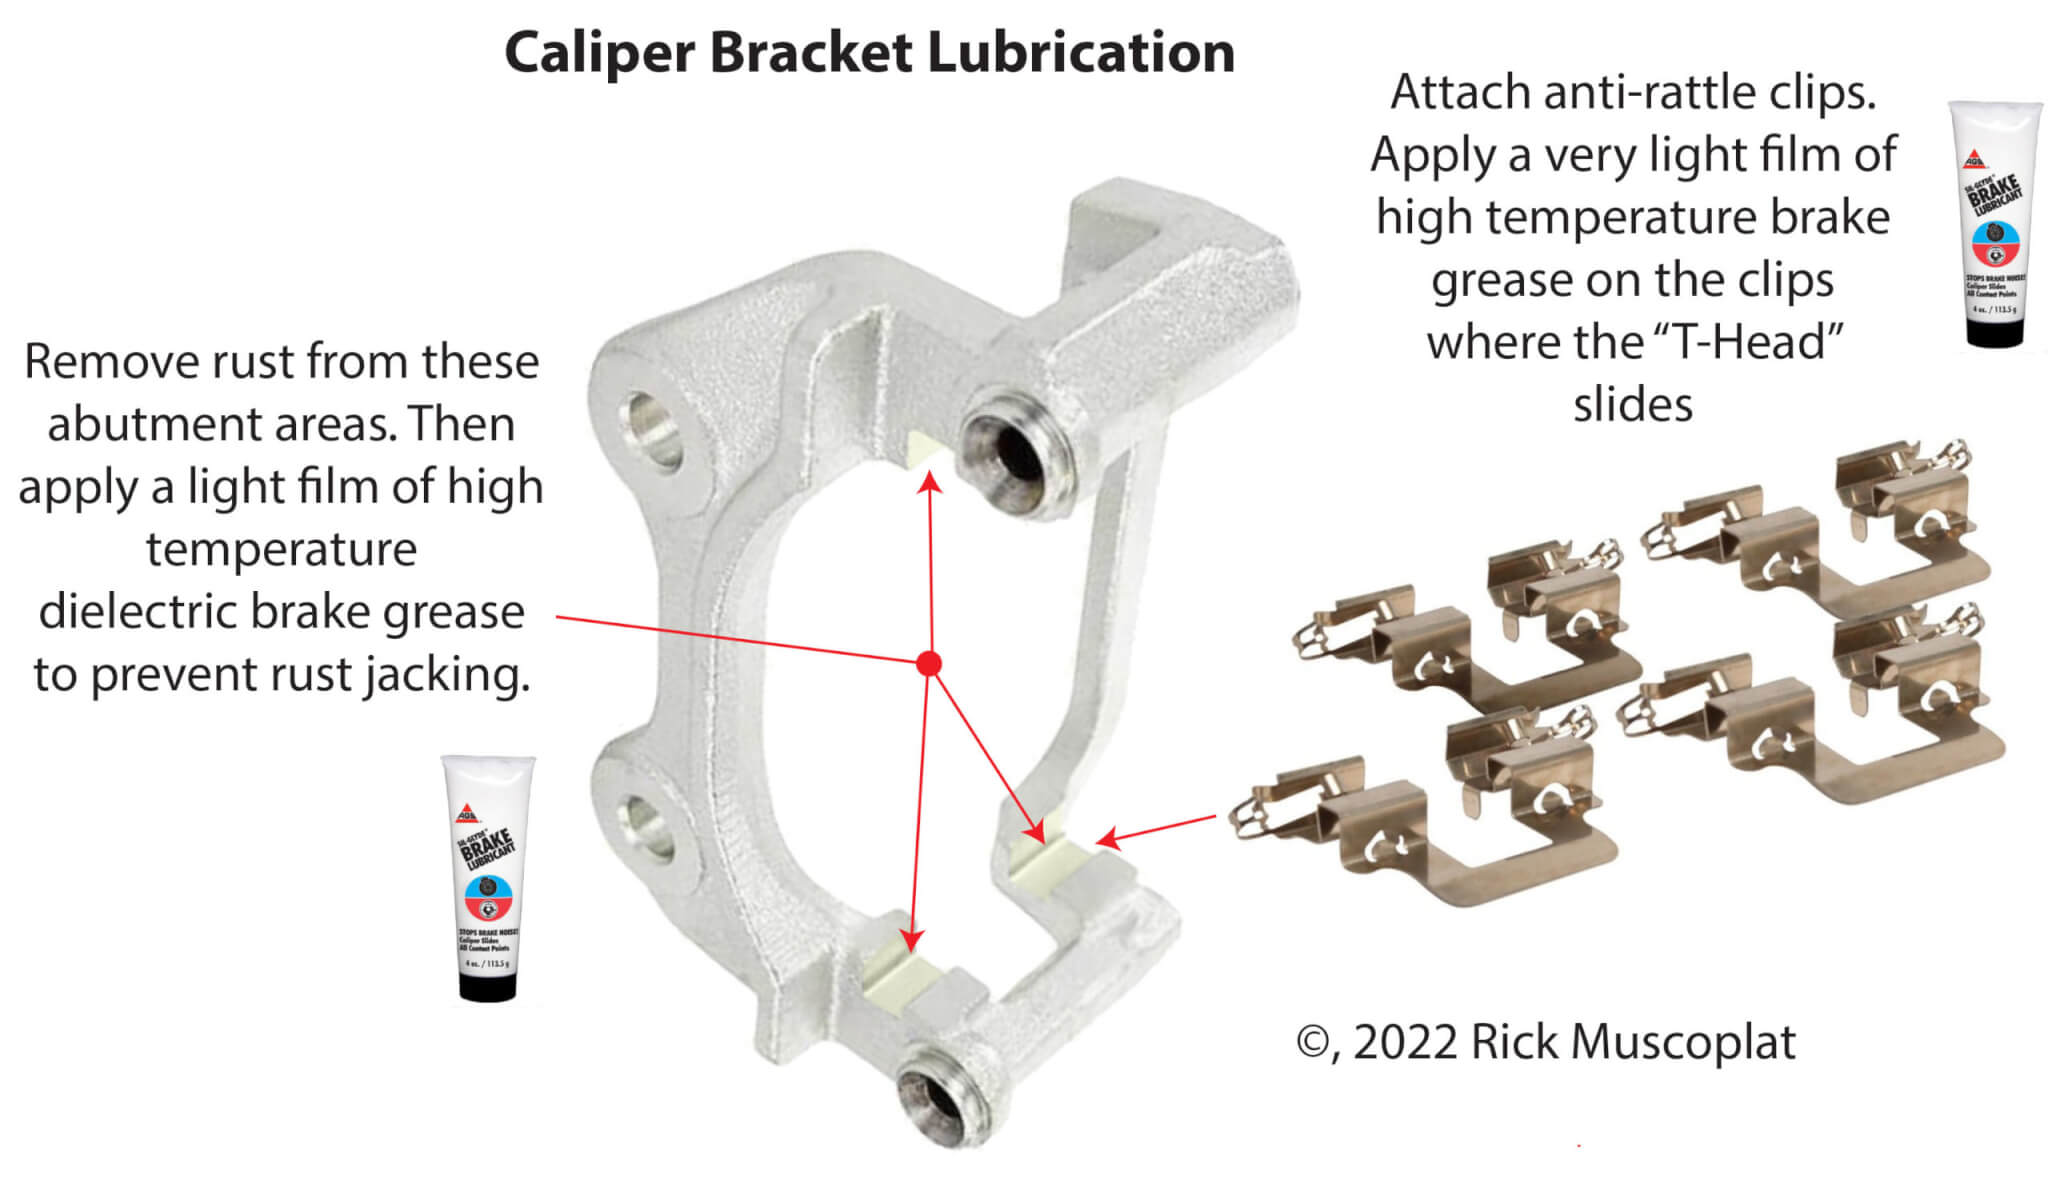
4) Not removing rust from the abutment areas
Clean and lubricate the abutment areas and caliper slide pins. Apply high-temperature synthetic brake grease to the abutment and slide pins. Install new anti-rattle clips (never reuse the old ones) and noise-reduction shims). Apply a light film of brake grease to the anti-rattle clips and to the back of the shims.
©, 2019 Rick Muscoplat
Posted on by Rick Muscoplat