P2757 Code on Corolla — What it means and how to fix
Learn what a P2757 code means on a Corolla and how to fix it.
The P2757 code is a generic powertrain code, meaning it applies to all makes and models equipped with an electronic transmission control system. It means there’s a problem with the torque converter clutch solenoid valve B. This solenoid valve controls the engagement and disengagement of the torque converter clutch.
Symptoms may include transmission slipping, poor acceleration, excessive engine RPM with no acceleration, or the inability to lock the torque converter clutch.
Toyota has a service bulletin fix for the P2757 code on a Corolla
Toyota has issued a service bulletin T-SB-0150-16 to address a Corolla P2757 code on 2014-2019 Toyota Corollas equipped with a CK313 CVT transmission. The fix corrects the Torque Converter Clutch Pressure Control Solenoid Performance (Shift Solenoid Valve SL) code.
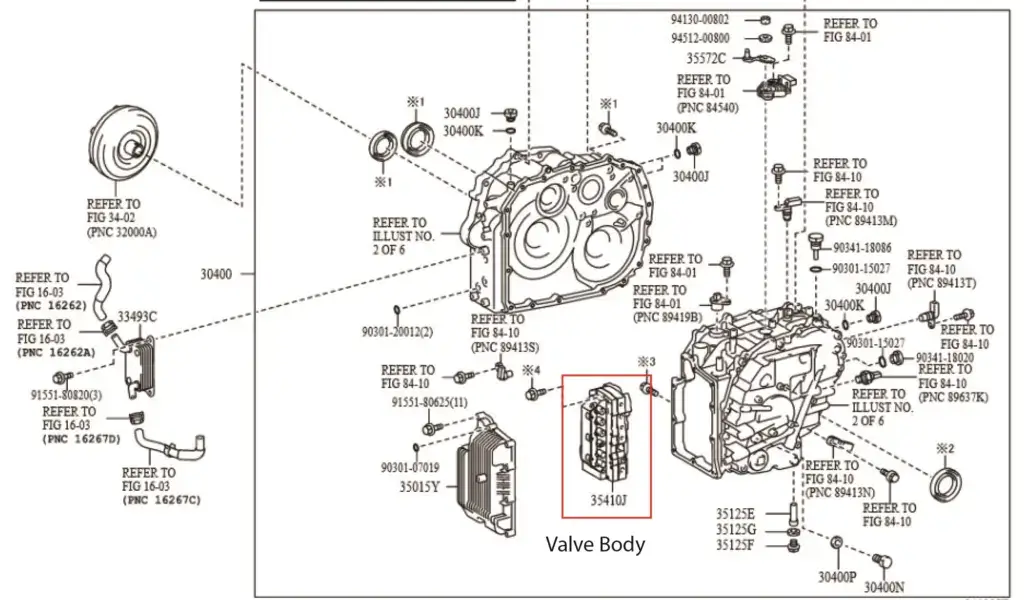
New Corolla transmission valve body
Toyota as issued a redesigned valve body to correct the Corolla P2757 issue and the repair is covered by the factory powertrain warranty of 60 months or 60,000 miles.
Here are the parts you’ll need to fix this yourself
35410-12871 Body assembly Transmission valve
35168-12091 Gasket, Transaxle Oil Pan
35145-07010 Gasket, Transaxle Case
90301-22019 Ring.
90301-06004
08886-02505 ATF CVT FE approximately 6-liters
Replace the valve body to correct Corolla P2757
1. Drain the CVT fluid
2. Remove the 16 pan bolts and then the transmission pan
3. Remove any remaining gasket from the transmission
4. Clean debris from the drain pan using new CVT transmission fluid. Do NOT use brake cleaner to clean the pan
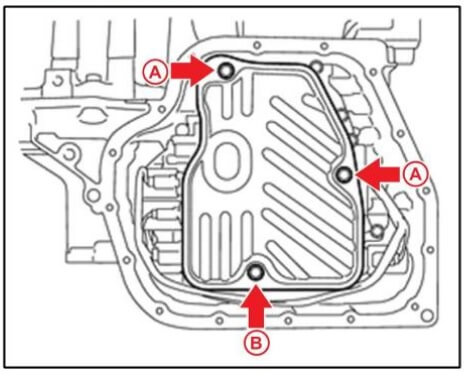
5. Remove the three bolts holding the  oil strainer to the valve body. One bolt is longer than the other two. Note the location of the long bolt.
6. Remove the o-ring from the strainer
7. Remove the bolt and oil temperature sensor clamp. Remove the o-ring from the oil temperature sensor. Using a needle-nose pliers, disconnect all five connectors from the valve body.
8. Remove the 13 bolts from the valve body, noting the location of the three different bolt lengths. Then remove the valve body and gasket from the transmission case
9. Apply Toyota MP grease or CVT fluid to the new valve body gasket and fit to case. Then install the valve body, holding it horizontally to prevent the manual valve from falling off
10. Hand tighten all the bolts
11. Using a torque wrench tighten all the valve body bolts to 10.8-Nm
12. Coat the new O-rings with CVT fluid and reinstall the oil temperature sensor, clamp, and bolt
13. Reconnect the electrical connectors
14. Place a new o-ring on the oil strainer and install, tightening the strainer bolts to 10.8 Nm
15. Install a new oil pan gasket and 16 bolts. Tighten to 7.8-Nm. Mount overflow tube
16. Install the overflow plug and gasket and tighten to 40-Nm
17. Refill the transmission following the shop manual procedure
18. Clear the trouble code
©, 2020 Rick Muscoplat
Posted on by Rick Muscoplat
