Honda Civic pop or clunk noise
Fix a pop or clunk noise on Honda Civic
Honda has issued a technical service bulletin #07-078 to address a pop or clunk noise From the Front Suspension While Driving Over a Bump After Turning issue on the Honda Civics listed below.
The bulletin applies to
2006–10 Civic 2-door – ALL
2011 Civic 2-door – From VIN 2HGFG1…BH500001 thru 2HGFG1…BH508895
2011 Civic Si 2-door – From VIN 2HGFG2…BH700001 thru 2HGFG2…BH700656
2006–10 Civic 4-door – All U.S. and Canadian-built only
2011 Civic Si 4-door – From VIN 2HGFA5…BH700001 thru 2HGFA5…BH701093
2011 Civic 4-door – From VIN 2HGFA1…BH500001 thru 2HGFA1…BH529944
2011 Civic 4-door – From VIN 19XFA1…BE000001 thru 19XFA1…BE019187
The problem presents as a pop or clunk noise that appears to come from the front suspension while driving over a bump or after turning. The pop or clunk noise is heard most often after completing a full turn of the steering wheel.
Confirm the pop or click noise
Drive the vehicle in a few figure-eight patterns. Hold the steering wheel at full lock in the
turns with a short straight section between turns. Then drive over a 2-inch dip or bump while going straight at 15 mph. If you don’t hear a pop or clunk noise, this bulletin does not apply to your vehicle.
If you do hear the pop or clunk noise, drive the vehicle in a straight line at 15 mph, alternating between forward and reverse (no turning) over the same bump. If you don’t hear a pop or clunk, but you did in above step repair the vehicle. However, if you hear a pop or clunk noise during this second procedure, this bulletin does not apply.
Fix for pop or clunk noise turning on Honda Civic
Honda has determined that the pop or clunk noise is due to
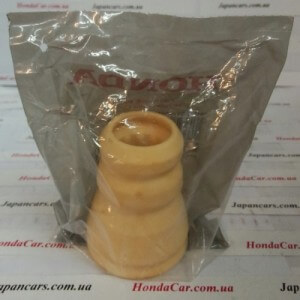
bump stops that have become dislodged and then pop back into place. Honda has redesigned the bump stops and issued new part number. Buy two bump stops: 2-door and Si: P/N 51722-SVA-A04, 4-door except S: P/N 51722-SNA-A03 and four Damper Pinch Bolts P/N 90190-SNA-000, six flange nuts P/N 90304-S10-024, two self locking nuts P/N 90213-SJ6-004, and four self locking nuts P/N 90213-SR3-013, as well as a tube of adhesive P/N 08712-0007.
- Remove one front damper assembly (strut) according to the instructions in the shop manual
- Disassemble the strut and clean and dry the bump stop damper mounting base area.
- Apply a full bead of adhesive on the strut mount base and install the new bump stop.
- Reinstall the strut components using new fasteners.
- Allow the vehicle to sit for 6 hours to allow the adhesive to cure. Check alignment.
©, 2015 Rick Muscoplat
Posted on by Rick Muscoplat
