
Step-by-Step Guide to Restore Foggy Headlights
How to Restore Foggy Headlights Like a Pro
Over time, the plastic lenses of headlights can become foggy or cloudy due to oxidation, UV exposure, and environmental contaminants. Foggy headlights not only detract from the appearance of your vehicle but also significantly reduce visibility, making night driving dangerous. Fortunately, restoring foggy headlights is a straightforward process that can restore clarity and improve safety. Here’s a detailed guide on how to restore foggy headlights effectively.
What causes headlights to get cloudy?
Most modern headlights are made from polycarbonate plastic, which is durable but prone to oxidation. To prevent oxidation, all headlight lenses are coated with a UV-inhibiting clear coat. Over time, that protective coating degrades, allowing the surface to oxidize and become cloudy.
The main causes of foggy headlights include:
• UV exposure— Prolonged exposure to sunlight causes the plastic to degrade and oxidize.
• Environmental Contaminants— Your headlights get sandblasted with dirt, road salt, and chemicals as you cruise down the road. Those abrasive particles scratch and dull the surface.
My choice for the best headlight restoration kit
There are many brands of headlight restoration kits. The process involves sanding off the degraded clear coat, polishing the plastic to restore clarity, and then applying a new clear coat layer to protect against future oxidation. The best kits include all the materials needed to remove the old clear coat, polish the lenses, and an approved clear coat to protect. However, not all kits include a clear coat. If you don’t apply an approved clear coat, you’ll be doing this job again withing six months.
I chose the Sylvania Headlight Restoration Kit
I’ll show you how I restored the headlights on a 2005 Subaru Outback using the Sylvania Headlight Restoration Kit ($22 from Amazon or most auto parts stores). I like the Sylvania Headlight Restoration kit because it comes with everything I need (except masking tape), including a clear coat.
Sylvania Headlight Restoration kit contents
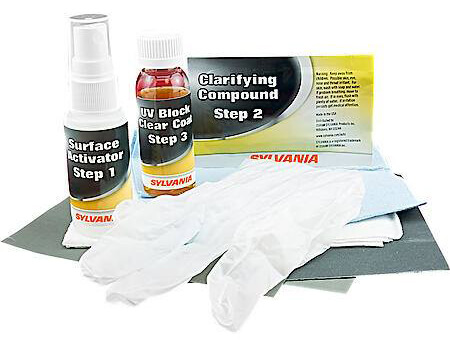
The kit comes with clear coat remover solution (activator), multiple grades of sandpaper, plastic polish, gloves and new DOT approved clear coat.
• Headlight clear coat remover liquid
• 400-grit wet-of-dry sandpaper
• 1,000-grit wet-of-dry sandpaper
• 2,000-girt wet-of-dry sandpaper
• Plastic polish
• Clear coat approved by the Department of Transportation
Restore headlights — Step 1: Masking
Start by masking off the headlight with tape so you don’t accidentally sand paint off the fender.

Mask around the headlight to protect painted areas
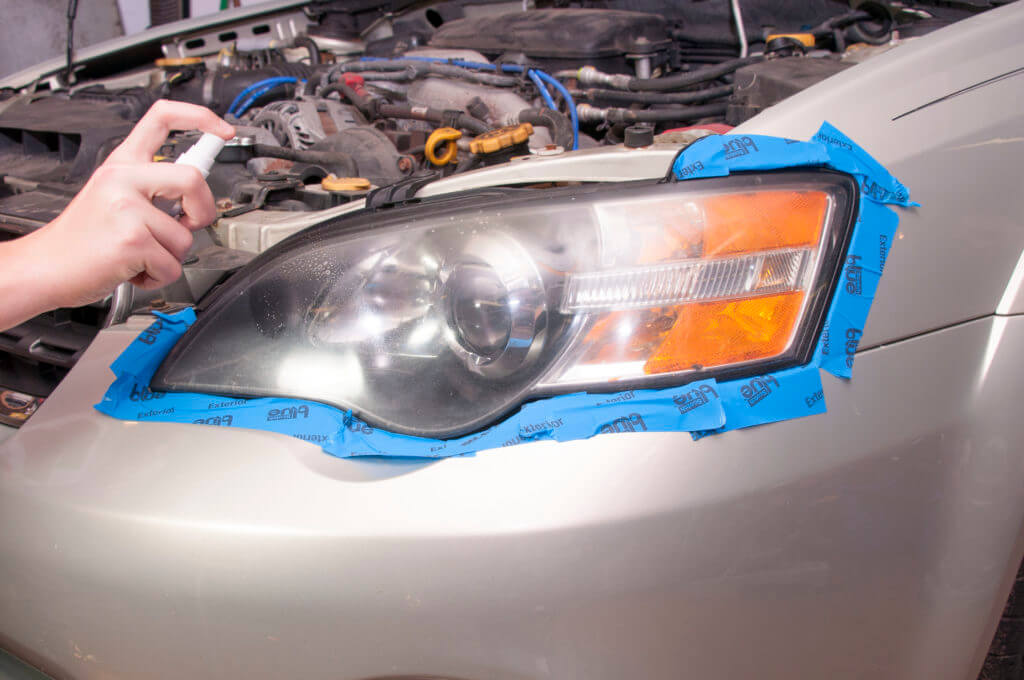
Restore cloudy headlights —Step 2: Apply the clear coat activator liquid
The Sylvania kit includes a bottle of activator to spray on your headlights. It’s designed to soften the old clear coat, making removing it easier. Spray the entire headlight and let it sit for about thirty seconds, then rinse clean with clear water.
Restore foggy headlights —Step 3: Sand with 400-grit and 1000-grit
Next, sand off the old clear coat with wet 400-grit sandpaper. Dip the sandpaper in clean water and sand aggressively over the entire headlight using circular motions. Once you’ve removed the old clear coat, switch to 1,000-grit sandpaper.
Rinse the headlight and sand the entire surface with 2,000-grit sandpaper. Then, wash the entire headlight with soap and water. Dry with a microfiber towel and air dry.

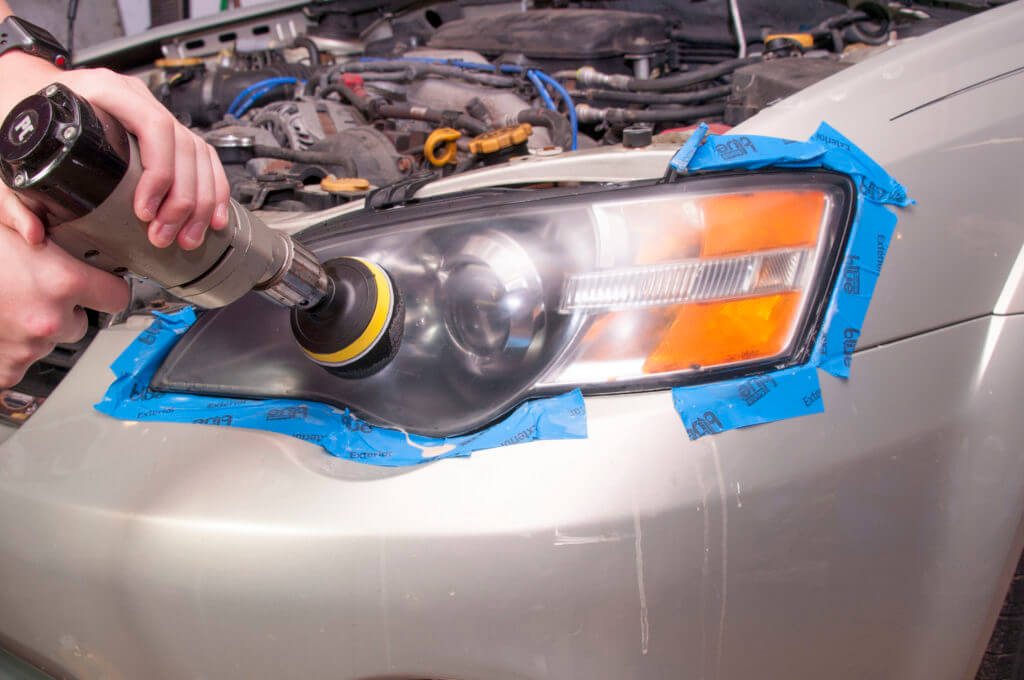
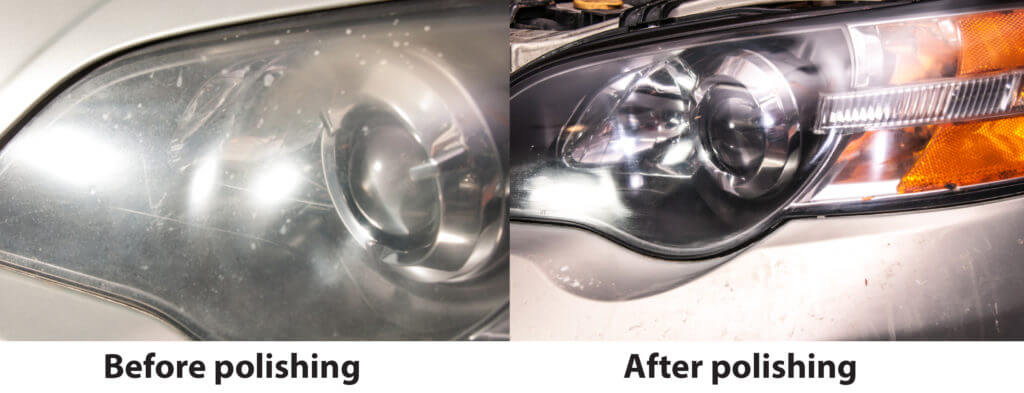
Polish headlights —Step 4: Apply plastic polish and polish the lens
At this point, the headlight will most likely look cloudier than when you started. Don’t worry; the plastic polish will bring it back. Using the plastic from the kit, apply some to the white cloth and polish the headlights. If you want to speed up the polishing process, purchase a set of foam polishing discs and chuck them into your drill. Apply the polish to the foam pad, wipe it across the lens, and hit the trigger.
Restore headlights —Step 5: Wipe on the clear coat
Rinse off all excess polish. Dry. Then apply the new clear coat to the blue cloth provided and wipe it over the entire lens surface. Allow at least one hour for the clear coat to dry before driving.
©, 2019 Rick Muscoplat and Alex Steil
Posted on by Rick Muscoplat