How to Install a Dash Camera
Tips to install a Dash Camera
Owners install dash cameras to get a video record of what happens on the road. A dash cam can provide evidence in case of accidents, captures unusual events to show to the police when reporting other drivers, and can even act as a security feature for your vehicle. Installing a dash cam is a relatively straightforward process you can do yourself. Below is a step-by-step guide on how to install a dash camera in your vehicle.
Pre-Installation Dash Cam Checklist
Before starting the installation, make sure you have the following:
A dashboard camera kit, usually consisting of the camera unit, power cables, and a mount
A memory card if not included (check your camera’s specifications for the correct type)
Basic tools: screwdriver, trim removal tool or plastic pry tool
Optional: cable clips or adhesive cable organizers
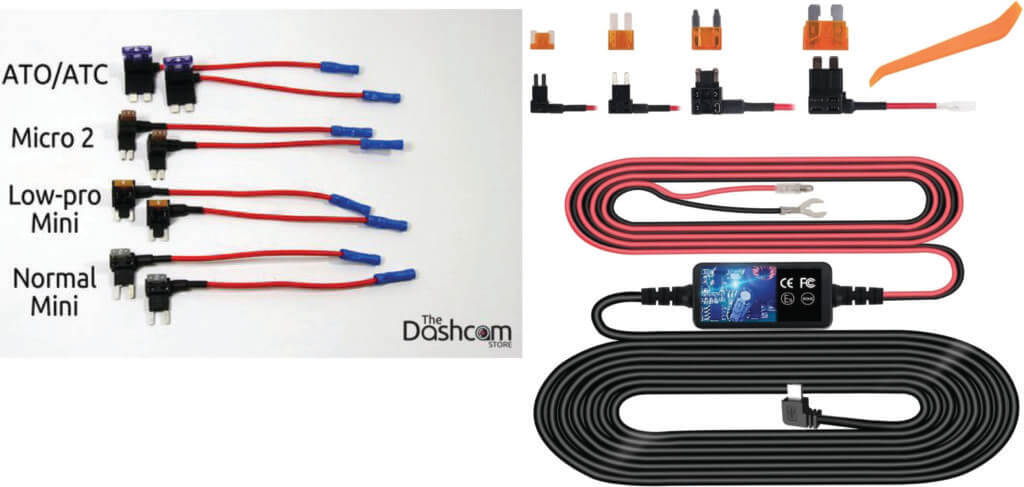
Optional: fuse tap kit if you plan to hardwire the camera to your car’s electrical system
Planning Camera Placement
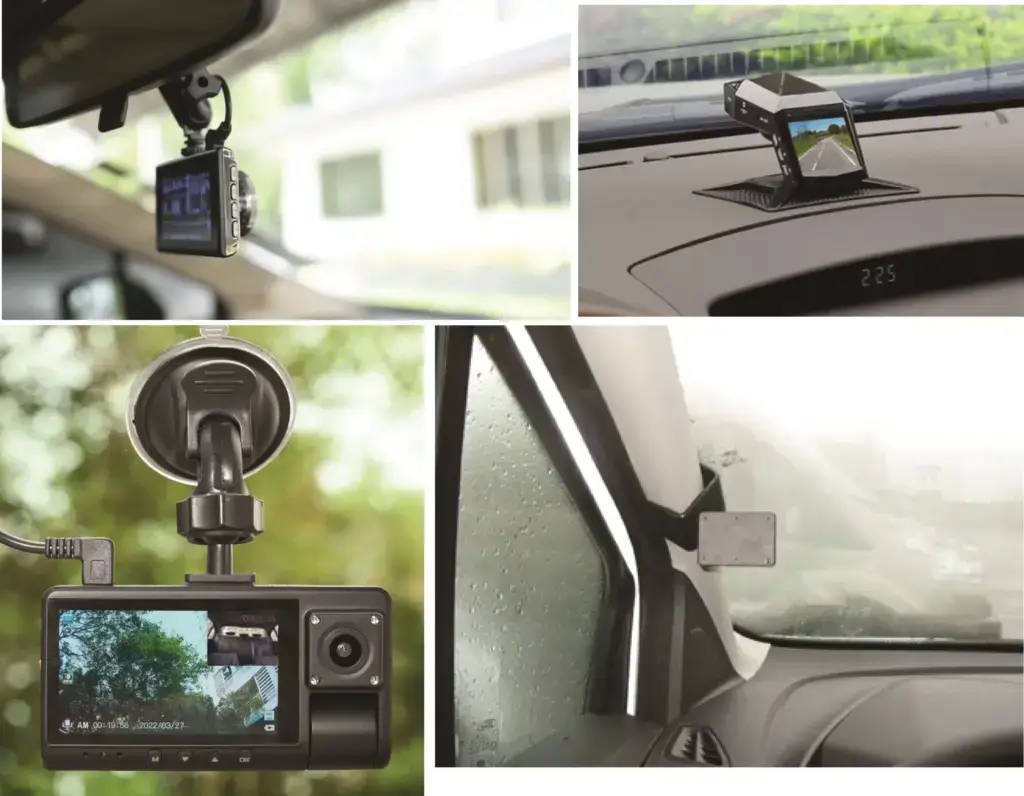
Most owners place the dash cam near the rear-view mirror or on the dashboard directly below the rear-view mirror. As long as it doesn’t obstruct the driver’s field of view, you can place the camera in those location or even in the upper left hand corner of the windshield. However, some states/cites have restrictions on where accessory devices can be mounted so check with your DMV to avoid being pulled over and ticketed.

Dash cam mounting locations. 1) Under rear-view mirror. 2) On dash. 3) Suction mount on wiindshield. 4) Side bracke on A-pillar
Step 1: Mount the Dash Camera
Clean the windshield area or dashboard where you’ll mount the camera. Use glass cleaner on the windshield or dash cleaner that won’t leave a residue if you want to mount on the dash.
Attach the mount to the camera.
Stick the mount onto the windshield. This usually involves a suction cup or adhesive. Press firmly to secure it.
Step 2: Connect Power to the power source and dash camera
You can usually power the dash cam in one of three ways:
Cigarette Lighter: This is the simplest method. Just plug the power cable into the cigarette lighter socket.
USB Port: Some modern cars have a USB port that can power a dash cam.
Hardwiring: This method connects the dash cam directly to the car’s fuse box and is more permanent. If you opt for this method, you’ll have to find a fuse that’s only powered when the vehicle is running. It’s not a good idea to connect to a fuse that is powered at all times because the camera can drain your car battery. If you’re unsure, consult a shop manual and print out a fuse box diagram.
Find fuse taps and wiring kits at thedashcamstore.com
Find wiring diagrams at alldatadiy.com or eautorepair.net
Step 3: Route and Hide Cables to your dash camera
If you’re powering from either the fuse box, USB port, or the power port and you want a clean neat installation, plan on routing the cables under the dash and up through the driver’s side A-pillar. That will require removing the A-pillar trim piece.
In most cases, the trim piece is help in place by snap connectors. But some trim pieces required dislodging a snap lock at the top of the trim piece. If you don’t know how to remove the trim, consult a shop manual. Find trim removal instruction at alldatadiy.com or eautorepair.net
Once the cables is at the top of the A pillar, route the power cable along the headliner to the camera. Use cable clips or adhesive organizers to keep the cable in place.
Step 4: Insert Memory Card Into Camera, Format and Test
Insert the micro-SD memory card into the camera slot.
Start your car to power the dash cam.
Go to the camera’s settings and format the memory card
Check the camera’s display to ensure it powers on and is recording.
Adjust the angle as needed.
Step 5: Set Up the Dash Camera Features
Most dash cams offer additional features such as loop recording, motion detection, and even parking mode. Go through the settings to customize according to your needs.
WARNING: Dash cameras are great to record other drivers actions. But they also record YOUR actions. If you’re in an at-fault accident, the video on your camera can be used against you if you’re sued. Keep in mind that the recorded video could be considered evidence of a crime and destroying evidence is illegal.
©, 2023 Rick Muscoplat

