
Install car emblem or badge
Install car emblem or badge
Whether you’re installing a new car emblem or re-installing a car emblem that’s fallen off or removed, you should follow these cleaning and preparation steps first.
Clean the area before you install a car emblem or badge
If there’s any adhesive residue left from the old car emblem or badge, remove it using 3M 3618 adhesive remover. For more information on removing a car badge or emblem, see this post.
Choose a car emblem adhesive
Choose from a liquid adhesive, high-bond tape or transfer adhesive. Here are the pros and cons of each.
Liquid car emblem adhesive
3M Plastic and Emblem Adhesive is available at most auto parts stores. To install a car emblem or molding simply apply a bead of adhesive in the middle and around the edges of the car emblem. Then press it onto the car paint. Align it. Remove excess adhesive with a cloth and Q-tip. Then tape in place with painter’s tape.
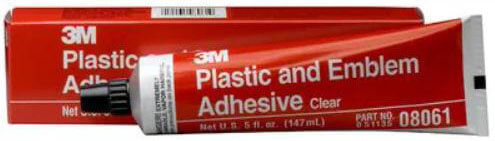
3M plastic and emblem adhesive
Advantages of liquid car emblem adhesive
• Easy to coat all areas of the car emblem, badge or molding
• No cutting required
Dis-advantages of liquid car emblem adhesive
• It’s not an instant bond so you can’t drive the vehicle until the adhesive sets up and dries.
• It’s somewhat messy to clean up around the edges of the emblem.
High-bond car emblem adhesive tape
3M exterior car attachment tape is what carmakers use to attach car emblems and molding at the factory. It’s applied to the emblem and then the emblem and tape are die-cut and the excess adhesive is removed. There are several advantages to using this tape, but for the best and most permanent application, you should apply the emblem to the tape and cut around the edges using an Exacto knife.
Some people avoid the trimming step by applying cut strips of the tape to the emblem and not running it all the way out to the edges. That’s a mistake. Water, dirt and road grit will accumulate on all the horizontal edges of the tape and that will eventually weaken the bond.
Lay out several pieces of 3M exterior car attachment tape. Remove one liner from each strip. Then press the emblem onto the sticky tape. Use an Exacto knife to trim around the edges.
Then remove the backside liner and stick it to the paint, being careful to get the proper alignment.
Advantages of 3M exterior car attachment tape
It bonds instantly
Disadvantages of 3M exterior car attachment tape
You must trim around the edges with a knife
3M Press-In-Place Emblem Adhesive Strips
This is a unique product for the DIY market. It allows you to get all the advantages of high bond tape without the difficult trimming. But it’s expensive. It sells for around $40 for ten 2″ x 12″ strips. It’s basically a 10-mil transfer film. Cut the strip to the length of your car emblem. Then lay that strip on a table. Remove the top liner. Then press your emblem onto the tacky adhesive. Hold the emblem and pull the excess strip away from the emblem. The adhesive film will stick to the emblem and the excess will stay on the remaining liner. If done properly, you won’t have to perform any trimming or adhesive removal.
To get the full effect, watch this video
©, 2021 Rick Muscoplat
Posted on by Rick Muscoplat