
Lift Kit Installation: Install a lift kit yourself
Follow this step-by-step process for installing a lift kit on your truck
When it comes to modifying your vehicle’s suspension with a lift kit, it’s crucial to follow the lift kit manufacturer’s guidelines to the letter. While these general instructions can serve as a helpful guide, they should never replace the specific recommendations the lift kit’s maker provides.
The installation process varies depending on the type of suspension on your truck. For example, your truck may have a coil spring, leaf spring, or torsion bar suspension, and the steps will be different for each type.
Here are the tools you’ll need to install a lift kit yourself
• Floor jack and at least 6 jack stands (rated above the weight of your truck)
• Impact wrench and impact sockets
• Rust penetrant.
• Torque wrench
• Hammer, punch, and chisel
• Rotary tool with cut off wheel
• Mechanic’s wire
• Reciprocating saw
• Drill and drill bits
• Coil spring compressor
• Mechanic’s creeper
Recommendation: If you plan to install larger tires/wheels after the lift, consider installing larger struts/springs to handle the extra wheel weight. Also, consider a Gear Ratio Adjustment. Larger tires change your acceleration and braking so changing the differential gear ratio may provide better acceleration.
Step 1) Raise and support the vehicle and the suspension
Raise the vehicle in the air and support all four corners of the frame with jack stands.
Place jack stands under the axles (solid axle type) so it’ll be supported when you disconnect the brackets.
Lift Kit Installation TIP: Lay out the lift kit contents and separate the components into front and rear piles. Familiarize yourself with the components before starting the project.

Rough Country 3″ lift kit contents for a 2023 F150 truck
Step 2) Start your lift kit installation by removing the shocks, struts, and springs
• If you have a torsion bar suspension, release the tension on the torsion bar before attempting to remove your shocks.
• Remove your current shocks or struts
• If your truck has leaf springs, remove the U-bolts and springs. If they’re rusted, it may be easier to cut off the rusted nuts and replace with new parts.
• Use a spring compressor to remove coil springs.
• Support the control arm and axle shaft when removing the strut or coil spring.
• Wire the brake caliper to support it. Never let it hang by the flexible brake hose
Step 3) Remove and replace control arms, tie rod ends, and stabilizer end links
Depending on the amount of lift, you’ll most likely have to replace at least one control arm and possibly the tie rod ends and stabilizer end links. You’ll probably have to replace the steering knuckle on a large lift. Follow the manufacturer’s instructions to the letter! Proper installation is critical to your safety.
NOTE: Don’t guess on torque values. Always use a torque wrench when installing new nuts and bolts.
NOTE: If your truck has struts, install the strut and strut mounts, duplicating the same strut mount orientation as the old strut. Snug the 3 strut mount nuts, but don’t apply final torque with the truck in the air. Always torque strut mount nuts with the strut mount fully loaded (tires on the ground).
Step 4) Install longer axle shafts if needed
Some large lifts require a longer axle shaft. Follow the shop manual instructions for removing the axle shaft from the differential.
NOTE: Most axle shafts require a new axle shaft nut. You cannot
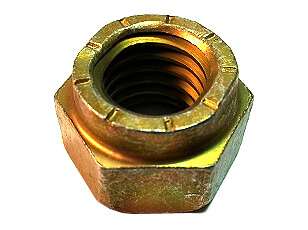
This is a one-time-use prevailing torque-style axle nut. It can’t be reused.
reuse a one-time-use nut. Be safe and buy new axle shaft nuts. Also, follow the shop manual specs for axle shaft torque. Failure to properly preload the wheel bearings will result in early bearing failure.
Step 5) Remove and replace rear leaf spring components
A suspension lift on a rear leaf spring setup usually requires the installation of blocks and spacers. Make sure you install the parts in the correct orientation.
Step 6) When you’re done installing your lift kit
Post-Installation Checklist for Your New Suspension Lift Kit
You’ve just finished installing that new suspension lift kit on your truck or SUV – congratulations! But before you hit the trails or start enjoying that extra ground clearance, there are some important steps to take care of.
1) Check All Torque Specs
After installing the lift kit, double-check that all nuts, bolts, and components are tightened to the proper torque specifications in the instructions. This ensures nothing is loose, which could lead to issues down the road.
2) Check for Driveline Vibrations
Your driveline angles have changed with the new lift height. Take it for a low-speed test drive and check for unnatural vibrations or noises that could indicate driveline issues. Adjustments or driveline modifications are needed to address these.
3) Get a Complete Alignment
Lifting the suspension throws off the alignment angles. You’ll definitely want to get a full alignment done at a shop to ensure proper tire wear and smooth handling. Most lift kit makers recommend getting an alignment before and after installing the lift.
4) Inspect All Brake Lines & Calipers
Double-check that the brake lines weren’t stretched or kinked during installation. Also, ensure the calipers are sliding properly with the new suspension geometry.
5) Check Clearances & Cycle Suspension
Do a final visual inspection, looking for any potential clearance issues with the new lift between tires, body, and suspension components through the full range of motion.
By taking these precautions after installing your new suspension lift, you’ll ensure safe and reliable operation and prevent any potential issues before they happen. Then, you can start enjoying the added capabilities!©,
©, 2024 Rick Muscoplat
Posted on by Rick Muscoplat