
Replace an Auto AC Compressor: Step-by-Step Guide
Learn how to replace an auto AC compressor using this step-by-step guide
You can replace your car’s ac compressor yourself. Just use this handy step-by-step guide
Step 1 Evacuate any remaining refrigerant and measure how much oil came out with it.
It’s illegal to vent refrigerant into the atmosphere, so you should pay a shop to evacuate, recover, and measure the amount of oil that comes out. Recovering the refrigerant is essential for environmental reasons, but it’s even more important to find out how much oil came out of the system because you’ll have to add that same amount back into the system before you refill it.
If you skip this step, you risk under or overfilling the system with oil. Underfilling will cause premature compressor piston/seal and valve failure while overfilling will dramatically reduce cooling.
Step 2 Remove the old auto AC compressor, drain, and measure how much oil comes out
• Remove the AC compressor drive belt.
• Disconnect the AC lines from the compressor.
• Remove the retaining bolts and remove the compressor from the vehicle. Be careful not to spill any oil as you remove the compressor.
• Remove the compressor crankcase drain plug (if equipped) and pour the oil into a measuring cup. Tilt the compressor to drain any oil from the suction and discharge ports. Wait a few minutes for the remaining oil to drain down, then rotate the compressor shaft one-half turn every minute for up to three minutes as you continue to drain and measure. Tilt the compressor back and forth several times while doing this to drain out as much oil as possible.
Step 3 Drain the oil from the new compressor
Remove the new compressor drain plug. Using a fresh measuring 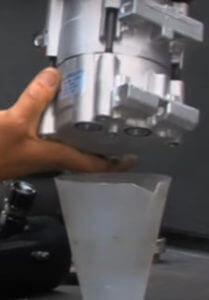 device, drain the oil from the new compressor following the steps above. Then add as much new oil back into the compressor as you took out of the old compressor. Reinstall the compressor drain plug.
Step 4 — Always replace the condenser when you replace a compressor
The condenser in modern AC systems has passages that capture and hold sludge and debris. They can’t be flushed. They must be replaced.
Step 5 — Always replace the receiver/drier or accumulator when you replace a compressor
The receiver/drier and accumulator contain a desiccant bag to remove moisture from the system. The desiccant bag can only hold about a teaspoon of moisture. So it doesn’t make sense to try and reuse the old one. The part is cheap. Replace it.
Refer to this article to learn how much oil to add to the system when replacing parts.
Step 6 Flush the system and add oil
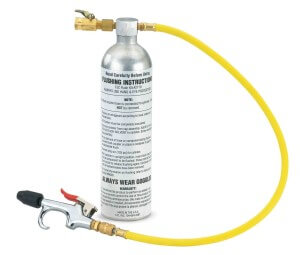
Flush with an AC compatible fluid and flush it.
Then flush the lines and evaporator.
Step 7 Install the new compressor
Rebolt the compressor to the engine and mount the AC lines using new gaskets or O-rings. Reconnect the clutch and any other electrical connections.
Step 8 Evacuate and refill
Evacuate the air from the system and then recharge using an AC refrigerant scale. See this chart for the proper amount of refrigerant.
©, 2020 Rick Muscoplat
Posted on by Rick Muscoplat