
Understanding and Resolving the P0641 Code on GM Vehicles
Troubleshooting a P0641 Code on GM Vehicles
Shops are reporting a high incidence of a P0641 code on GM vehicles. This code specifically relates to the vehicle’s powertrain control module (PCM) detecting an issue with the 5-volt reference circuit “A.” In this article, we’ll explore what the P0641 code means, its causes, symptoms, and how to diagnose and fix the issue.
What is the P0641 Code?
The P0641 code is a generic OBD-II trouble code that indicates a problem with the 5-volt reference “A” circuit. This reference voltage is crucial for the operation of various sensors in the vehicle, including those that monitor engine functions, transmission, and other key systems. These sensors rely on a steady 5-volt supply to function correctly, and any deviation from this voltage can cause the sensors to send inaccurate data to the PCM.
The “A” in the code refers to a specific circuit within the vehicle’s multiple 5-volt reference circuits. The PCM provides this reference voltage to sensors such as the manifold absolute pressure (MAP) sensor, throttle position sensor (TPS), and others. When the PCM detects that the voltage in this circuit is either too high, too low, or missing altogether, it triggers the P0641 code.
GM has issued a service bulletin #P11067B to address a P0641 Trouble Code GM vehicle on the vehicles listed below. When the issue happens, the check engine Malfunction Indicator Lamp (MIL) will come on, a Reduced Power Mode message will be displayed and a P0641 Poor Performance/Shifts trouble code will be stored.
Vehicles affected by service bulletin #P11067B:
2013-2017 Chevrolet Equinox Equipped with 3.6L Engine (RPO LFX)
2013-2017 GMC Terrain Equipped with 3.6L Engine (RPO LFX)
Cause of a P0641 Code GM vehicles
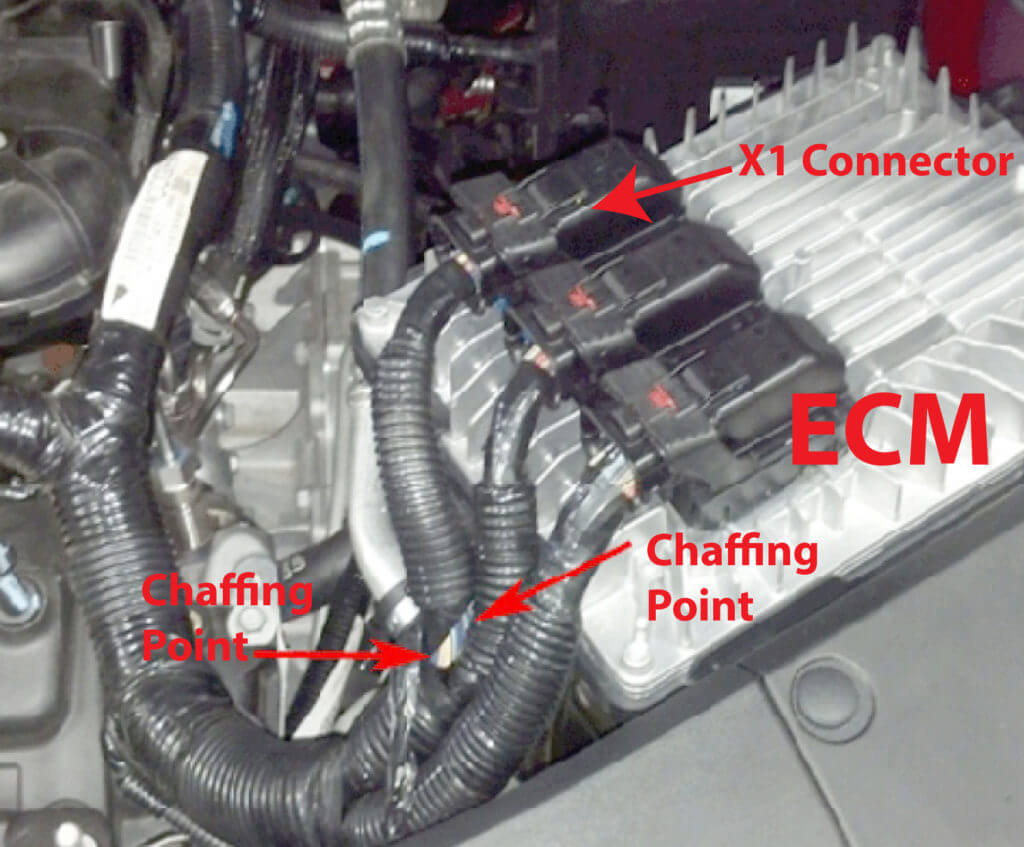
GM has identified the cause of the P0641 to be a chaffed wire in the ECM wiring harness. The chaffing occurs because the ECM wiring harness is rubbing on the ECM bracket.
Inspect ECM wiring harness
Using the image here, locate the wire harness bundle from connector X1 at the ECM. Follow the harness down to where it might come into contact with the ECM bracket. Then examine the wiring harness for signs or rub through or chaffing. Repair any damaged wires and insulation using suitable materials. Then wrap the repair using woven polyester electrical tape and any other type of anti-abrasion tape.
©, 2020 Rick Muscoplat