CV boot clamp installation instructions
CV boot clamp installation instructions — Learn how to install both types of CV boot clamps
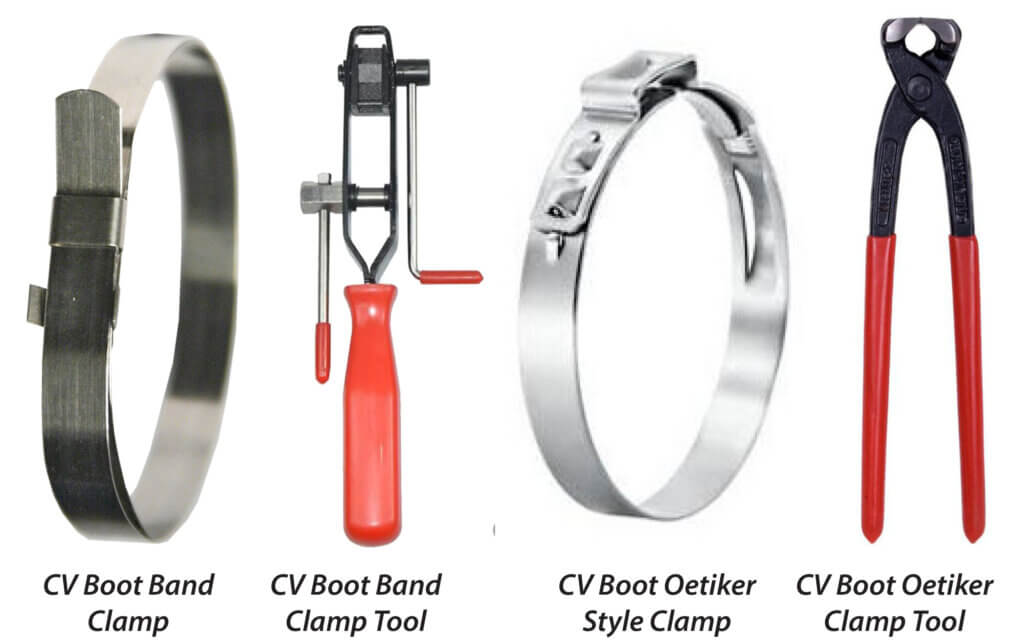
CV boot clamps come in two styles: band clamps and Oetiker style. While both can be installed without the special tools, the job is much easier with the correct tool. I’ll show you how to perform the CV boot clamp installation for both types.
The two types of CV boot clamps
How to install a CV boot band clamp
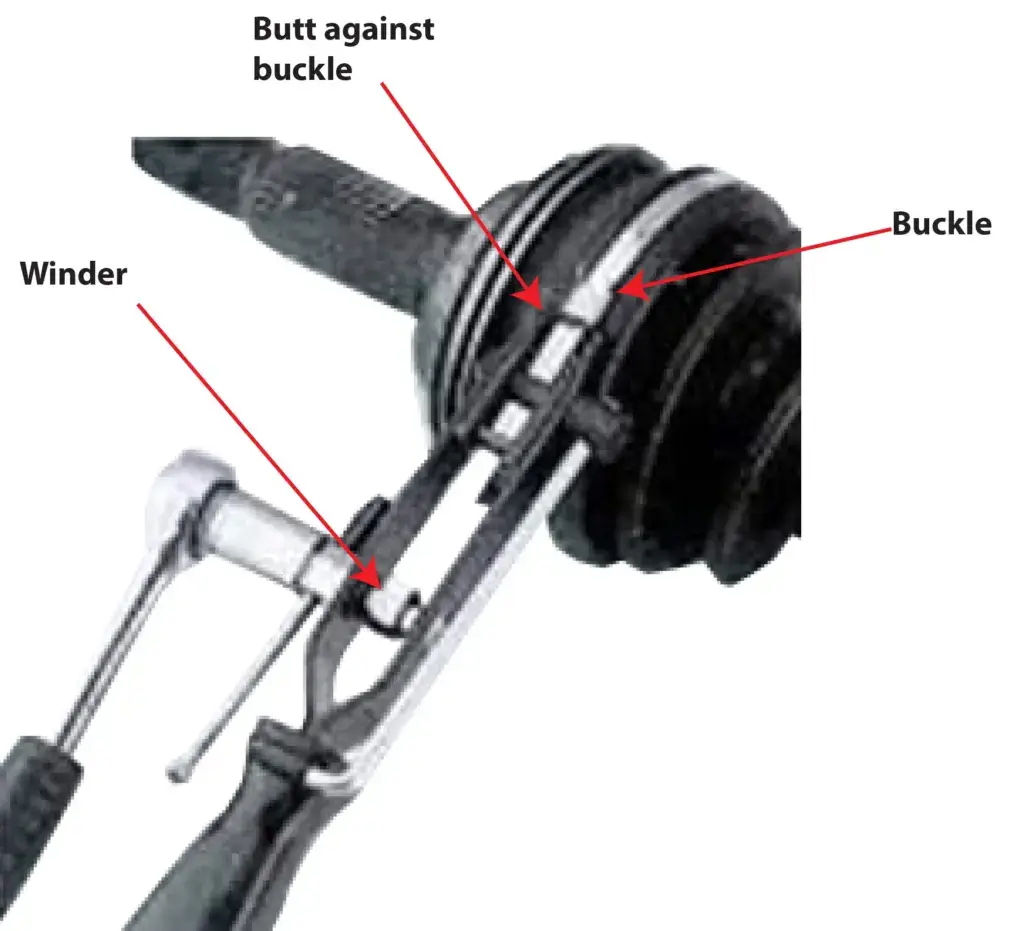
Band clamps work much like a belt for your pants. You wrap the band around the boot and tuck the end of the clamp through the buckle. Then you insert the end of the “belt” into the winding tool as shown here.
Wind the end of the belt using the lever or with a socket/ratchet on the end of the winder mandrel. As you tighten, the butt end of the tool will stop the tool at the buckle. Continue winding until the band is tight.

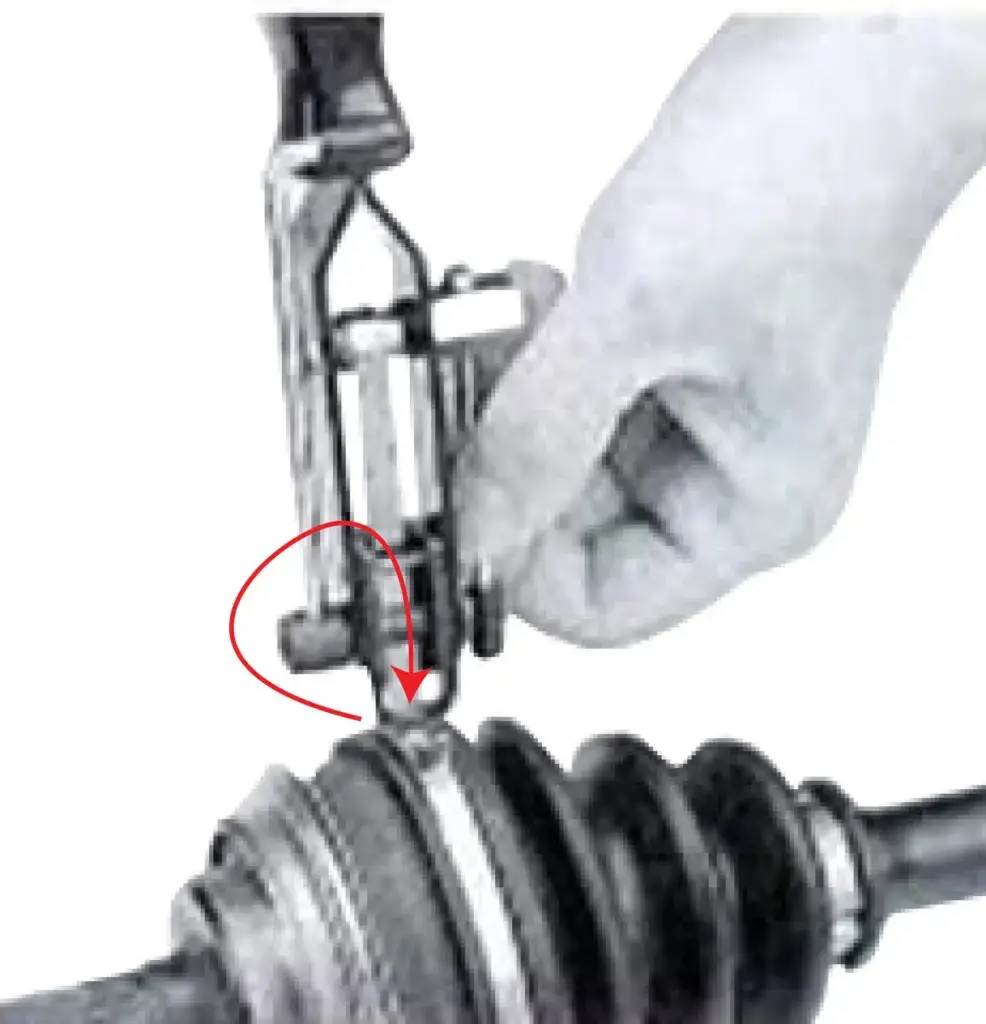
Once the band is tight rotate the tool 90° to bend the band so it can’t slip back through the buckle

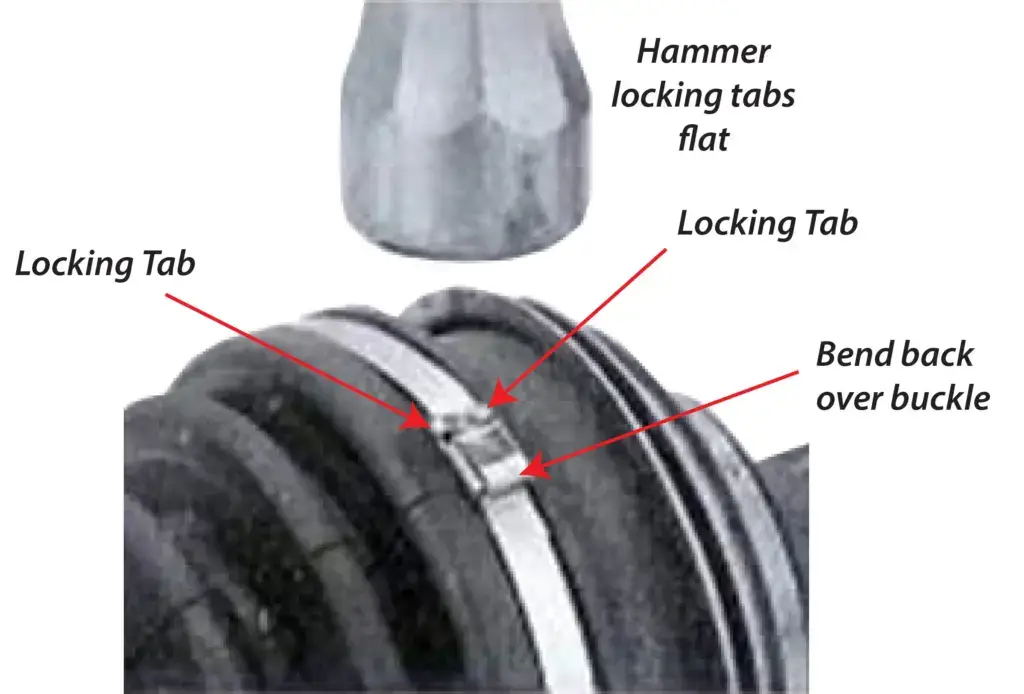
To complete the installation, remove the winding tool and fold the belt over the buckle so it’s made a 180° turn. Lay the belt into the locking tabs. Then flatten the tabs to lock the belt in place. Cut off any excess belt using a side cutters.

How to install an Oetiker style CV boot clamp
Unhook the clamp from the prongs to open it up and fit around the boot.
Resnap the clamp to the prongs to achieve the tightest fit before the final crimp.
Using the crimp tool squeeze the pre-formed crimp to achieve final clamp tightness.

©, 2024 Rick Muscoplat

