Should you replace a CV boot versus new axle shaft
The Pros and Cons of Replacing the CV Boot Versus a New Axle Shaft
When a CV boot fails, you’re faced with a decision: should you replace just the CV boot, or should you replace the entire axle shaft? Each option has its pros and cons, which can impact the cost, longevity, and overall performance of your vehicle. This article explores the advantages and disadvantages of replacing the CV boot versus a new axle shaft.
The Pros Of Replacing Just the CV Boot
Cost-Effective Solution: One of the main advantages of replacing the CV boot alone is cost savings. A CV boot is relatively inexpensive, typically costing between $10 and $50, depending on the vehicle and the quality of the part. Labor costs for boot replacement are also lower than for a full axle replacement, making it a more budget-friendly option.
Preservation of Original Parts: If the CV joint and axle are still in good condition, replacing only the CV boot allows you to retain the original parts, which may be preferable if you’re trying to maintain the vehicle’s factory components. This is especially important for enthusiasts or owners of classic cars who prioritize keeping the vehicle as original as possible.
The Cons Of Replacing Just the CV Boot
More Labor-Intensive: Replacing the CV boot is more labor-intensive than replacing the entire axle shaft with a new unit. Replacing the boot involves removing the axle from the vehicle, disassembling the joint, cleaning it, repacking it with grease, and installing the new boot. This process can be time-consuming and requires a high level of skill to ensure the joint is properly reassembled and sealed.
Risk of Hidden Damage: If the CV boot has been torn or damaged for an extended period, dirt, water, and debris may have entered the joint, causing unseen damage. Replacing the boot without addressing potential internal damage may lead to premature joint failure, requiring a more costly repair down the line.
Short-Term Solution: While replacing the CV boot can be effective if caught early, it is often considered a short-term solution, especially if the axle has high mileage. The CV joint itself may have already sustained wear, meaning that even with a new boot, the joint may not last as long as expected.
The Pros of Replacing the Axle Shaft
Comprehensive Repair: Replacing the entire axle shaft ensures that any potential damage to the CV joint or other components is fully addressed. A new axle shaft comes with fresh CV joints and boots, eliminating the risk of hidden damage and extending the overall lifespan of the drivetrain.
Warranty Coverage: New or remanufactured axle shafts typically come with a warranty, providing peace of mind that the replacement part is covered in case of defects or premature failure. This can be particularly beneficial if the vehicle has high mileage or if the original axle has been subjected to heavy use.
Saves Time and Labor: Replacing the axle shaft takes less time and effort than replacing the boot. The old axle is simply removed, and the new one is installed, without the need to disassemble and reassemble the joint.
Better Longevity: A new axle shaft is likely to last longer than a repaired one, especially if the original axle had high mileage or signs of wear. This option provides a long-term solution, reducing the likelihood of future issues and potentially saving money on repairs in the long run.
The Cons of Replacing the Axle Shaft
Higher Cost: Replacing the entire axle shaft is generally more expensive than just replacing the CV boot. Depending on the make and model of the vehicle, a new axle shaft can cost between $100 and $400, with labor adding another $100 to $200. For budget-conscious vehicle owners, this higher upfront cost may be a significant drawback.
Unnecessary Replacement: If the CV joint and axle are still in good condition, replacing the entire axle may be overkill. In some cases, the CV boot may have failed due to external factors, and the joint itself could still be perfectly functional. Replacing the axle in such cases might be unnecessary and wasteful.
Quality Concerns with Aftermarket Parts: Not all replacement axles are created equal. Some aftermarket axles may be of lower quality than the original equipment, leading to reduced performance or a shorter lifespan. It’s important to choose a reputable brand or consider using OEM (Original Equipment Manufacturer) parts to ensure reliability.
How to replace a CV boot
Remove the axle from the vehicle
To replace a torn CV boot you must first disconnect the axle shaft from the wheel hub. Most technicians prefer to remove the entire half shaft from the vehicle before replacing the boot because you have to remove the CV joint in order to replace the boot. Removing the outer CV joint can require removing a snap ring or using a punch and hammer to remove the joint. That’s often easier to do when the axle is held in a vice.
Remove the CV joint from the axle and clean out the grease
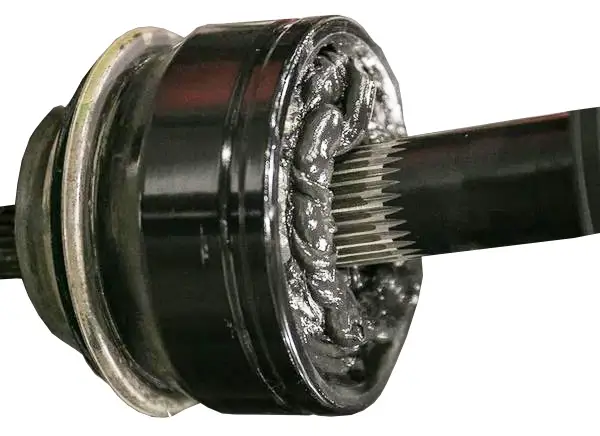
The inner “spider” joint is held on by a snap ring, while the outer CV joint is held in by a circlip or a snap ring. Once you remove the joint from the axle shaft, you have to clean out all the grease so you can inspect the CV joint. A torn boot allows road grit to get into the joint, and that grit can often damage it.
Once the CV joint is clean, you can install the new boot and reinstall the joint
Slice the boot onto the axle shaft, then reinstall the inboard spider and bearings and the outer CV joint. Move the new boot into position and secure one end of the boot with the clamp provided in the kit.
Add grease to the new boot and burp the air out of the joint
Each boot kit comes with a packet of grease specially  designed for CV joints. Do not use ordinary chassis grease. Clip a corner of the grease packet and squeeze all the grease into the boot, avoiding grease on the boot where it seals. Install the clamp. Then, reinstall the axle shaft into the vehicle
Why it usually makes more sense to replace the entire axle shaft versus replacing just the CV boot
There’s likely already some damage in the joint
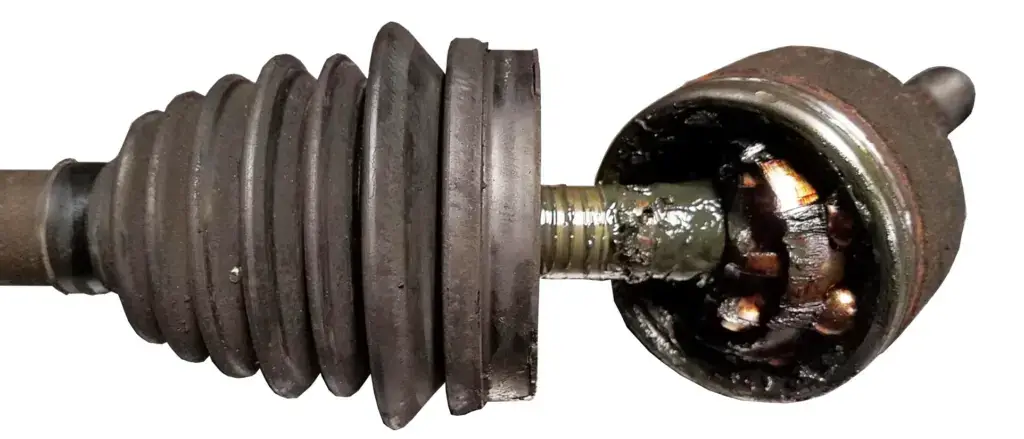
If the CV boot is torn, chances are high that the joint has already been contaminated with road grit. You simply don’t know the condition of the joint at this point. If you do the work yourself or pay a shop to replace just the CV boot, you could wind up with CV joint vibration or noise due to the internal wear caused by running with dirt and grit in the joint.
It’s labor-intensive to replace just the boot
Most shops remove the entire axle shaft before removing the joint and installing a new boot. The CV boot kit is cheap, but there’s more labor involved to replace the boot than to replace the entire half shaft.
With a rebuilt axle shaft or a new axle shaft you get a warranty
No shop will warrant the joint if you insist on just a CV boot replacement instead of replacing the axle shaft. Some shops refuse to reboot a CV joint for this reason.
What is a CV joint?
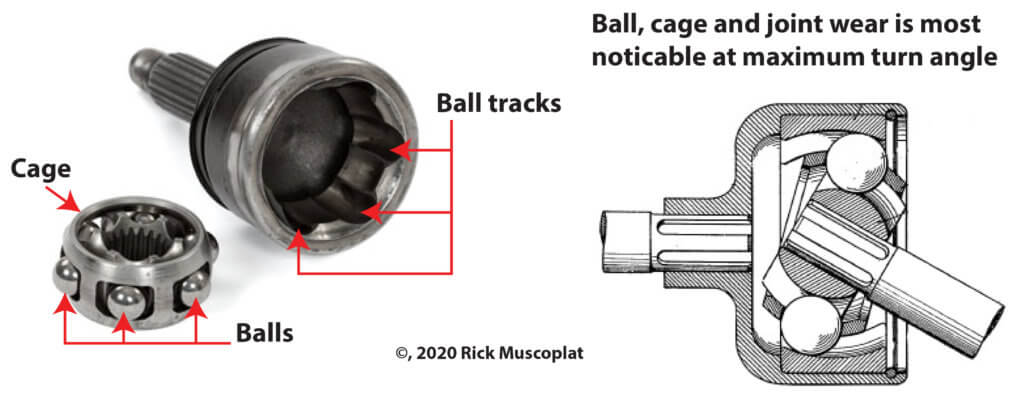
A constantly variable CV joint transmits power at a variable angle and at constant rotational speeds. It’s used in place of a traditional U-joint because it can transmit rotational power at greater angles; that’s important in a front wheel drive vehicle where the wheel have to turn.
Ford engineer Alfred Hans Rzeppa designed the CV joint in the 1930s. Instead of four U-joint bearings mounted in two yokes, Rzeppa used six balls mounted in paths. His invention was used widely in WWII Jeeps’ front axles.
What is a CV boot and how does it fail?
A CV boot is a rubber cover that protects the CV joint, which connects the drive axle to the wheel. It keeps grease inside the joint and debris outside. Over time, the constant flexing can cause the CV boots to crack or tear, allowing dirt and moisture to enter the joint and grease to escape. This can lead to CV joint damage.
©, 2023 Rick Muscoplat
Posted on by Rick Muscoplat

