
Free Up a Stuck Caliper Pin: A Step-by-Step Guide
Learn How to Loosen A Stuck Caliper Pin Fast and Easy
If you’ve ever worked on your own car’s brake system, you know that sometimes, components don’t cooperate the way they should. A stuck caliper pin is one of the most frustrating issues you may encounter.  A stuck caliper slide pin can make a brake job drag on longer than expected, but with the right knowledge and approach, it’s possible to free that stubborn pin and get your brakes working like they should again. Here’s a step-by-step guide to removing a stuck caliper pin and a little insight into what might be causing the issue.
Step 1: Remove the Caliper Bracket From the Vehicle and Clamp it in a Vise
If your caliper pin seems stuck or seized, you’ll first want to determine if the pin is truly stuck or if it’s just tight from being in place for so long. Gently attempt to move the pin by turning or pulling on it with pliers. If there’s any movement at all, the pin may just be difficult to remove, not fully seized.
If the caliper pin won’t budge or shows no signs of movement, it’s likely seized. A seized caliper pin is often the result of corrosion, rust, or simply the pin becoming worn from years of use.
Place the caliper in a vice with the stuck caliper pin pointing up.
Step 2: Remove the Rubber Boot And Soak the Stuck Pin
You should always replace old caliper pin boots
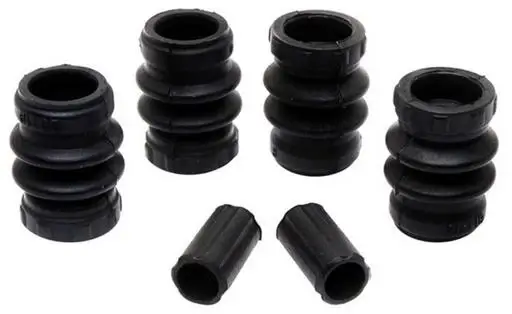
Caliper pin boot kit
when performing a brake job. They’re cheap, and they are responsible for keeping water and grit out. In this case, the fact that you have a seized caliper pin proves that the old boots failed. So don’t hesitate to remove them. Just cut them off with a knife.
Next, use a high-quality rust penetrant like PB Blaster or Liquid Wrench, NOT WD-40, which is just an all-purpose lube and has very little rust-penetrating ability, in my opinion. Apply a generous amount of penetrating oil and let it sit for 15 to 20 minutes.
Rust penetrant works best when you apply vibration. If you have an air chisel with a hammer bit, rap it against the caliper bracket to help the penetrant seep into the bore. Or, hit the bracket with rapid hammer blows to get the penetrant moving.
Step 3: Don’t Pull, Rotate
Use an open-end wrench, adjustable wrench, or a vice grip to rotate the stuck caliper pin. Work the wrench forward and back until it turns freely. Rotating to free it up takes far less force than trying to pull it out as your first step. Once it rotates, use a vice grip to pull and rotate. I’ve never had this method fail.
Step 4: Clean the Bore
Don’t even think of reinstalling the caliper pin into a rusty bore. Use round wire brushes and rust penetrant or phosphoric acid to clean the rust from the bore.
Step 5: Use New Caliper Pins
New caliper pins are cheap, usually less than $10/set per caliper.  It never pays to try and remove the rust from the old bolts because the anti-corrosion coating is already degraded. Look closely at the head of the bolt, and you’ll see that the sealing area for the boot isn’t smooth so that it won’t seal with the new boot.
 If All Else Fails — Use Heat or Buy a New Bracket

I’m not a big fan of using heat, except as a last resort. I know many techs break out the torch at the first sign of trouble. However, too much heat can damage the bracket by reducing its temper.
Heat and Temper are related
Tempering involves reheating the hardened steel to a specific temperature, typically between 300°F and 1,300°F, and then allowing it to cool slowly. This process helps relieve internal stresses, improve ductility, and make the steel less brittle, resulting in a material that is strong yet more resistant to cracking or breaking.
However, if the steel is heated beyond its original tempering temperature, it loses strength. So yes, the knuckleheads that heat fasteners to cherry red or white should not reuse the fastener. It must be replaced.
600–900°F (315–480°C): Significant loss of hardness and increased ductility.
Faint red (barely visible in the dark) 900°F 482°C
Dark red (dull cherry red) 1,100°F 593°C
Bright cherry red 1,300°F 704°C
Orange-red 1,500°F 815°C
Bright orange 1,700°F 927°C
Yellow 1,900°F 1,038°C
Bright yellow 2,100°F 1,149°C
White (welding heat) 2,300–2,500°F 1,260–1,371°C
To get expansion, you only need to heat the pin to about 400°F and then cool it with water spray. The goal is to heat it enough to break the rust, then cool it so it shrinks back. Then, soak it with a rust penetrant so it can seep in. Then, follow the rotating instructions above.
If you can’t remove the stuck caliper pin, you can always order just the bracket.
Understanding How You Got Here In The First Place
Let’s talk about what causes a stuck caliper pin. The caliper pins are responsible for allowing the brake caliper to move freely when the brakes are applied. These pins slide within the caliper bracket, ensuring that the caliper stays in proper alignment with the rotor. Over time, the brake heat can degrade the protective rubber boot, allowing water and road salt to penetrate into the bore. That sets up the corrosion process, causing the caliper pins to seize.
That’s why it’s so important to replace the caliper slide pin boots on every brake job. Remove the old boots and clean any corrosion off the sealing surfaces. Coat with silicone brake grease and then install the new boots.
©, 2025 Rick Muscoplat
Posted on by Rick Muscoplat