How to Fix A Car Horn: Common Issues and Solutions
How to Fix a Car Horn: A Step-by-Step Guide
If your car horn stops working, it can compromise your ability to communicate effectively on the road. Thankfully, fixing a broken horn is typically straightforward, whether it’s caused by a faulty fuse, a damaged horn switch, or a corroded connection. This article will show you the components commonly used in horn systems and walk you through the process of how to fix your car horn.
Understanding How a Car Horn Gets Power
Over the decades, carmakers have changed the way they power car horns. In most cases, the horn button doesn’t actually switch power to the horn. Carmakers try to avoid that because horns can use 6-10 amps, and running that kind of amperage through the small contacts on a horn switch can cause them to pit and fail.
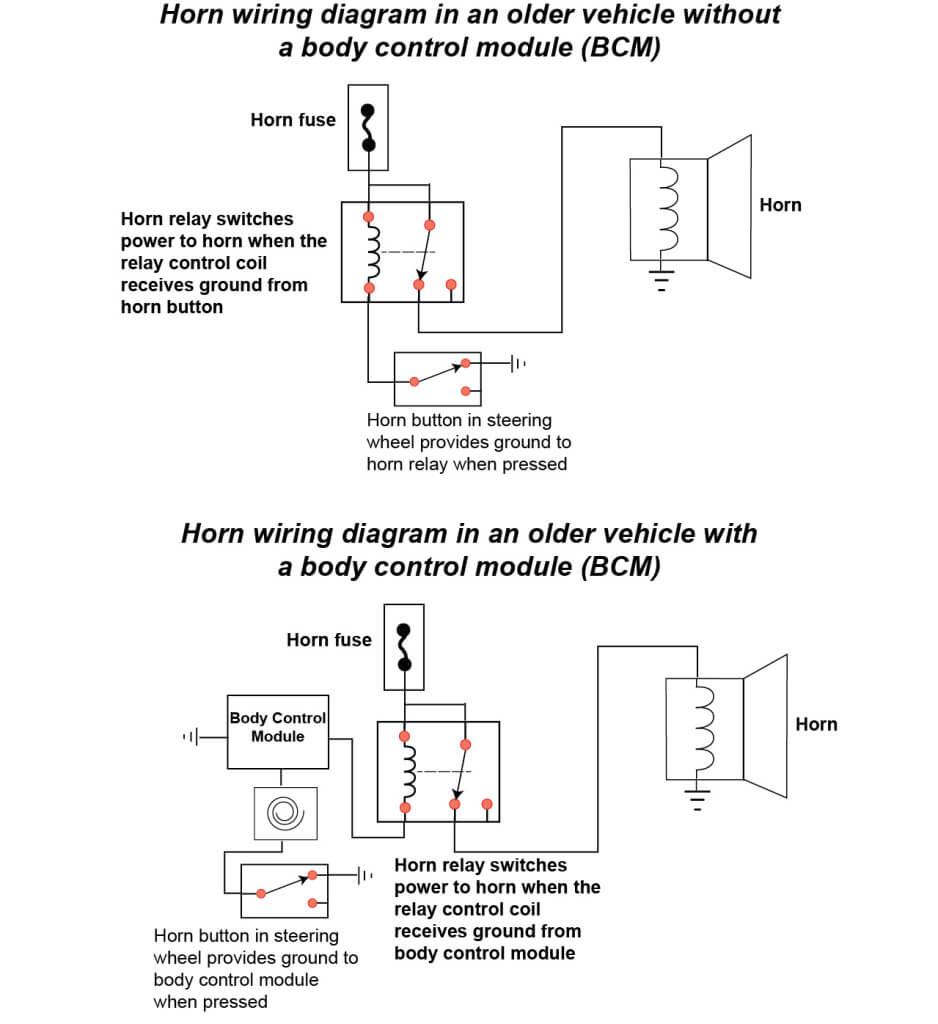
1) Horn Switch Activates a Relay— Activating the horn button connects the control coil in the horn relay to ground, completing the circuit, which then closes the relay contacts, providing power to the horn.
2) The Horn Switch Is an Input to the Body Control Module (BCM)— Activating the horn switch grounds the reference voltage from the BCM. When the BCM sees the voltage drop, it knows the driver is requesting hornoperation. In some vehicles, a horn relay in the BCM activates, switching power to the horn. Yet, in other designs, the BCM communicates digitally with a Totally Integrated Power Module (TIPM) or Smart Junction Box, telling it to provide power to the horn.
Components in a Horn System
Fuse— There’s always a fuse for the horn. It can be located in the cabin fuse box or the underhood fuse box.
Horn button— Located on the steering wheel, the horn button connects power to ground to complete a circuit.
Clockspring— The clockspring is a wind-up
ribbon cable that allows the controls on the steering wheel to communicate with accessories, even when the steering wheel is turning. In many ways, it’s like a window shade that unwinds when the wheel is turned in one direction and then winds up when turned in the other direction.
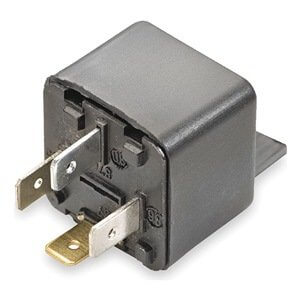
Horn Relay— Used to switch battery voltage and high amps to the horn
Horn— One horn for the high note, and one horn for the low note.
Step 1: Check the Fuse
The first and easiest step in fixing a malfunctioning horn is to check the fuse. Like many electrical components in your car, the horn operates through a circuit protected by a fuse. A blown fuse could disrupt the flow of electricity to the horn.
1. Locate the Fuse Box
Most vehicles have one or more fuse boxes under the hood or dashboard. Check your vehicle’s manual to identify the location of the fuse that controls the horn. It will typically be labeled with the word “horn” or a symbol.
2. Inspect the Fuse
Once located, remove the horn fuse using a fuse puller or pliers. Hold the fuse up to the light and inspect the metal strip inside. If the strip is broken, the fuse is blown and needs to be replaced. If the fuse is blown, the most likely cause is a corroded horn. If you replace the fuse and it immediately blows when you press the horn button, check for faulty horn.
3. Replace the Fuse
Replace the blown fuse with a new one of the same amperage rating. It’s important not to use a higher-amp fuse than the recommended rating, as it can cause electrical damage or even fires. After replacing the fuse, test the horn to see if it works.
Step 2: Test the Horn Relay
If the fuse is intact but the horn still isn’t working, the next step is to test the horn relay. The horn relay is an electrical switch that controls the power flow to the horn, and it can sometimes fail.
1. Locate the Relay
The relay is typically located in the same fuse box as the horn fuse. Check the vehicle’s manual to identify the horn relay.
2. Swap the Relay
One way to test if the relay is the issue is to swap it with another identical relay in the fuse box. If your horn works after swapping the relay, then the original relay is faulty, and you’ll need to replace it.
3. Replace the Relay
If the relay is bad, purchase a replacement that matches the specifications of the old relay and install it.
Step 3: Inspect the Horn Itself
If the fuse and relay are working, but your horn still won’t sound, the problem could be with the horn assembly itself. Horns are usually mounted behind the grille or under the vehicle’s bumper.
How a Car Horn Works and How It Fails
As soon as the car horn receives power, the power activates an electromagnet, which pulls on a metal spring disc. The disc contains an electrical contact that carries power to the electromagnet. As the magnetic force pulls on the disc, it moves and disconnects power to the electromagnet, interrupting the circuit, which de-energizes the electromagnet. The disc then falls back into place, reconnecting the electromagnet and energizing it again. The cycle happens many times per second, generating the loud, consistent tone we associate with a car horn.
What goes wrong with the horn
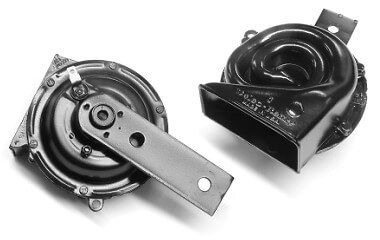
As you can see in the pictures below, most horns have a snail design that amplifies the sound of the vibrating disc. However, since the horn is open to the environment, it is susceptible to water, salt, and road grit. Over time, those contaminates can cause the disc to corrode, swell, and stop working.
At the point where the disc can no longer move, the electromagnet stays engaged, overheats and burns the insulation off the windings, creating a dead short, which is what blows the horn fuse.
Horns are not repairable
If the horn doesn’t work, it must be replaced.

Some horns have only one electrical contact. That’s for power. It gets ground through its connection to the chassis.
1. Check for Corrosion
Corrosion on the horn terminals or mounting points can prevent the horn from working. Disconnect the horn’s electrical connector and inspect the terminals for rust or debris. Use a wire brush or sandpaper to clean the terminals.
2. Test the Horn with a Direct Power Source
If cleaning the terminals doesn’t fix the problem, try powering the horn directly from the car battery. Using jumper wires, connect the positive terminal of the horn to the positive post of the battery and the negative terminal to the negative post. If the horn sounds, it’s working, and the issue may lie with the wiring or horn switch. If the horn doesn’t sound, you’ll need to replace the horn itself.
3. Replace the Horn
Replacing a broken horn is relatively easy. Simply unbolt the old horn from its mounting bracket and disconnect the electrical connector. Bolt the new horn into place and reconnect the electrical connector.
Step 4: Test the Horn Button and Clock Spring
If the horn assembly is in good condition, the issue could lie with the horn button or the clock spring in the steering wheel. The clock spring is a spiral-wound electrical connector that allows the steering wheel to turn while maintaining the connection between the horn button and the rest of the vehicle’s electrical system.
1. Test the Horn Button
To test the horn button, remove the steering wheel cover (airbag-equipped vehicles require special care, so consult a mechanic if necessary) and check the wiring behind the horn button. Look for loose or disconnected wires. If the button doesn’t seem to make proper contact when pressed, it may need replacement.
2. Check the Clock Spring
If the horn button seems to be in working order, the clock spring could be at fault. The clock spring is likely the culprit if your vehicle has additional symptoms like non-working steering wheel controls or a malfunctioning airbag light. Replacing the clock spring is more complex and may require professional help, especially since it’s located within the steering column.
Step 5: Troubleshoot Wiring Issues
In some cases, the horn’s wiring may be damaged or disconnected. This could happen due to corrosion, wear, or rodent damage.
1. Inspect the Wiring
Trace the wiring from the horn back to the relay and fuse box. Look for obvious signs of damage, such as frayed wires, cuts, or corrosion. If you find damaged wiring, it may need to be spliced and repaired.
2. Use a Multimeter
To further diagnose the problem, use a multimeter to check for continuity in the horn circuit. If there’s no continuity, this could indicate a broken wire or poor connection that needs repair.
©, 2024 Rick Muscoplat
Posted on by Rick Muscoplat


