How to replace a car battery terminal
How to replace a car battery terminal
Replace a battery terminal instead of the entire battery cable
A car battery terminal can corrode from battery acid and the corrosion can cause very high resistance that prevents your alternator from properly charging your battery, Corrosion can also eat away at the terminal making it impossible to tighten. If you can’t clean the corrosion or tighten the terminal, you must replace a battery terminal. Tou can replace the entire battery cable, but that can be costly and time-consuming. Or you can just replace the car battery terminal itself.
Three types of battery terminals
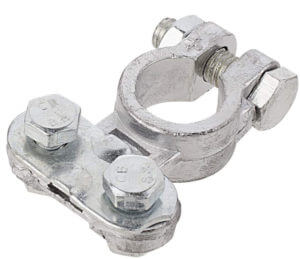
Plate battery terminal
This is the cheapest type. To install it, just use a hacksaw to cut

Plate-style battery terminal. The cable gets squashed under the plate. This is the cheapest style but is most prone to corrosion
off the old terminal. Then strip the insulation off the cable and insert the cable under the plate and tighten the bolts. These terminals are cheap and they work, but they’re not the best choice because the plate doesn’t contact all the wires. So you don’t get the best conductivity.
Since the current only flows through a portion of the wire and terminal, you get hot spots and that reduces starting power. The open design exposes the copper strands to the elements so they corrode and reduce conductivity even further.
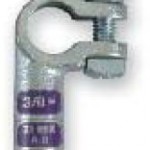
Crimp battery terminal
Shops often use these to replace your factory battery terminals because they’re easy to install and provide the best electrical contact. But you need a special crimping tool to fasten them to the battery cable.
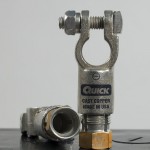
Compression battery terminal
This is the type I like but you’ll have to shop around a bit to find them. If you can’t find them, click on this link for more information. It’s the best for DIYers because it doesn’t require special tools and it provides the best electrical connection.
Buy the terminal to fit your battery cable wire gauge. Depending on the size of the engine, your battery cables will be 4, 6, 8-gauge. Then make sure you buy the proper polarity terminal—positive or negative. While you’re at the auto parts store, buy a small piece of heat shrinkable tubing to fit around the cable insulation and protect the cable from corrosion.
Steps to replace a battery terminal
Step #1 Disconnect the terminals and remove the ends
Remove the negative battery terminal first, then the positive terminal. If the copper cable is molded into the old terminal, cut off the terminal with a hacksaw. If the cable was crimped onto the terminal, try unbending the crimp.
Step #2 Clean the copper wire strands with a wire brush to remove corrosion
Use a wire brush to clean up the wire strands until they’re bright. Then slide the heat shrinkable tubing onto the battery cable, followed by the compression nut.
Step #3 Insert the cable into the new terminal
Next, push the copper strands into the new terminal making sure no strands get caught.
Step #4 Tighten the compression nut
Hold the compression nut with a wrench while you screw on the terminal. Continue tightening until the compression nut is hard to turn. Finish the job by sliding the heat shrinkable tubing over the connection and shrinking it with a heat gun. The heat will shrink the tubing and activate the sealing adhesive.
Compression terminals are a bit harder to find. NAPA stores carry the Quick Compression brand terminal made by QuickCable shown here.
© 2012 Rick Muscoplat
Posted on by Rick Muscoplat


