
Radiator drain plug location: How to find it
Learn how to find the radiator drain plug on your radiator
Lots of DIYers change their own coolant and the first step in that process is to drain the coolant form the engine and radiator. Many times, the first obstacle they encounter is finding the radiator drain plug or valve. The valve, called a petcock, has changed since the old days when it was made from brass with a “T” handle.
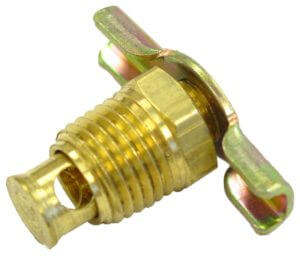
Old-style brass radiator drain “petcock”
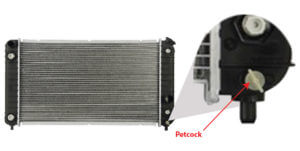
Radiator drain valve location
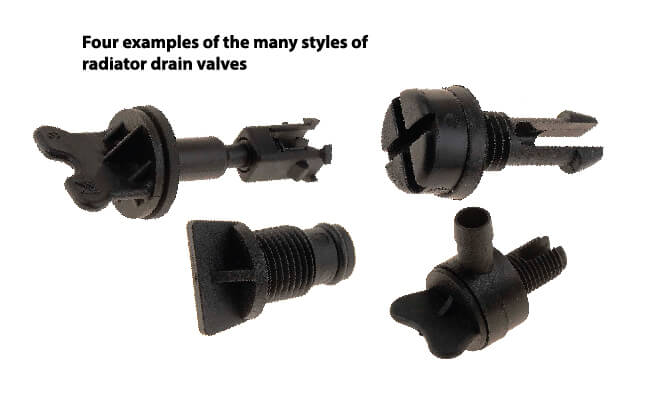
The new drain valves are plastic and have a twist-lock design if the radiator has one.

Plastic radiator drain valve petcock or “drain cock.”
And that’s the point; most car makers have eliminated the radiator drain valve from their radiators.
Why some carmakers eliminated the radiator drain plug or valve
It’s really pretty simple. First, radiator drain valves are never used by professional mechanics. If a shop is going to flush a cooling system, they’d install a flushing tee and attach flushing equipment. If they’re going to do a radiator drain and fill, they’ll loosen the hose clamp on the lower radiator hose and remove the hose. All the coolant from the radiator and lower part of the engine drains out quickly using that technique. Then, the mechanic reinstalls the lower radiator hose and refills the system. The entire drain procedure takes about 5 minutes.
Opening a radiator drain valve can cause BIG problems
But what if your radiator has a drain valve? Well, my advice is: DON’T OPEN IT! Plastic drain valves usually have a flat portion for twisting and an O-ring washer at the end of the valve. Over time, the O-ring welds itself to the drain valve seat. When you try opening the valve, you can encounter several really bad scenarios:
1): Since the O-ring is welded to the seat, the flat portion twists and breaks off. Now the valve can’t be opened.
2): The valve opens slightly and the flat either breaks off or the engine stem breaks off, leaving a portion of the stem inside the valve. Coolant begins leaking out and there’s no way to stop it. Sometimes you can remove the broken portion with a needle nose pliers and then buy a replacement valve stem. However, that means a trip to the auto parts store. Do you have a second vehicle to make that trip? And, does the auto parts store stock that particular valve? If you can’t find a replacement valve stem, you’ll have to replace the radiator. Cost—at least $200 if you replace it yourself or up to $600 if you have to take it to a shop. Oh, then there’s the towing charge.
Which radiator drain is in your radiator? Where will you find a replacement on short notice?
3) You crack the tank. Keep in mind that the newer coolants are long life chemistries, so you’re probably not changing coolant for 5 or 10 years. The plastic tanks on modern radiator can get brittle and crack if you apply twisting stress to the drain valve. Why risk damaging a perfectly good radiator.
Here’s how to drain your radiator
Loosen the hose clamp on the lower radiator hose. If it’s a worm drive clamp, use a screwdriver to loosen it. If it’s a constant tension spring clamp, use slip jaw pump pliers or special hose clamp removal pliers to open the clamp and move it away from the radiator neck.
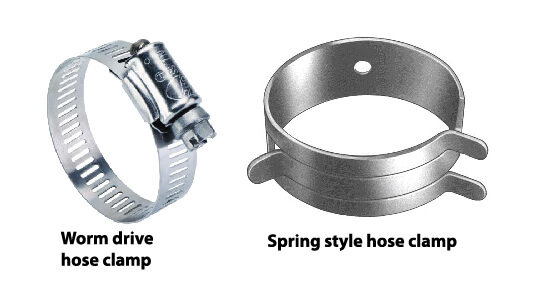
Worm drive and spring style hose clamps
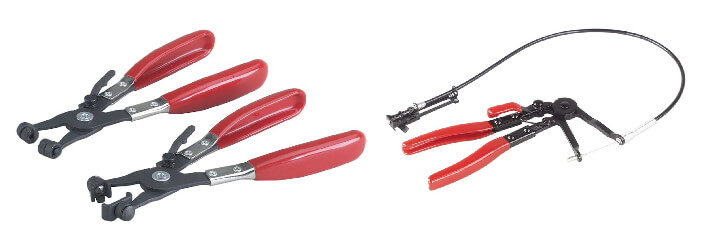
Spring hose clamp removal and installation pliers
Next, slide a radiator hose removal tool between the hose and the neck and slide it around
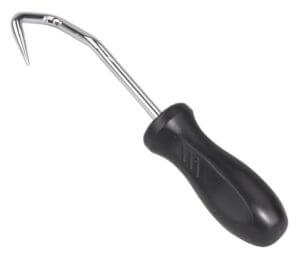
OTC 4521 Hose Removal Tool New
the neck to break the bond between the hose and the neck. Then, twist the hose off and let the coolant drain.
Removing the lower radiator hose removes more coolant
A radiator drain petcock is usually located above the bottom of the radiator. So even if you can open it, you’re not draining the radiator completely. That’s why shops always remove the lower radiator hose. That drains the entire radiator AND most of the coolant from the engine.
©, 2017 Rick Muscoplat
Posted on by Rick Muscoplat