
Replace an Alternator Step-by-Step: A DIY Guide
Replace an alternator yourself — How to
Replacing an alternator might seem like a daunting task, but with the right tools and a bit of mechanical know-how, it’s a job that many DIY enthusiasts can tackle. The alternator is a critical component of your vehicle’s electrical system, responsible for charging the battery and powering the electrical systems while the engine is running. When the alternator fails, it can leave you stranded with a dead battery, so knowing how to replace it can be valuable. This article will guide you through the process of replacing an alternator yourself, step by step.
Tools needed to replace an alternator
• Socket set and ratchet
• Wrench set
• Screwdrivers (flathead and Phillips)
• Pliers
• Belt tensioner tool (if applicable)
• Work light
• Safety glasses
Step by step to replace alternator
1) Disconnect the battery terminals.
2) Disconnect the B wire at the back of the alternator and 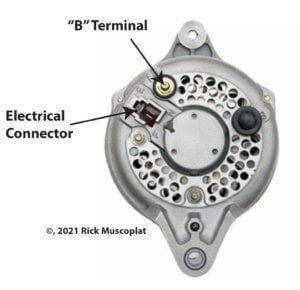 then disconnect the electrical connector from the alternator.
3) Loosen the alternator belt tensioner and remove the alternator belt
4) Remove the tightening bolt from the alternator
5) Remove the pivot bolt from the alternator
6) Remove the alternator from the vehicle
7) Place the new alternator in place and insert the pivot bolt. Tighten until snug. Do not perform the final tightening yet.
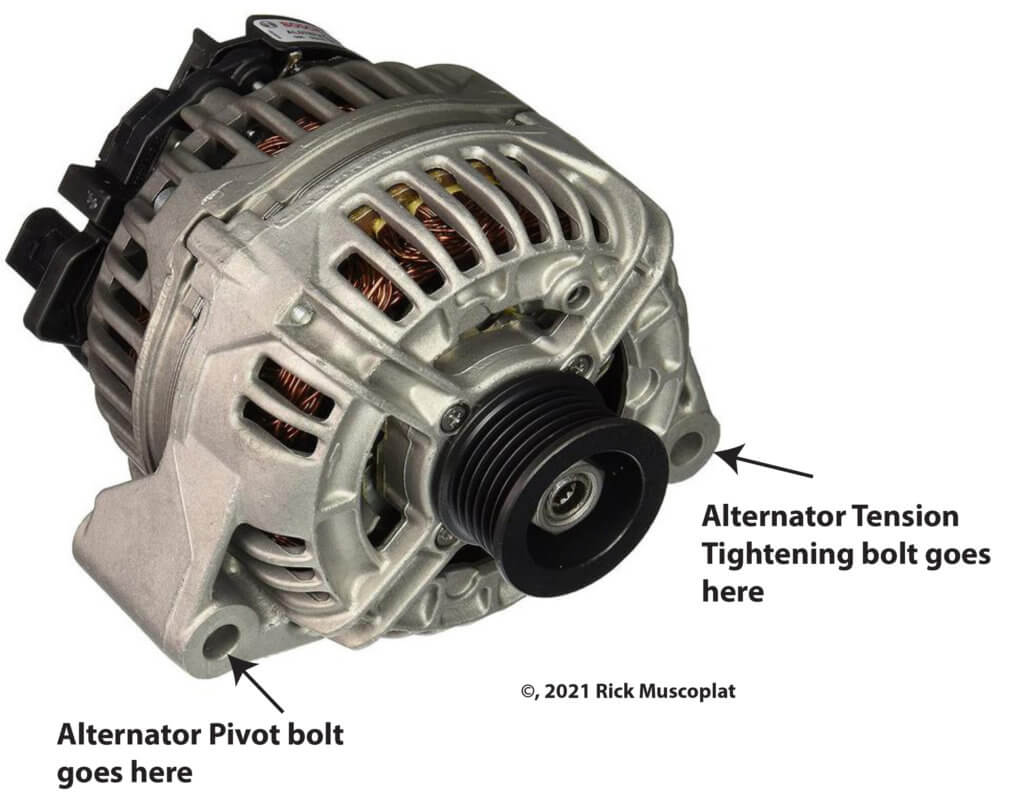
8) Install the tension bolt and leave it loose
9) Install a new alternator belt
10) Tension to the recommended tension and tighten the tightening bolt to spec.
11) Tighten the pivot bolt to the spec
12) Connect the B wire to the back of the alternator and reconnect the electrical connector
13) Check the battery’s state of charge. If it’s low, charge the battery using a battery charger
14) Clean the battery terminals and posts
15) Reconnect the battery terminals and install the negative terminal last.
16) Start the engine. Turn on all electrical loads, rev the engine to 2,000 RPM, and check battery voltage. It should read at least 13 volts. If so, you’re done.
Alternator replacement tips
• Never disconnect the B terminal wire while the battery terminals are connected
• Always use a new alternator belt when replacing an alternator.
• Checking the battery’s current state of charge and charging to 100% with a battery charger before starting the engine is the best way to avoid overheating the new alternator. Never rely on the alternator to recharge a dead battery.
©, 2021 Rick Muscoplat
Posted on by Rick Muscoplat