
Troubleshooting: Is It a Bad Alternator or Battery?
Diagnosing a No-Crank Condition: Is It the Battery or the Alternator?
When your car refuses to start, and you’re met with the frustrating silence, single click, or rapid clicking of a no-crank condition, it can be challenging to figure out whether the problem lies with the battery or the alternator. Both components are essential for the operation of your vehicle’s electrical system, and both can cause a no-crank situation if they fail. Here’s a comprehensive guide to help you diagnose whether the issue is with the battery or the alternator, ensuring you can address the problem correctly.
There may be other symptoms as well
• Dimming or pulsating headlights or dash lights while idling or driving, especially at night.
• Strange smells or sounds can also signal problems.
• Electrical components like power windows, locks, or stereo acting sluggishly or intermittently.
• The check engine light may activate due to voltage irregularities.
• Phone chargers and accessories connected through USB ports may stop functioning since the battery can no longer provide sufficient consistent power.
How to determine whether the problem is a bad alternator or battery
The diagnostic procedure always starts with the battery because an alternator can’t produce power unless it has power, and you can’t test an alternator if the battery is discharged. In addition, you won’t get an accurate reading of the battery’s condition if you test a discharged battery.
Charge the battery— Start by charging the battery with a battery charger. If you don’t have a battery charger, remove the battery and take to an auto parts store and have them charge it and test it once it’s fully charged.
Get the battery tested— Testing a battery involves more than just checking its voltage. Modern battery testers check the battery’s internal condition by checking for internal resistance and capacitance.
Replace the battery if it fails the test— A failed State of Health test is a deal breaker. Replace the battery
Test the alternator
With a fully charged or new battery in place, start the vehicle and check the voltage at the battery. Here’s how to do that.
1) Connect a voltmeter— Set the multimeter to DC volts and connect the red lead to the positive battery terminal and black lead to the negative terminal
2) Start the engine— Rev the engine to 1,500 RPM
3) Add electrical loads— Turn on the headlights, rear defogger, blower motor on high, and seat heater.
4) Read voltage at the battery— The voltage at the battery should read at least 13.5 or more volts and not drop to 13 volts.
What fails in an alternator?
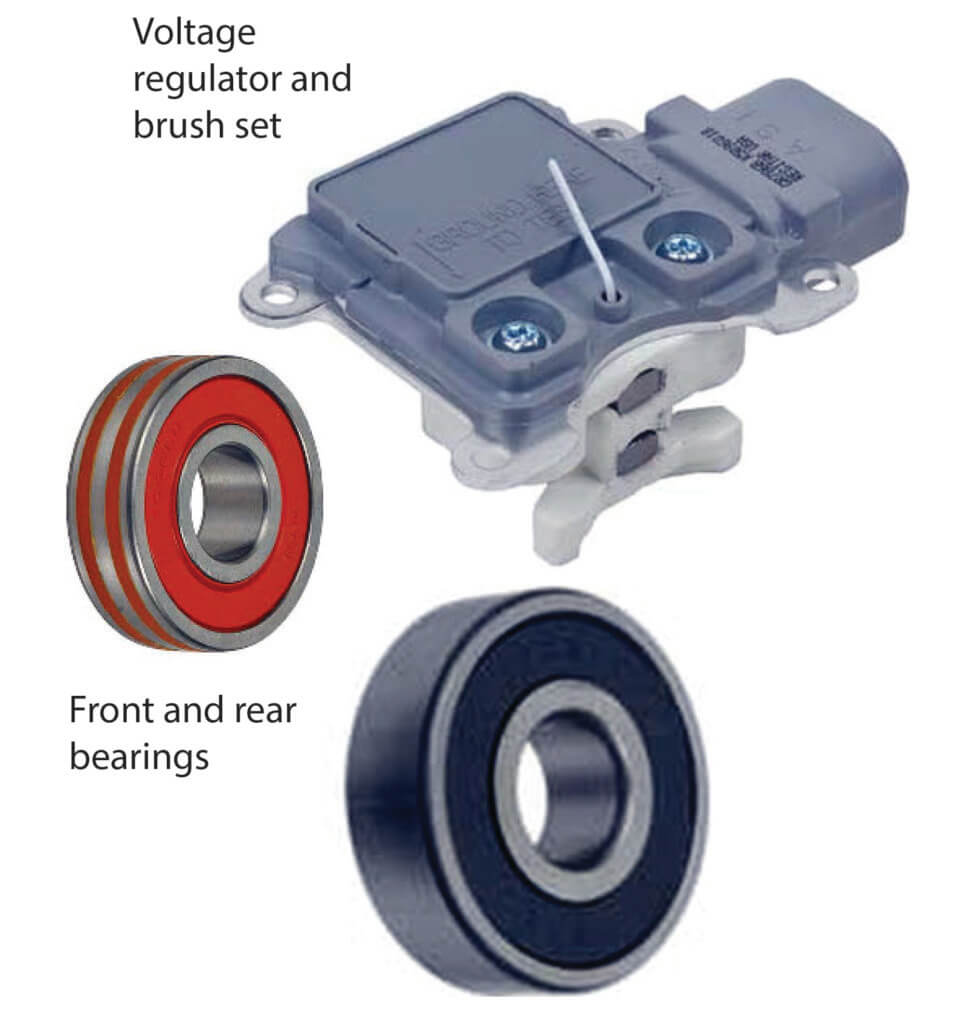
An alternator rebuild kit usually contains a new voltage regulator (if needed), a new front and rear bearing, and a new brush set (not shown).
Mechanical parts— Alternators contain two bearings, a brush set and an over-riding clutch. When those parts wear, they create growling or squealing noises; signs of a bad alternator.
Use an automotive stethoscope to check the sound of the front and rear alternator bearings. If you hear growling or one bearing is considerably louder than the other, chances are one of the bearings is failing.
Electrical parts— Diode trio and rectifier, stator, and rotor
See this post on how to test an alternator. If the test shows it’s bad, replace it.
©, 2022 Rick Muscoplat
Posted on by Rick Muscoplat