
Step-by-Step Car AC Diagnosis and Repair Guide
How to Diagnose and Fix Your Car’s AC So It Blows Cold Air (The Exact Process I Use)
Quick Summary
If your car AC isn’t blowing cold air, don’t guess—test. In my experience, most AC problems come down to refrigerant issues (low, contaminated, or overcharged), followed by airflow problems and restrictions—not a bad compressor.
• Low refrigerant (from leaks) is the #1 cause of AC not blowing cold air — When an AC system leaks refrigerant, it also leaks oil and, in many cases, allows air and moisture into the system. Air prevents the system from cooling, and moisture mixes with the remaining oil, causing acids and sludge that destroy the system.
• Overcharging is the most common DIY mistake—more refrigerant does NOT mean colder air
• Proper diagnosis requires gauges, temperature readings, and a step-by-step process
• You must verify compressor operation, condenser performance, and evaporator function
If you follow the same diagnostic process I use in the shop, you can pinpoint the exact problem and fix your car’s AC correctly the first time.
Why Your Car AC Isn’t Blowing Cold Air
Let me be blunt: most people waste time and money because they assume their car’s AC just needs a recharge. Low refrigerant is a symptom, not a cause. If you don’t fix the root cause, you set yourself up for future problems.
When I diagnose a car AC not blowing cold air, I’m looking for the root cause, not the symptoms. These are the most common failures I see:
1. Low Refrigerant (Leak in the System) — If your system is low, it’s leaking—period. Refrigerant doesn’t get “used up.”
2. Overcharged AC System — There’s only about a 2-ounce window between correct charge and overcharge. Go beyond that, and cooling actually drops.
3. Air or Moisture Contamination — Air reduces cooling efficiency. Moisture freezes at the orifice tube or expansion valve
• Moisture + oil = acid → destroys the compressor
4. Compressor or Clutch Failure — Clutch not engaging
There are many reasons why a compressor clutch is not engaging
• Faulty evaporator temperature sensor
• Faulty cabin air temperature sensor (on a climate-controlled system)
• Faulty sunload temperature sensor
• Faulty compressor clutch relay
• Faulty clutch coil
• Excessive clutch air gap
• Open wiring condition
• Clutch slipping
• Compressor spinning but not compressing
5. Restrictions (Orifice Tube or Expansion Valve)
• High high-side pressure
• Low low-side pressure
• Poor cooling
6. Poor airflow across the condenser or a clogged condenser
7. Poor airflow across the evaporator
The Tools I Use to Diagnose Car AC Problems
If you want to fix your car’s AC properly, you need real tools—not guesswork:
• Manifold gauge set (mandatory)
• Digital thermometer or duct thermometer — You can use a digital kitchen thermometer or even an analog unit as long as it goes down to 30°F
• Digital Meter and thermocouple or, if you already own a meter that can accept a “K” style probe all you need is the probe add-on

AC duct thermometer

Meter and themocouple
Temp probe alone
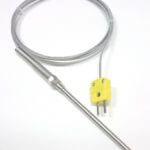
“K” style temp probe

Manifold gauge set with hoses
Step-by-Step: How I Diagnose Car AC Not Blowing Cold Air
Step 1: Check Static Pressure (Engine OFF)
This tells me if there’s even refrigerant in the system.
• Let the car sit 15 minutes with the engine off
• Connect the manifold gauge set
• Compare the high and low side pressure to the ambient temperature chart
If pressure is too low:
• Your AC system has a large leak that must be located and fixed before you proceed any further.
To find the leak, add only enough refrigerant to enable testing with a sniffer or UV dye.
If the high- and low-side pressures are the same and match the static pressure chart, move on to Step 2.
For more information on Static Pressure and the relationship between Static Pressure and temperature, see this article.
Step 2: Check Compressor Clutch Operation
• Start the engine and turn the AC to MAX.
If you have a clutch-style AC compressor and the clutch isn’t spinning, you have an electrical or clutch issue. Conduct tests to determine why the compressor clutch isn’t engaging. See this article for instructions.
• If it spins → move on
This step alone eliminates a huge number of guesses.
Step 3: Test Condenser Performance (Critical Step Most Skip)
I measure the temperature drop across the condenser:
• Run the engine at ~1,500 RPM
• Measure inlet vs outlet temps
What I expect:
• 20°F–50°F drop = normal
If less than 20°F:
• Dirty or blocked condenser
• Cooling fans are not working
• Missing shrouds/seals
• Overcharge or contamination
If more than 50°F:
• Low refrigerant
• Internal restriction
This test tells me if the condenser is actually doing its job.
Step 4: System Performance Test (Air Output Test)
Now I check what the system is actually doing inside the car.
• Measure ambient temp
• Measure vent temp
What I expect:
• At least a 30°F drop
If not, I look for:
• The blend door is now working properly and is heating the cooled air
• Heater valve not closing
• Recirculation door not working
• Evaporator blockage
• Incorrect refrigerant charge
This is where many “AC not blowing cold air” problems are actually HVAC issues—not refrigerant problems.
Step 5: Evaporator / Metering Device Test
On Orifice Tube Systems:
• Inlet vs outlet temp should be nearly identical
If the outlet is colder:
• Overcharged system
• Wrong orifice tube
• Internal leakage
If the outlet is warmer:
• Low refrigerant
• Restriction
• Too much oil
Step 6: Use Running Pressures to Finish Diagnosis
At this point, I already know the problem—but I confirm using pressure readings:
• High high-side = restriction or airflow issue
• Low low-side = restriction or low charge
• Equalized pressures = compressor not pumping
How to conduct a condenser subcooling temperature drop test — Diagnose AC not cooling
1) Start the engine and run at 1,500 – 1,700 rpm
2) Turn the AC to MAX and the highest blower speed
3) Open all doors and run the system for about 5 minutes to stabilize the system before taking the readings.
4) Then close the doors and windows and set the blower to low speed. With the engine running and AC on, set the blower motor to low speed.
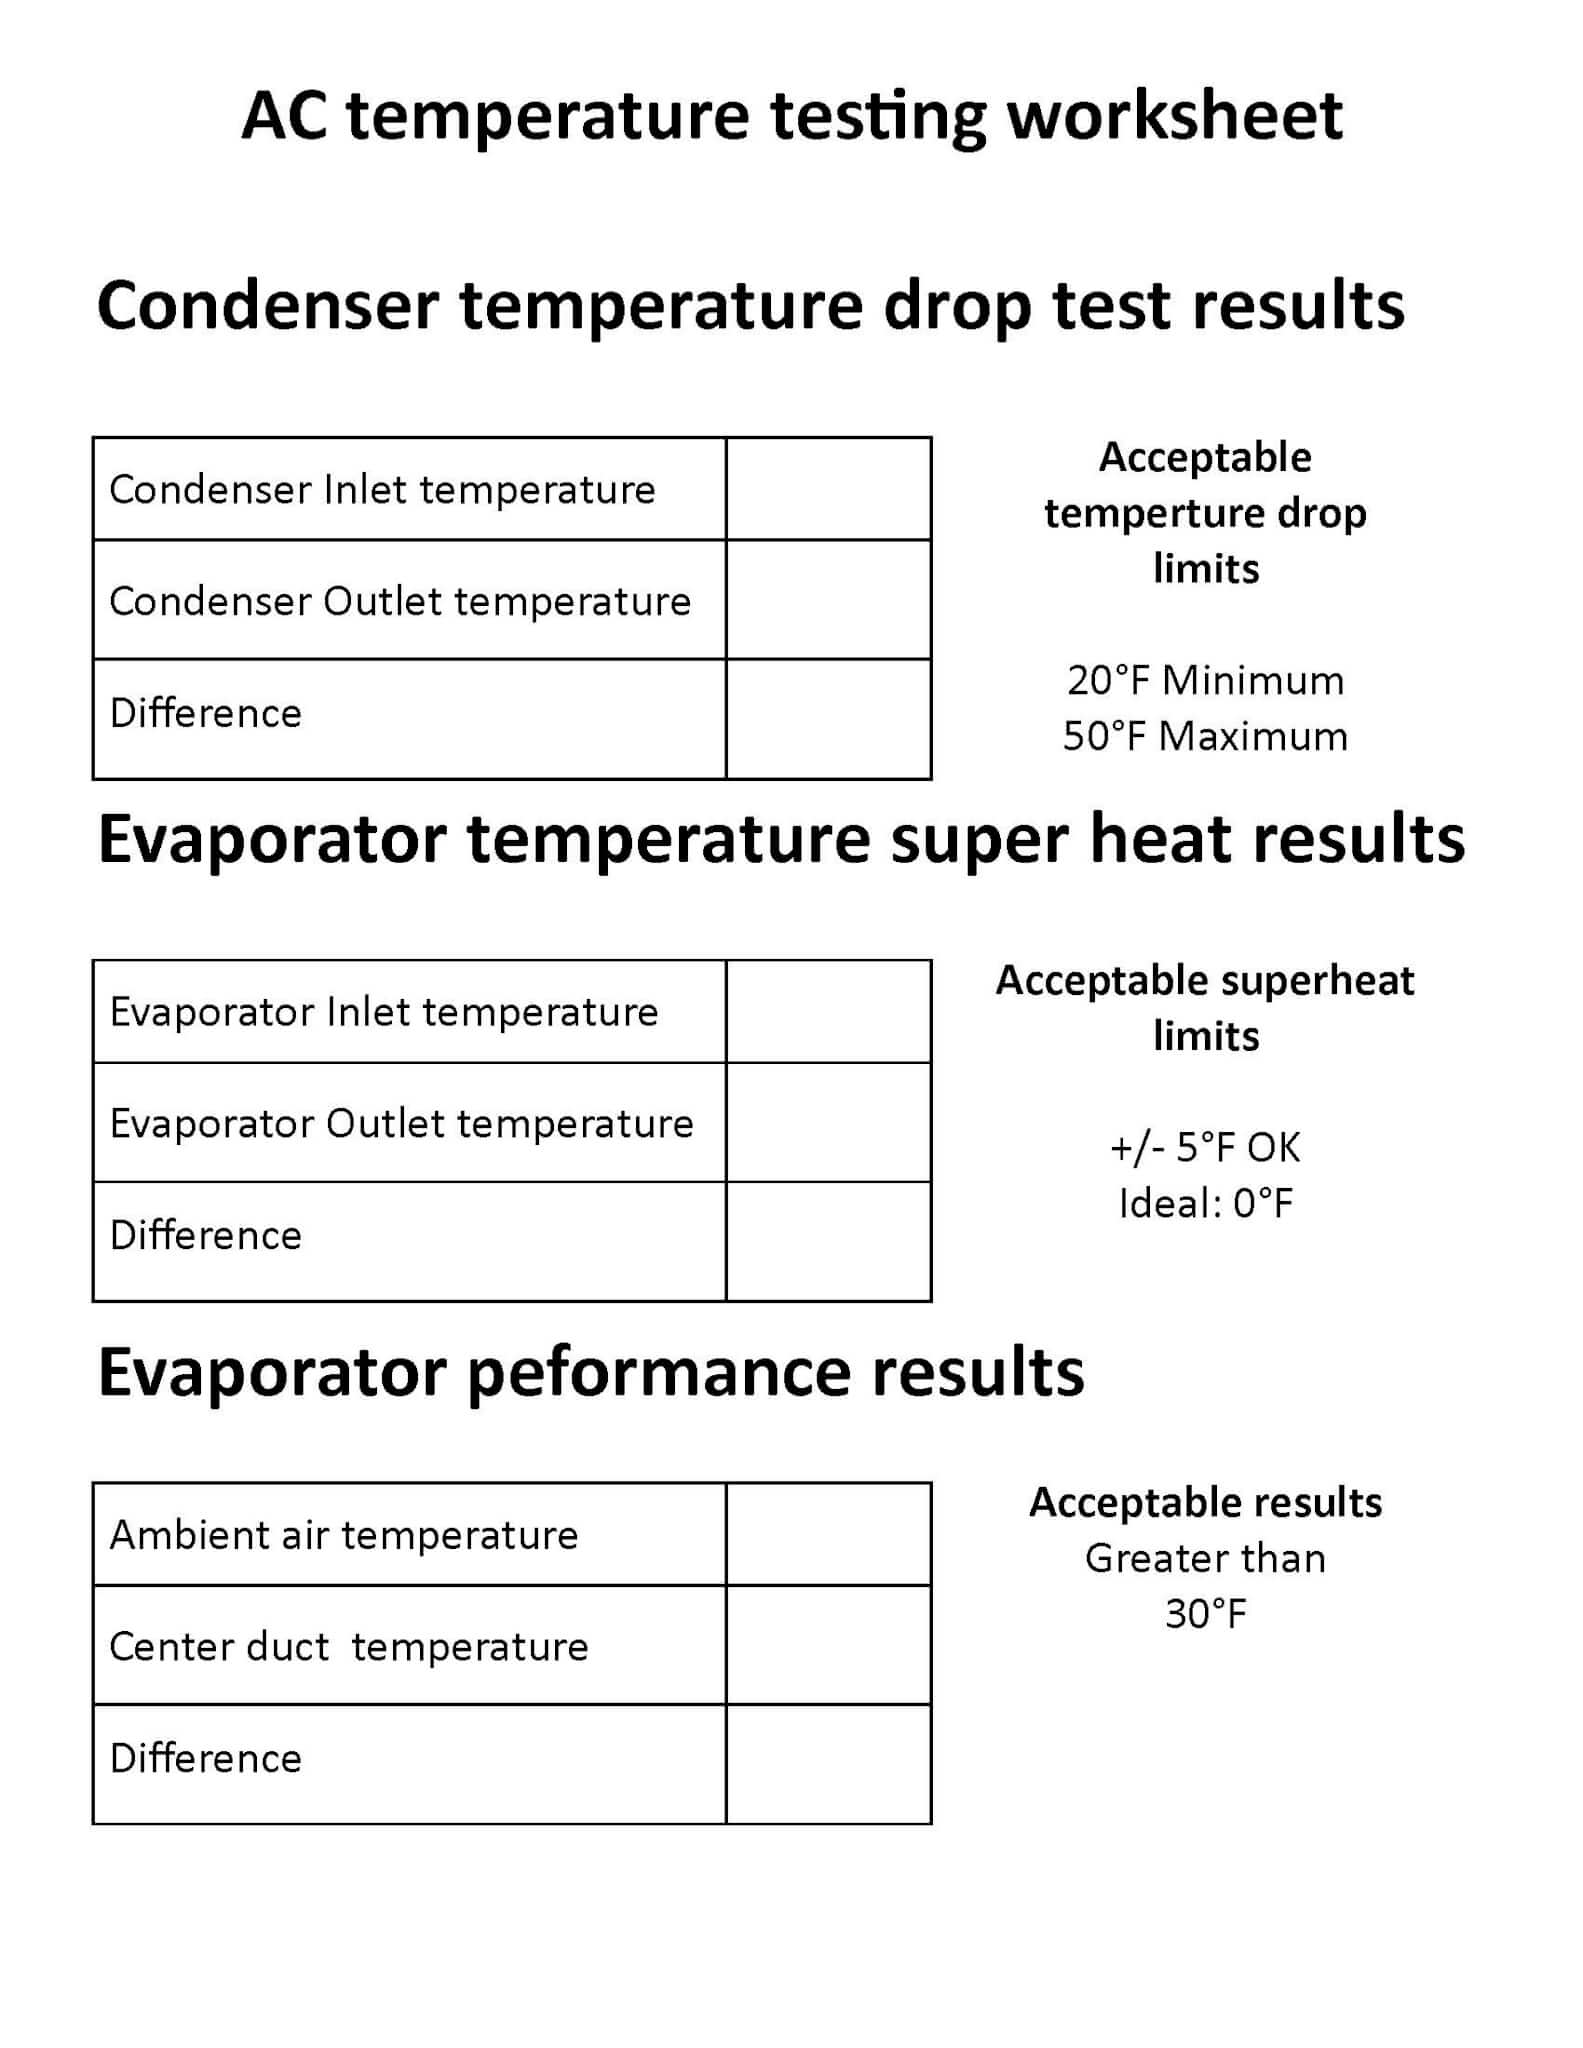
5) Use the temperature probe to measure the LINE-IN temperature as close to the condenser as possible. Then, measure the LINE-OUT temperature to be as close to the condenser as possible. Record the findings and calculate the difference.
6) A properly operating condenser should drop the temperature of the refrigerant by at least 20°F but no more than 50°F between the inlet and outlet.
If the AC Condenser isn’t cooling by at least 20°F
1) Check for bent fins or debris in fins that are preventing proper airflow across the condenser. If you find bent fins or debris, clean/repair and retest.
2) Check for proper electric radiator fan operation. In a two-fan system, both fans should be running at high speed when the AC is on. Many systems have multiple-speed radiator fans. Make sure the fans are running at high speed.
3) Check the condition of the radiator fan shrouds and seals. These are far more important than you think. They direct the airflow through the condenser and radiator. A missing seal can greatly affect AC cooling.
4) If the fins are clean and in good shape, the fans are working properly and the seals and shrouds are good, but the condenser isn’t dropping inlet temperature by at least 20°F, the cause may be:
• Internal contamination
• Too much refrigerant oil
• Refrigerant overcharge
Do not try any fixes until you finish the other tests
If the AC Condenser is dropping inlet temperature by at least 20°F and no more than 50°F but AC still isn’t cooling.
That confirms the condenser is operating properly and isn’t the cause of your AC problems. So move on to the System performance check
If the AC Condenser is dropping the inlet temperature by more than 50°F
• Check for low refrigerant charge
• Check for contamination
The condenser may have internal restrictions, So an infrared thermometer is used to check temperatures across the condenser tubes. If you find spots with large temperature differences, chances are it’s caused by a blockage from a prior AC failure.
How to conduct a system performance test
This test checks the performance of the compressor, evaporator, and orifice tube/expansion valve.
1) Measure ambient air temperature one foot in front of the car’s front grille. Record the temperature on the worksheet.
2) Start the engine and run at 1,500 – 1,700 rpm
3) Turn the AC to MAX and the highest blower speed
4) Set the system to recirculate
5) Open all doors and run the system for about 5 minutes to stabilize the system before taking the readings.
6) Then close the doors and windows. With the engine running and AC on, set AC to MAX and blower motor to on high speed.
7) Insert the AC thermometer into the center duct and wait until the dial reads the lowest temperature. Record the results on the worksheet
If the AC system is operating properly, you should see the temperature drop at least 30°F from the ambient temperature measured in front of the grille.
If the AC system is cooling the air by less than 30°F
Check the blend door for full closing (not passing heated air across the evaporator coil)
Check the heater valve is fully closed (in vehicles with a heater valve located in the heater hose, make sure it’s not circulating hot coolant into the heater core)
Check the recirculation door to make sure it’s not pulling in outside air
Check for debris blocking the evaporator
Check evaporator fins for scale or bacterial buildup
Check refrigerant charge
Move on to the evaporator superheat test
How to conduct an evaporator superheat test on an orifice tube system
1) Start the engine and run at 1,500 – 1,700 rpm
2) Turn AC to MAX and the highest blower speed
3) Set the system to recirculate
4) Open all doors and run the system for about 5 minutes to stabilize the system before taking the readings.
5) Then close the doors and windows. With the engine running and AC on, set AC to MAX and blower motor to on high speed.
6) Measure the temperature at the evaporator inlet as close as possible to the evaporator.
7) Measure the temperature at the evaporator outlet as close as possible to the evaporator.
For more information on performing a heat load test on an orifice tube AC system, see this post.
For orifice tube systems, there should be NO difference in temperature between the inlet and outlet temperatures, but the maximum acceptable variation is +5°F to -5° colder or warmer than the inlet temperature. Read this note on expansion valve systems.* For more information on superheat, see this post
What goes wrong with expansion valves?
An expansion valve can fail in many ways. See this post for a full explanation of how an expansion valve works and what can go wrong.
If the AC evaporator outlet tube temperature is more than 5° colder than the inlet.
• The system is overcharged
• The orifice tube O-rings are leaking liquid refrigerant past the orifice
• The orifice tube is the wrong size for the system. Replace with correct orifice tube
If the AC evaporator outlet tube temperature is more than 5° warmer than the inlet.
The AC system is allowing superheat
• Check for low refrigerant charge
• Check for orifice tube restrictions—dirty filter screen, wrong orifice tube size.
• Check for excessive oil in the system
“The refrigerant charge level on a thermostatic expansion valve (TXV) system cannot be accurately determined by measuring evaporator superheat as it can on an orifice tube system. By design, the TXV maintains the appropriate level of superheating in the evaporator and adjusts refrigerant flow to match the system’s heat load. As the refrigerant charge level drops in a system due to a leak or from normal refrigerant loss as the system ages, the TXV will increase refrigerant flow to maintain evaporator superheat within specification. A TXV system will maintain a normal superheat value even when the system charge level has dropped significantly. For this reason, evaporator superheat cannot be used as a reliable method of confirming the refrigerant charge level on a TXV system.” 4 Seasons
How to Fix AC Condenser Issues
If the AC condenser is leaking or is clogged internally, it must be replaced. The condensers on most late-model cars and trucks cannot be flushed! The passages are too small, and once the debris is caught, it stays caught. So bite the bullet and replace both the condenser and the receiver/drier.
To replace the car’s AC condenser. Pay a shop to evacuate and recycle the refrigerant. Have them measure how much AC oil comes out during the evacuation.
Disconnect the condenser hose fittings and replace the condenser and receiver/drier. Replace the O-rings in the fittings and coat them with refrigerant oil. Pay a shop to evacuate the system and refill with refrigerant and oil.
Fix AC orifice tube issues
Locate the orifice tube in your system. It can be installed at the evaporator inlet or in a high-pressure line. Some systems require you to replace the entire high-pressure line, while others allow you to remove and replace just the orifice tube.
Pay a shop to evacuate and recycle the refrigerant. Have them measure how much AC oil comes out during the evacuation.
Disconnect the high-pressure line and replace the orifice tube with the proper size. Lubricate the orifice tube O-rings and the high-pressure line fittings with refrigerant oil. Pay a shop to evacuate the system and refill it with refrigerant and oil.
Fix C expansion valve issues
Locate the expansion valve in your system. It’s installed at the inlet of the evaporator coil. can be installed at the inlet of the evaporator or in a high-pressure line. Some systems require you to replace the entire high-pressure line, while others allow you to remove and replace just the orifice tube.
Pay a shop to evacuate and recycle the refrigerant. Have them measure how much AC oil comes out during the evacuation.
Disconnect the high-pressure line and remove the expansion valve and sensing tube (if equipped). Install the new expansion valve. Lubricate the orifice tube O-rings and the high-pressure line fittings with refrigerant oil. Pay a shop to evacuate the system and refill with refrigerant and oil.
©, 2019 Rick Muscoplat
Posted on by Rick Muscoplat