
Subaru wheel bearing replacement
A Guide to Replacing Subaru Wheel Bearings and Brake Backing Plate
Replacing a wheel bearing on a Subaru is a moderately challenging task, but with the right tools and a bit of mechanical know-how, it can be accomplished by an experienced DIY enthusiast. This guide will walk you through the process step-by-step, helping you to safely and effectively replace the wheel bearing on your Subaru.
How to replace a Subaru wheel bearing and rear brake backing plate
Replacing a Subaru wheel bearing is similar for the front and rear, but as long as you’re replacing the rear wheel bearing, you should also consider replacing the rear brake backing plate. On older Subarus like this 08′ Subaru Outback, the rear brake backing plate tends to rust. As the rust forms, it expands and actually pushes one of the components out. The “rust jacking” causes the circular component to rub against the brake rotor, causing an awful metal-to-metal scraping sound. Since the wheel bearing holds the Subaru brake backing plate in place, the time to replace it is when you’re replacing the rear wheel bearings.
I ordered the left and right brake splash guard and Subaru brake back plate from universitysubarumo.com. Each plate lists for $104, but universitysubarumo.com sells them for $70 ea.
26704AE050 Brake Splash Guard. Back Plate Brake. (Left, Rear)
26704AE040 Brake Splash Guard. Back Plate Brake. (Right, Rear)
I purchased Timken rear wheel bearings from Rockauto.com. You’ll also need a new axle nut for each side. I purchased these from rockauto.com as well (BECK/ARNLEY 1030504 spindle nut)
Tools you’ll need to replace a Subaru wheel bearing
Hammer
Center punch
Chisel
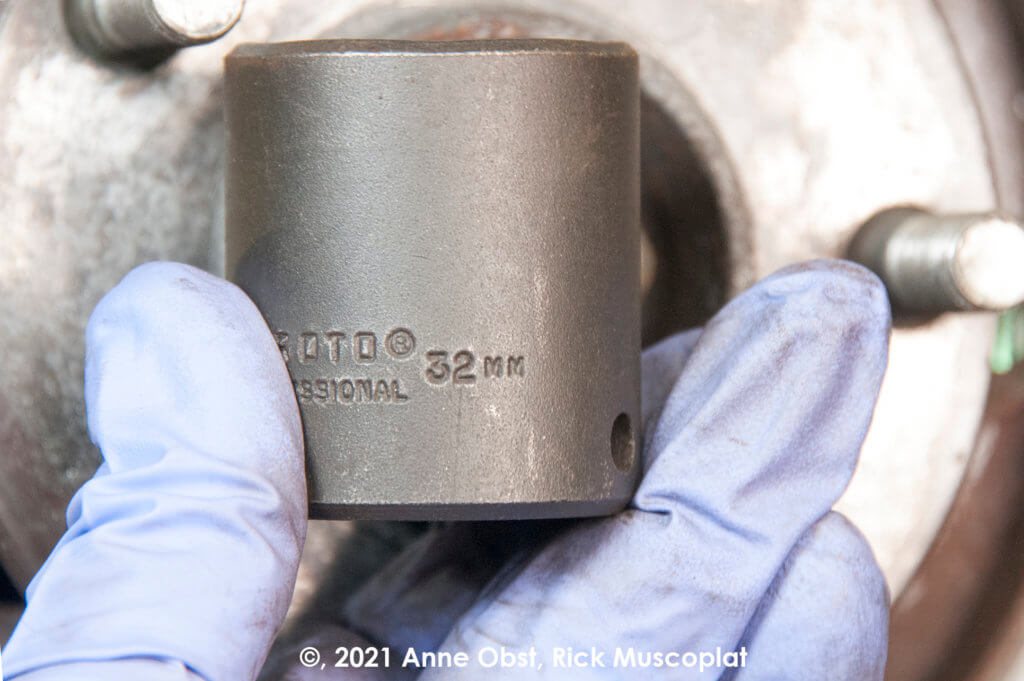
32mm socket for the spindle nut
14mm flex socket, extension, ratchet
Screwdriver
Brake pliers
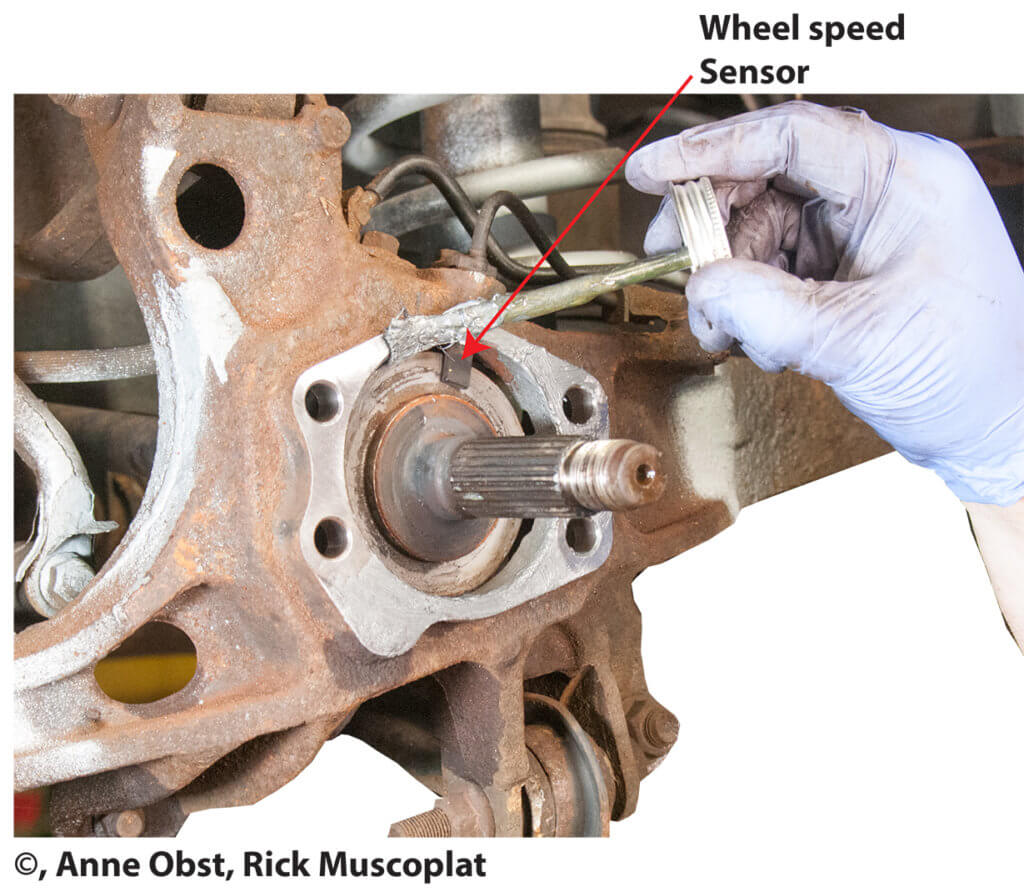
Step 1: Remove the wheel speed sensor
Unscrew the wheel speed sensor hold-down bolt. Then, wiggle out the sensor.
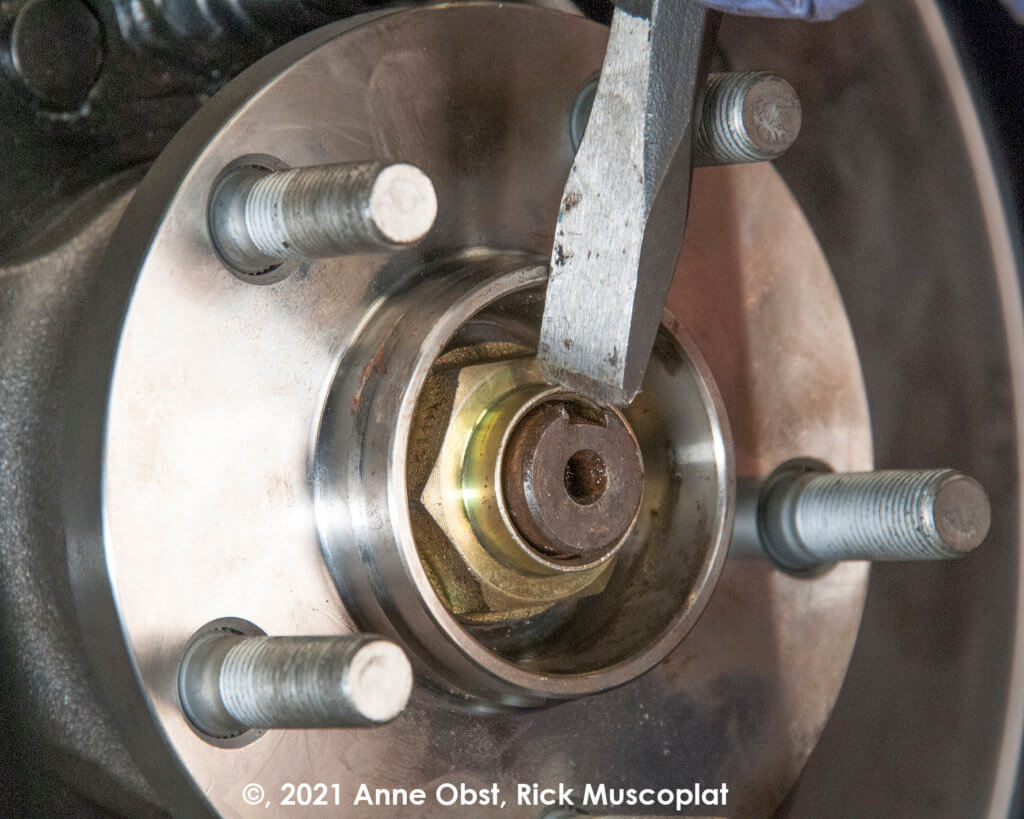
Step 2: Un-stake the spindle nut
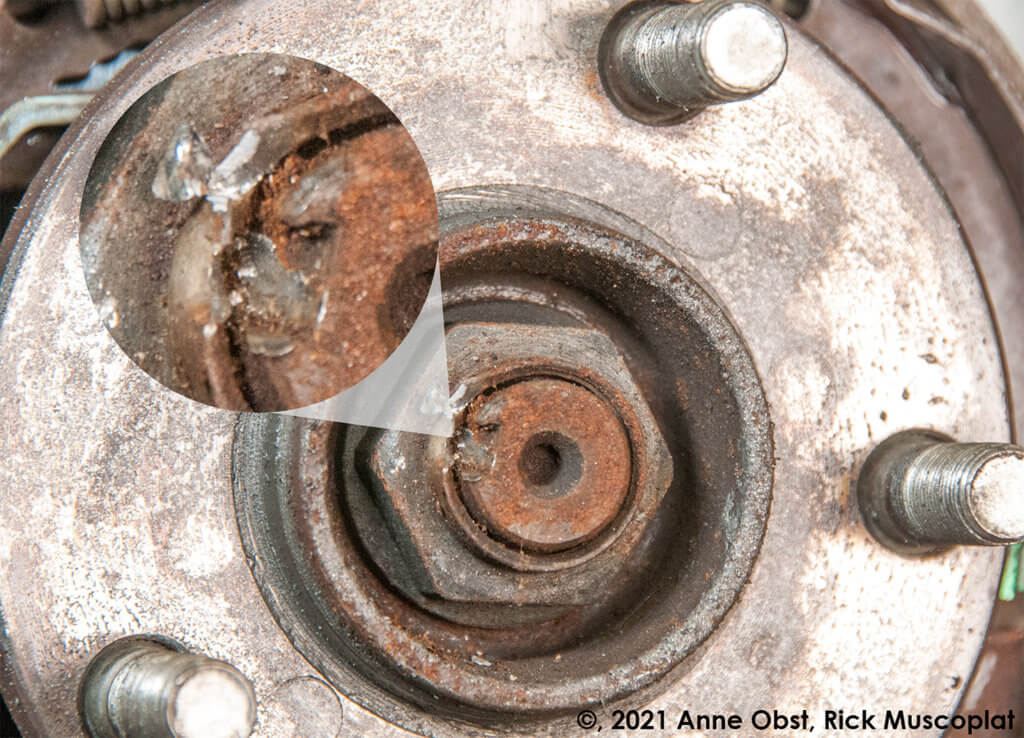
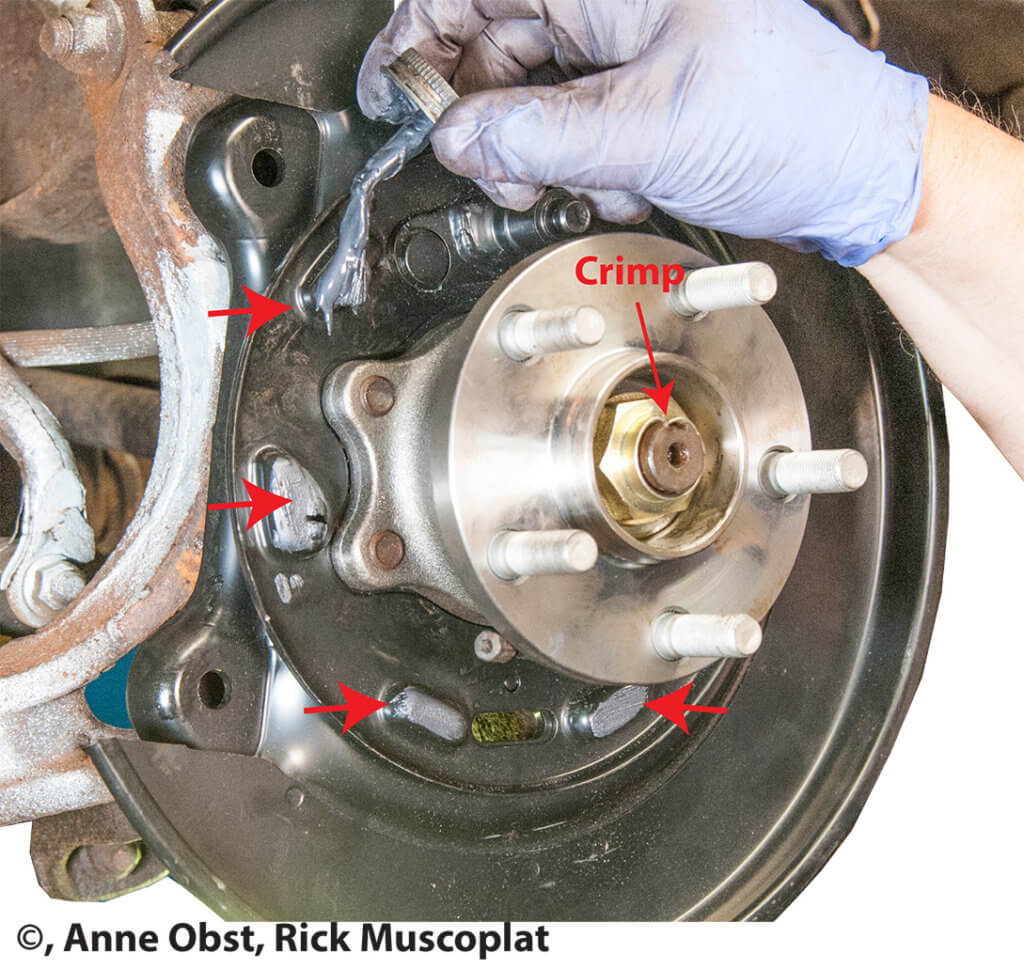
Un-stake the spindle nut using a center punch and hammer. Push the point of the center punch under the crimped edge of the spindle nut and into the axle shaft keyway. Hit the center punch until the crimped nut clears the keyway.
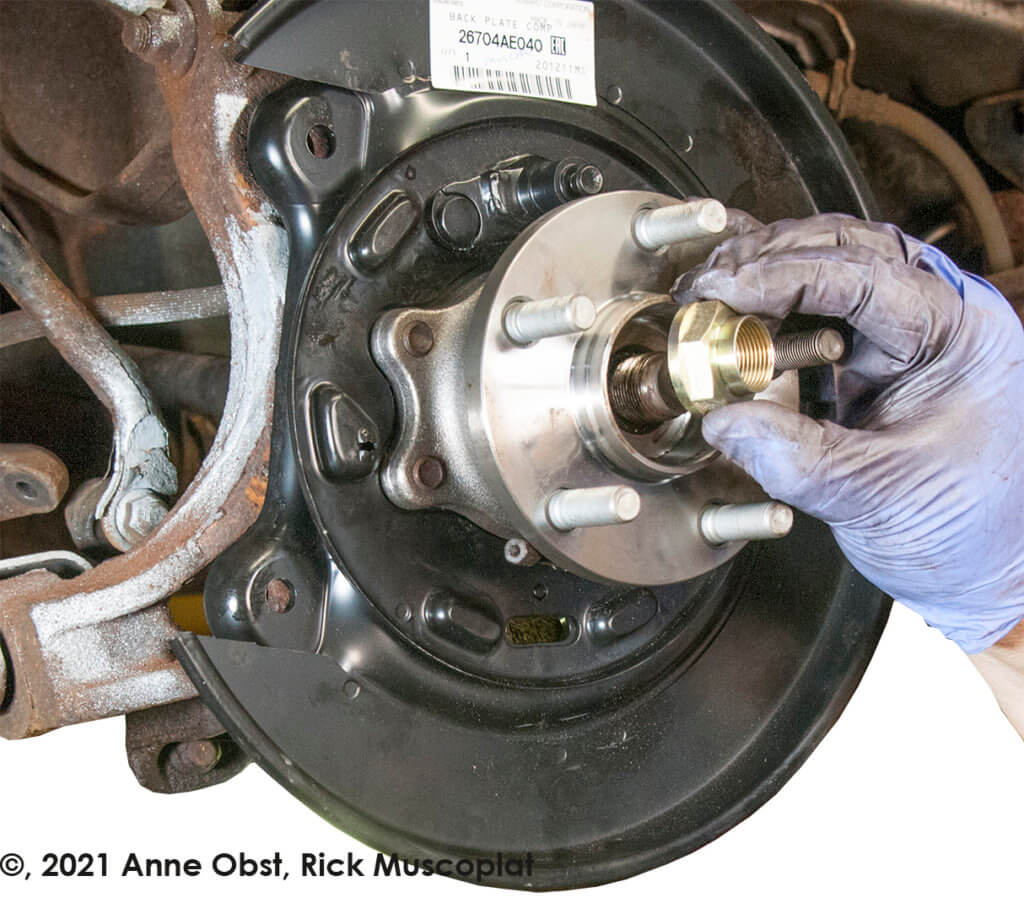
Step 3: Remove the Subaru spindle nut using a 32mm socket
Subaru warns you not to loosen the spindle while the vehicle’s weight rests on the bearing. Doing so can damage the bearing. So, obviously, you want to follow that if you’re going to re-use the old bearing. I raised the vehicle because I don’t know if the bearing will come apart if you try loosening the spindle nut while it’s on the ground. I locked the wheel using a crowbar and used a long 1/2″ drive ratchet to remove the axle nut.
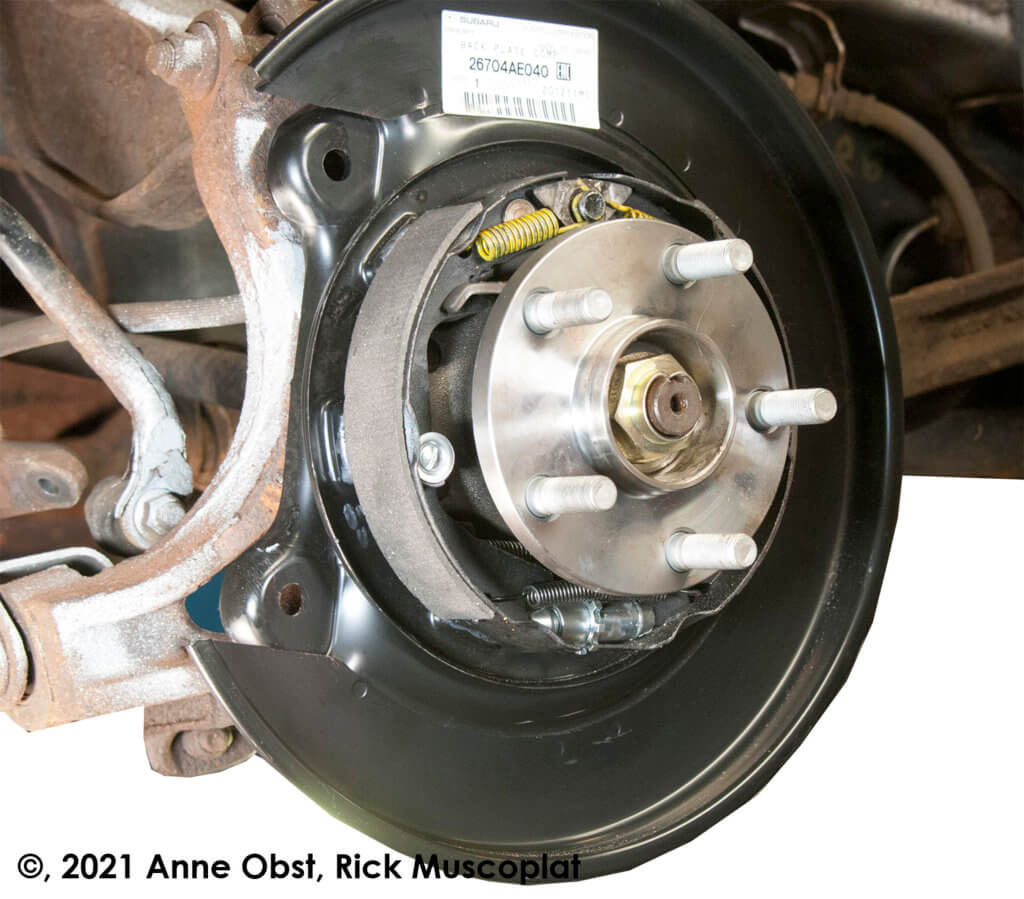
You don’t have to replace the parking brake parts, but if they’re worn or rusted, now is the time to do them.
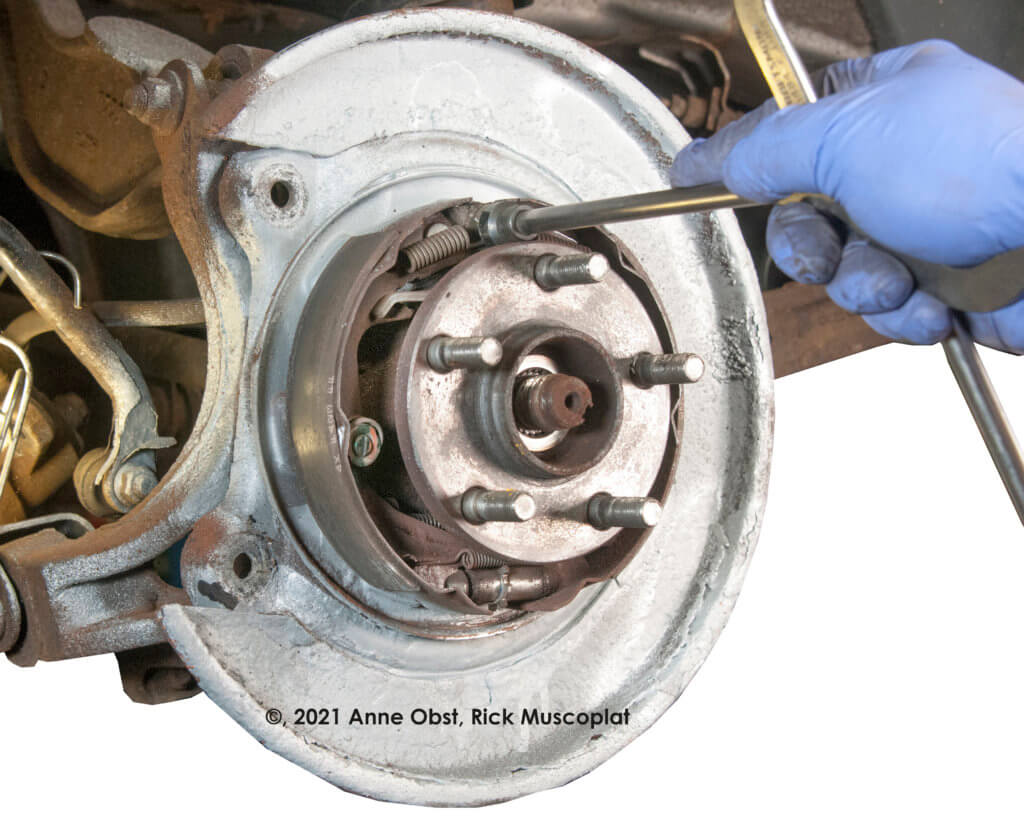
Step 4: Remove the parking brake parts if you’re going to replace the Subaru brake back plate
Start by removing the two top parking brake springs.
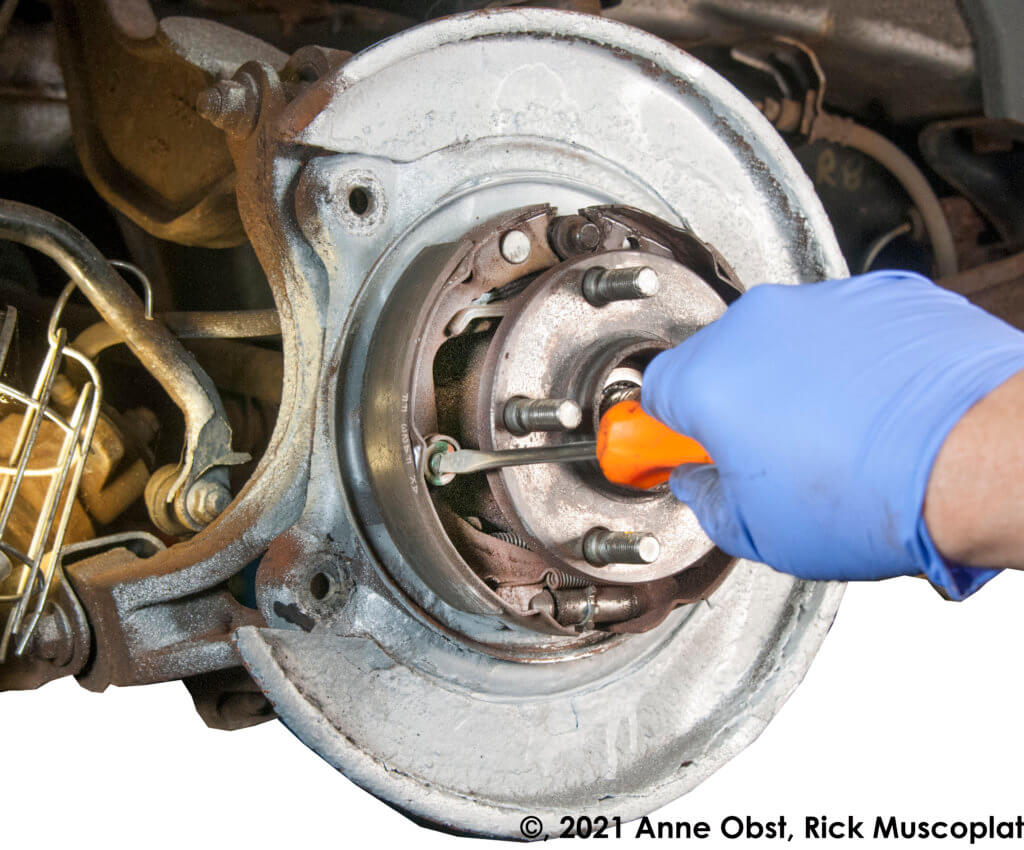
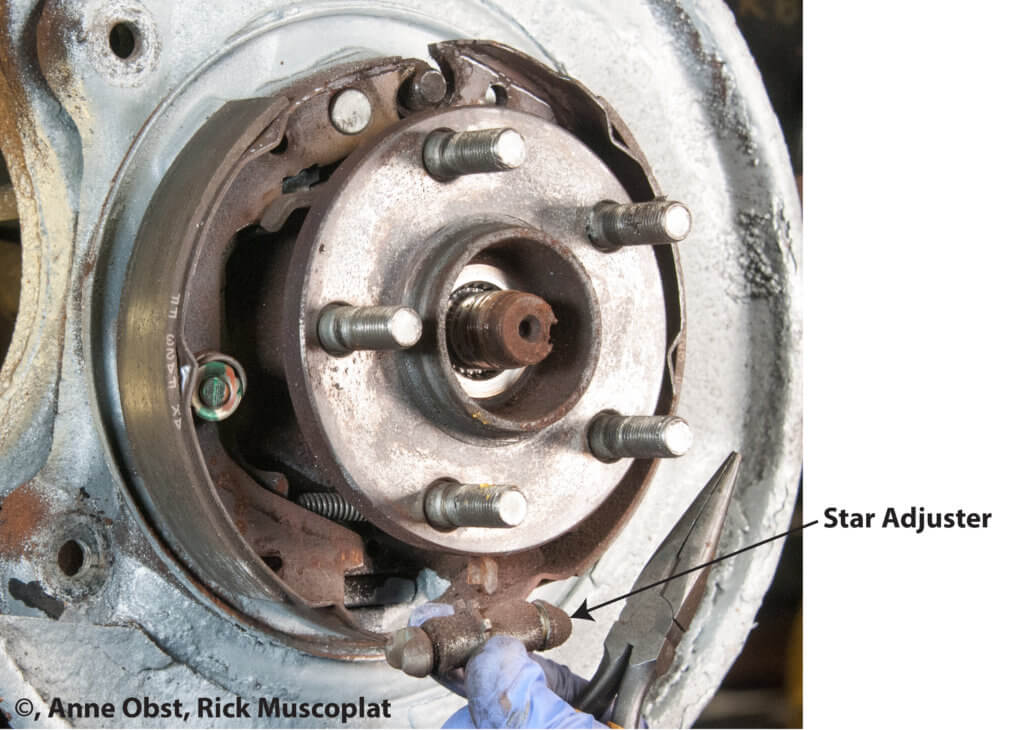
Step 5: Remove the parking brake shoe hold-down spring
Step 6: Remove the parking brake shoe strut and star adjuster
Note the orientation of the strut and star adjuster. One side of the strut holds a spring, and it must go back in the same direction. Also, note the orientation of the star adjuster, which end has the threaded shaft and which is the free-wheeling slotted component.
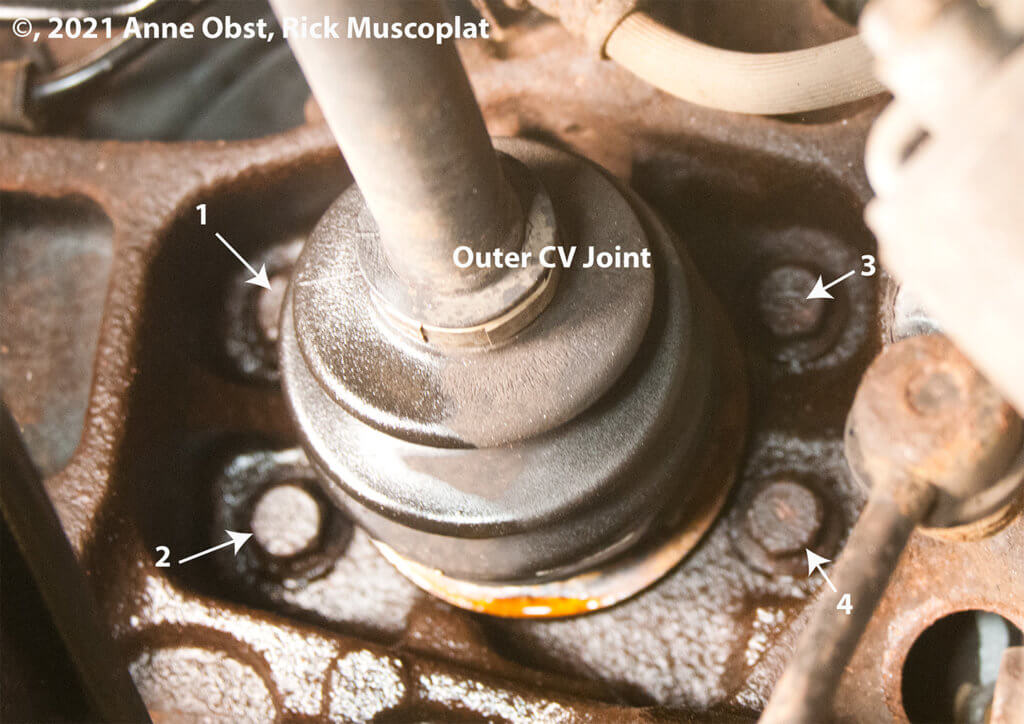
Step 7: Remove the 4 wheel bearing bolts from behind the backing plate
Using a 14mm deep flex socket, remove the four-wheel bearing retaining bolts. They’re located next to the outer CV joint.
Step 8: Loosen the wheel bearing
The Subaru rear wheel bearing will be stuck in the knuckle. Spray rust penetrant all around the wheel bearing mounting area and let it soak. Also, spray rust penetrant on the axle shaft splines in the wheel bearing.
Some of these bearings can be real bears to remove. Most people start by prying. That’s not always the best way to break it free. Instead, use a large drift punch and locate the end of the punch on the edge of the bearing. Your goal is to ROTATE the bearing by hitting it in a circular motion. It takes less force to get it to rotate than it takes to pry.
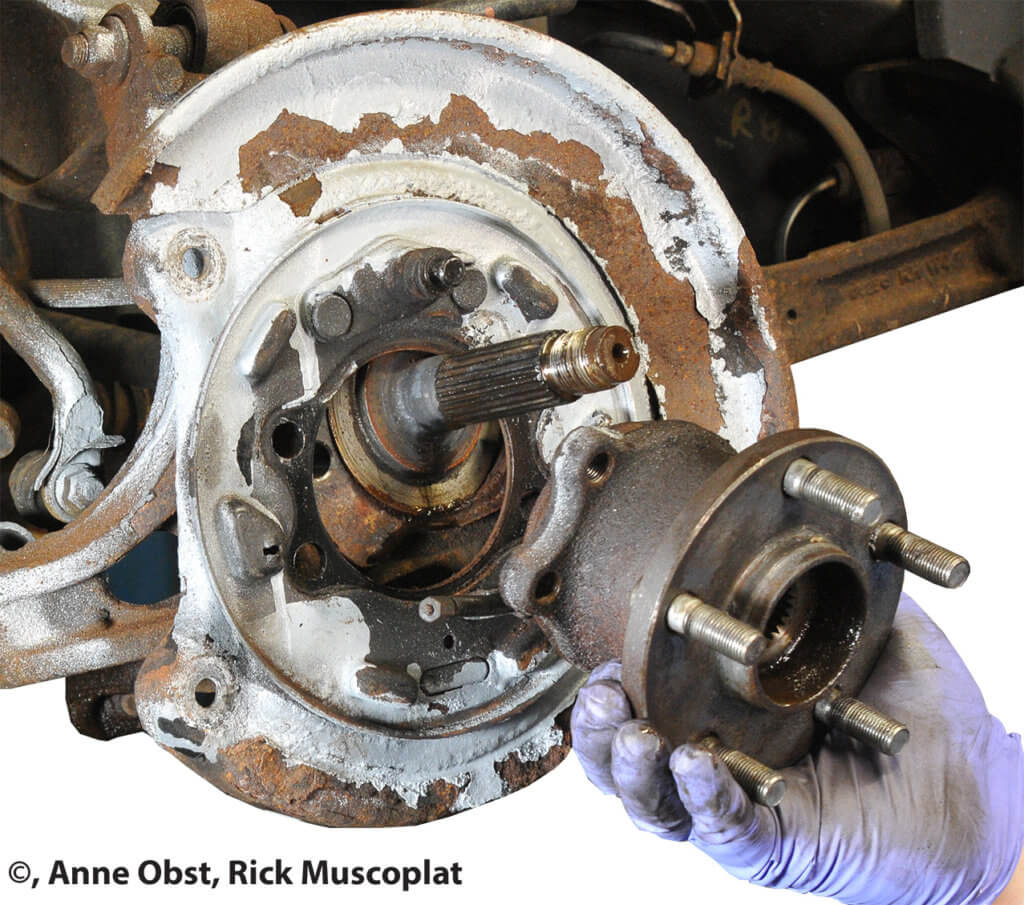
Once you get some rotational movement, use a small pry bar to release the wheel bearing from the knuckle. As you move the wheel bearing out of the knuckle, the axle shaft must be loose and slide out. If the axle shaft isn’t loose, pulling the bearing out can damage the rear wheel speed sensor.
TIP to loosen axle shaft splines from the wheel bearing. If the axle shaft is stuck, do NOT hammer directly onto the stub end of the shaft; that can mushroom the end and even damage the threads. Instead, screw the spindle nut back onto the axle shaft until the end is flush with the axle end. Then strike the spindle nut. Between the rust penetrant and hammer blows, the axle shaft will release from the bearing.
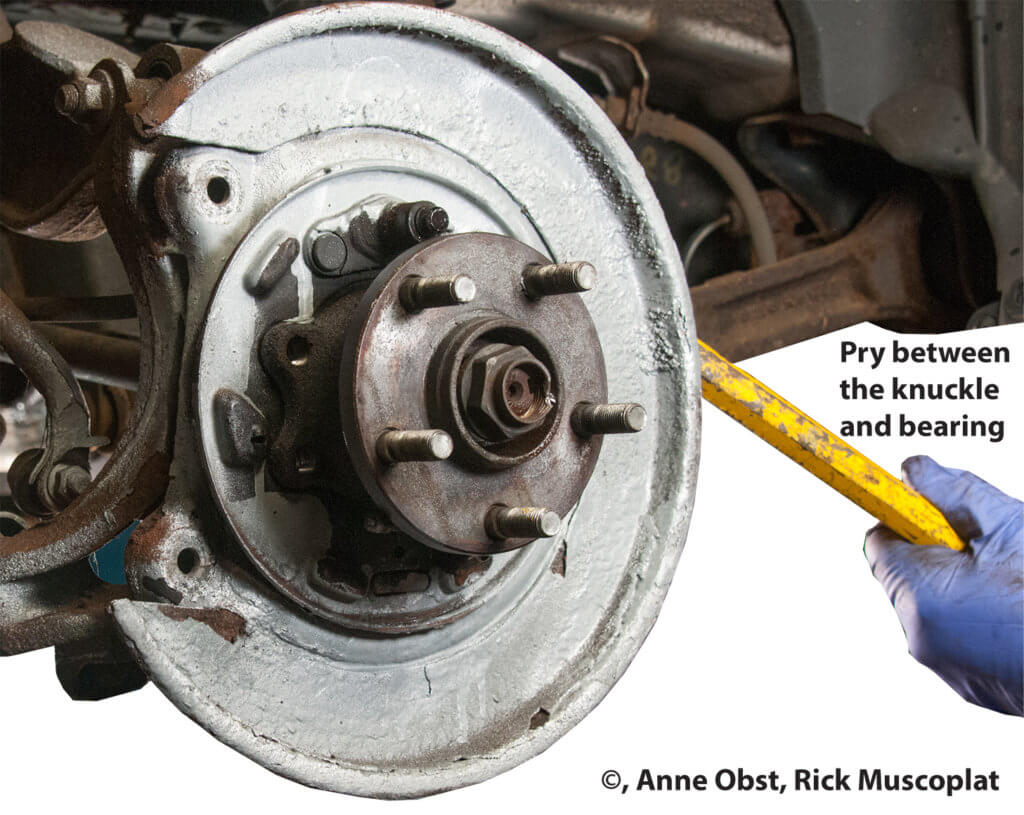
If you’re going to replace the brake back plate, simply pry between the knuckle and the backing plate, and both the plate and the bearing will move out.
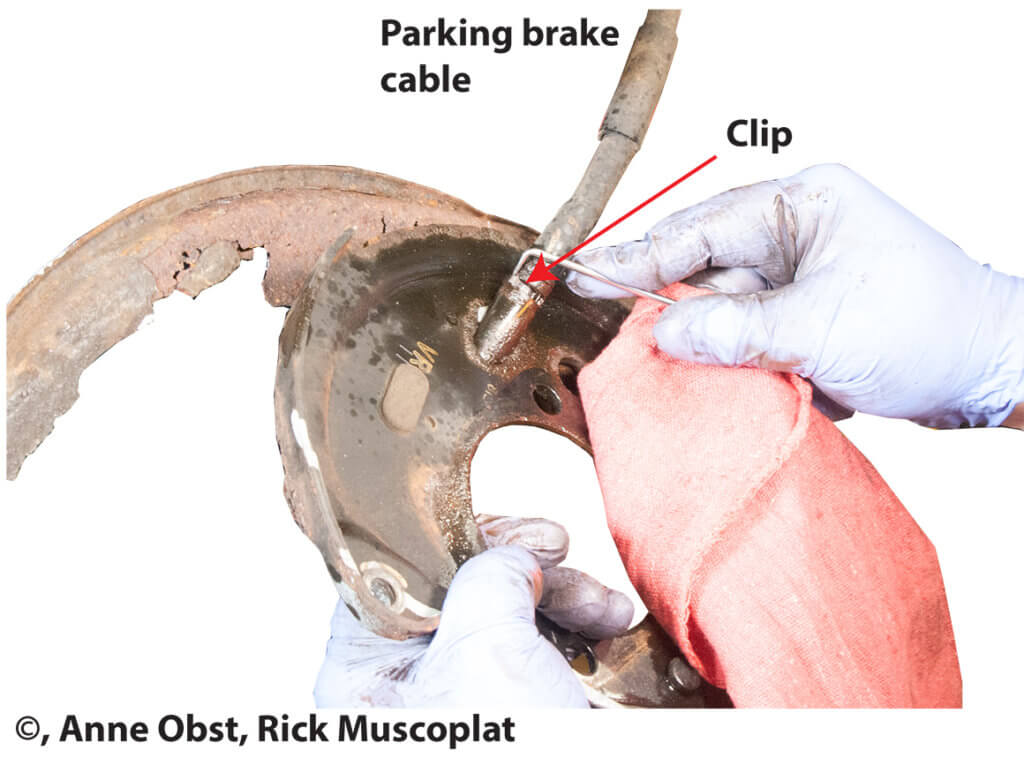
Step 9: Disconnect the parking brake cable from the backing plate
Using a small hook, pry the retainer off the parking brake cable. Do not lose this clip! You’ll need it to reinstall the parking brake on the new brake backing plate. With the clip off, soak the metal portion of the parking brake where it fits into the backing plate. Then, twist the cable as you pull it out.
Notice that the backing plate on this Subaru completely disintegrated during the removal. This is all that was holding your brake caliper to the vehicle!
Step 10: Clean the wheel bearing mounting area and apply a light coat of anti-seize
Use a wire wheel or 3M roloc disc to clean corrosion off the knuckle. Then apply a light coat of anti-seize to the area.
Step 11: Install new backing plate and wheel bearing
Insert the parking brake cable and retainer into the new Subaru back plate. Then, insert the 4-wheel bearing bolts from the backside. Locate the new backing plate onto the 4 bolts. Then, slide the wheel bearing onto the splined axle shaft and push it toward the knuckle. Start the bolts into the wheel bearing by hand. Make sure they’re properly engaged with the threads in the wheel bearing. It’s easy to strip the bolts, so take your time. Then, tighten the wheel bearing bolts in a cross pattern. Torque to 48 ft/lbs using a torque wrench. Then spin on the new spindle nut.
Step 12: Torque the spindle nut and crimp
Thread the new spindle nut onto the axle shaft until it bottoms. Then, spin lug nuts onto two wheel studs to protect the threads. Lock the wheel hub with a pry bar between the two studs. Use a torque wrench and the 32mm socket and torque the spindle nut to 177 ft/lbs. DO NOT TORQUE THE SPINDLE NUT WITH VEHICLE WEIGHT ON THE BEARING! That will damage the new bearing.
Step 13: Apply brake grease to the backing plate
Use a moly grease to all six pivot points on the backing plate. Then, reassemble the parking brakes. Install the brake caliper bracket, caliper, and pads.
©, 2021 Rick Muscoplat