
Replace a CV boot yourself — Step by Step Guide
Replace a CV Boot: A Step-by-Step Guide
It’s really doable. Seriously. If you have a jack, jack stands and the tools listed below, you can replace a CV boot yourself. Or, you can replace the entire axle shaft yourself. Even if you have to buy tools to do this job, you’ll probably come ahead. Plan for at least a half day to get the job done.
What tools you need to do a CV boot replacement yourself
This post shows you how to do a inboard CV boot replacement on a Subaru Outback without removing the entire axle from the vehicle. However, this isn’t possible on all vehicles. If you have to remove the axle shaft, you’ll need a socket to fit the axle nut. This repair can save you money over the cost of a replacement CV axle. The repair procedure is similar on most CV boots
Here are the tools you’ll need to replace a CV boot
Socket set • Diagonal side cutters • Needle nose pliers • External snap ring pliers • pick or small flat blade screwdriver • CV banding tool • Roll of kitchen tin foil • Rust penetrant like PB Blaster or Liquid Wrench (not WD-40)

Know what can go wrong before you start
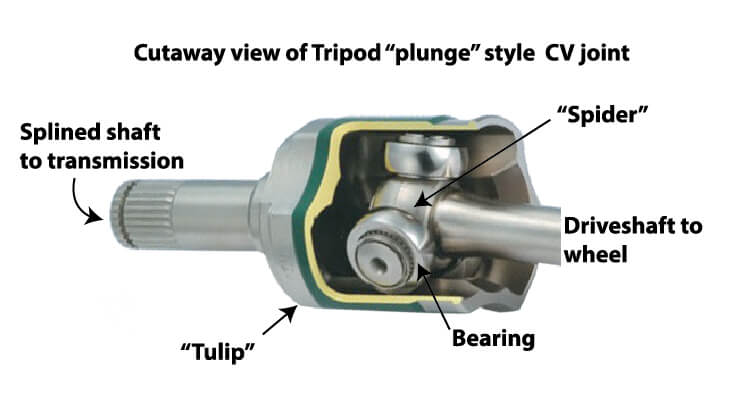
The biggest mistake DIYers make when doing an inner CV boot replacement is not realizing that the bearings will fall off the spider as soon as it’s removed from the tulip. It’s critical that the bearings and spider are reinstalled in exactly the same position during re-installation. If you install them in any other location, the wear patterns on the bearings won’t match the wear patterns on the tulip. That can cause vibration at high speeds. I’ll show you a trick on how to prevent that.
Should you replace the CV boot or the entire axle?
Here’s the deal with CV boot versus axle replacement. Prior to around 2015, your only choices for replacement CV axles were dealer new, dealer rebuilt or aftermarket rebuilt. The going price for dealer new axles was around $600 and dealer rebuilt prices were around $350. Aftermarket rebuilt axles, on the other hand, were priced at around $150.
That has changed. Today you can buy a brand new, not rebuilt axle shaft for as little as $37 from online sources. At that price it seems that doing a CV boot replacement makes little sense. But there’s a catch. The $37 axles are low end Chinese products that don’t seem to hold up well. DIYers complain of vibration, noise and early failure. If you’re just looking to get another year out of your vehicle, then perhaps a cheap axle is a good choice. But if you place on doing this job once, you may be better off doing a CV boot replacement on your OEM axle.
Here’s how to tell if you can re-use your CV joint
First, check the condition of both boots on the axle. The inboard plunge joint boot is much easier to replace than an outboard joint.
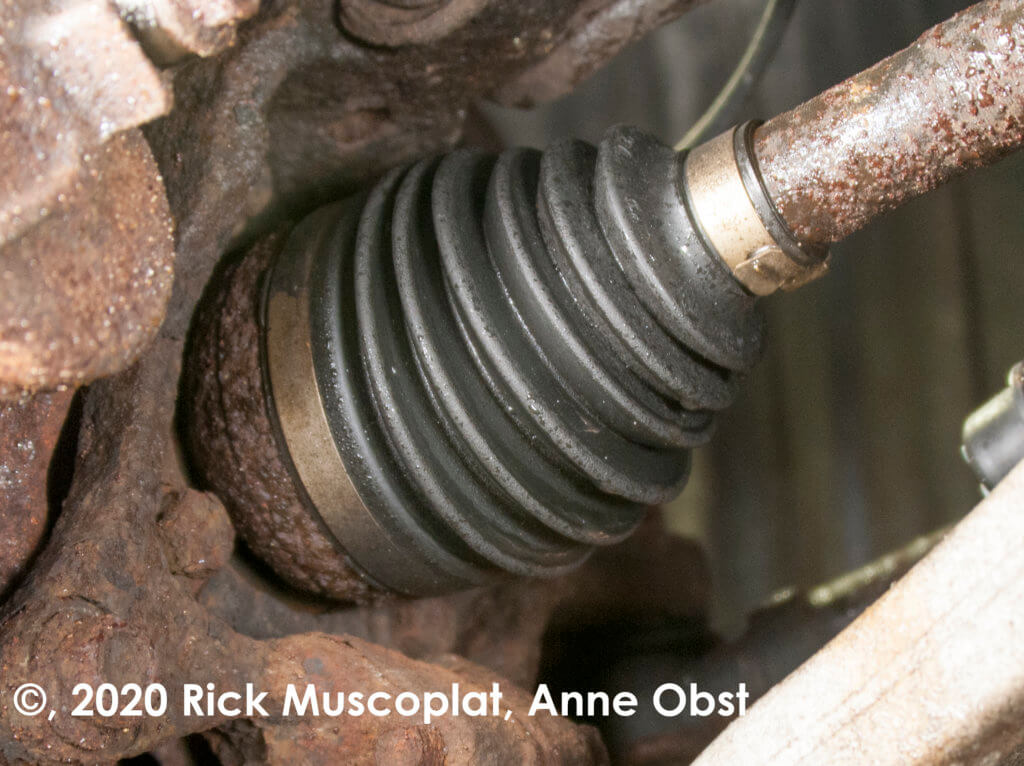
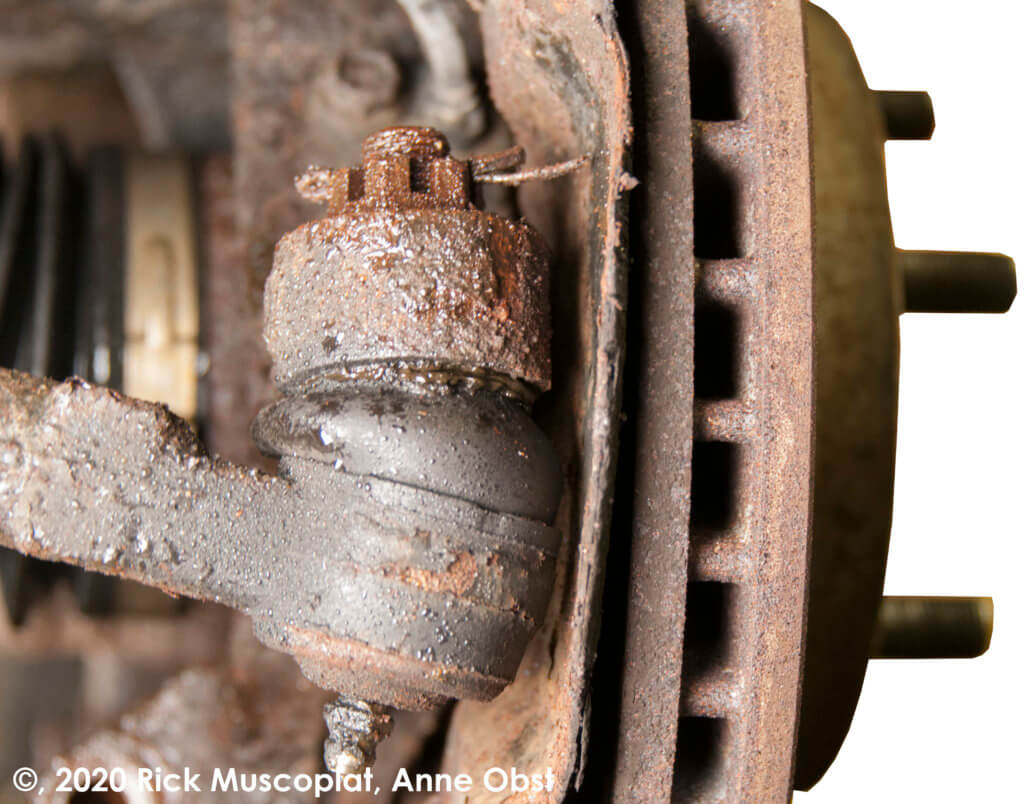
Outboard CV joint is in good condition
Inboard CV joint is torn
With the boot now open, road splash and road grit can enter the CV joint and start grinding it to smithereens. If the boot tear is fairly new, there might not be any grit in the remaining grease. In that case, the CV joint is a candidate for a boot replacement.
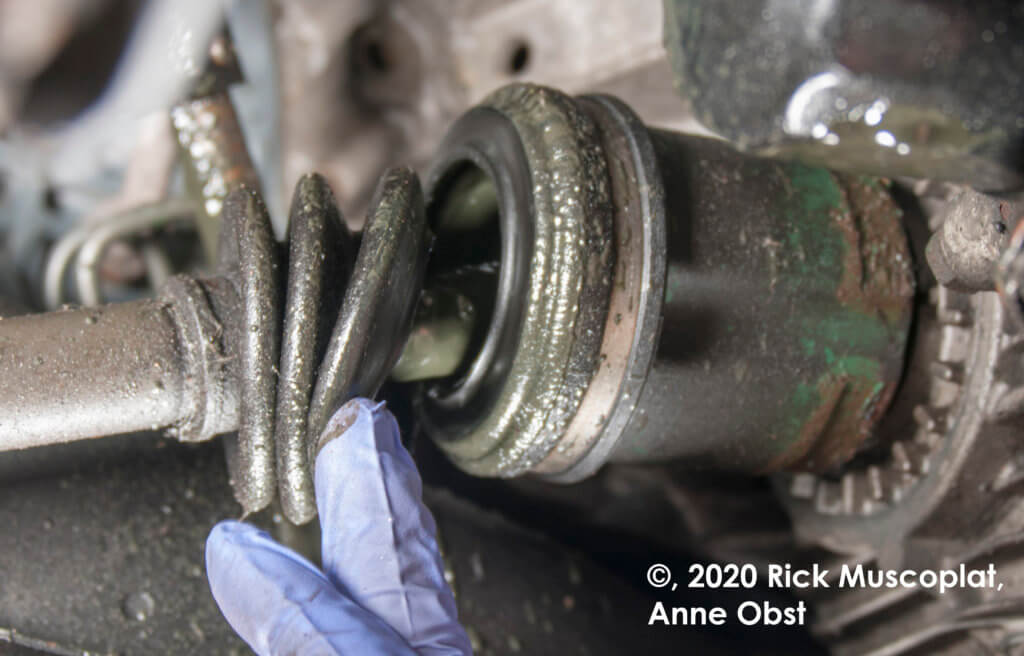
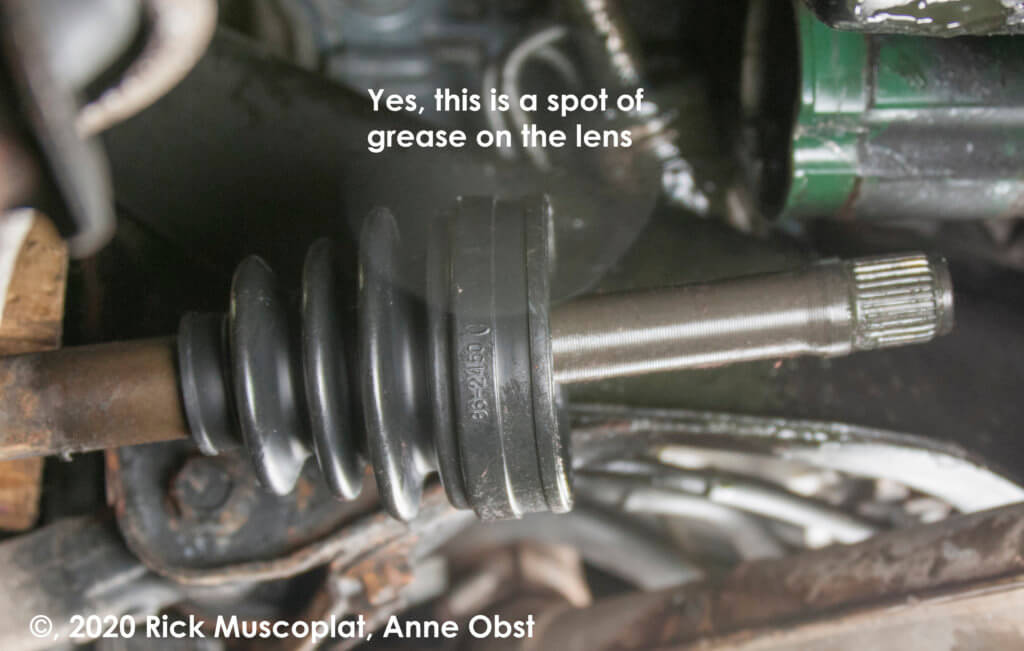
Test the remaining grease for grittiness
What you see here is a factory Subaru inboard CV joint with a torn boot. Scoop out some grease and feel for grit. The grease should feel smooth with no grit. If so, you can replace just the boot.
Step 1: Rem the outer tie rod end.
Using a diagonal side cutters and needle nose pliers, unbend the cotter pin and remove from the tie rod end castle nut. Then remove the castle nut and use a tie rod end separator to disconnect the tie rod end.
Step 2: Remove the ball joint nut or bolt
Remove the cotter pin using a diagonal side cutter and needle nose pliers. Then remove the castle nut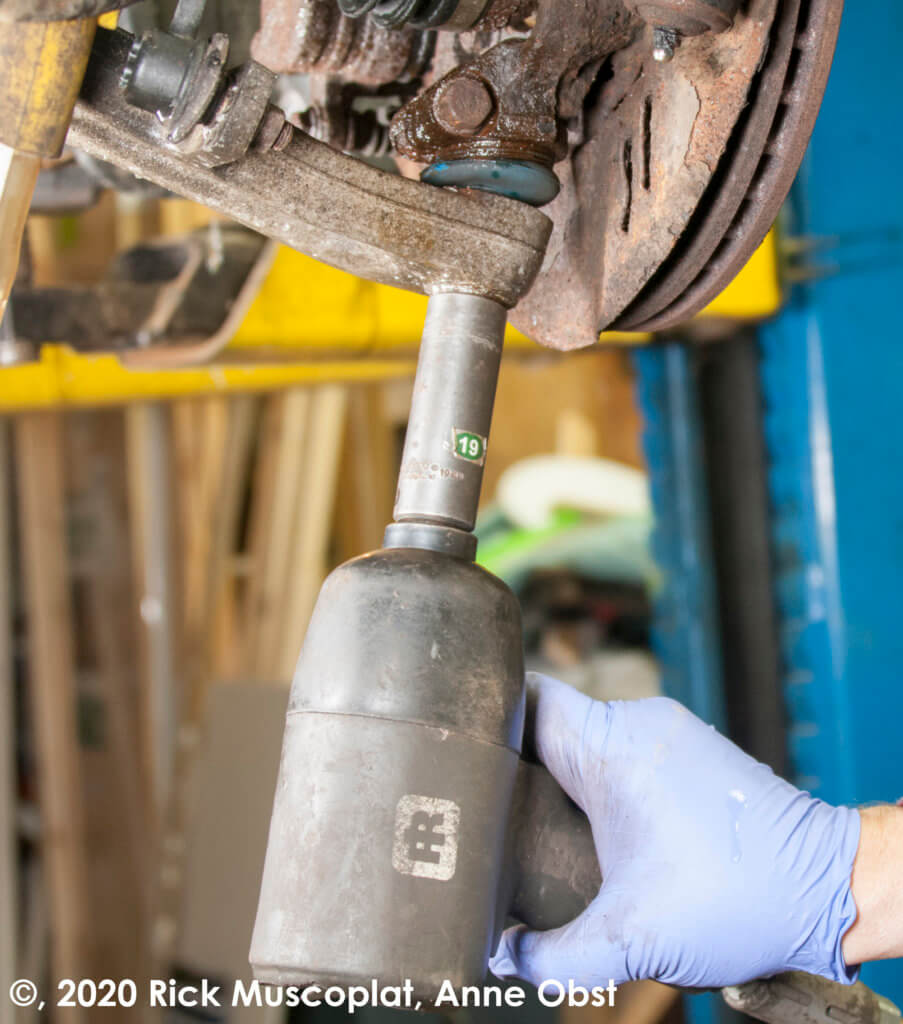
Step 3: Separate the ball joint from the control arm

separate the ball joint from the control arm
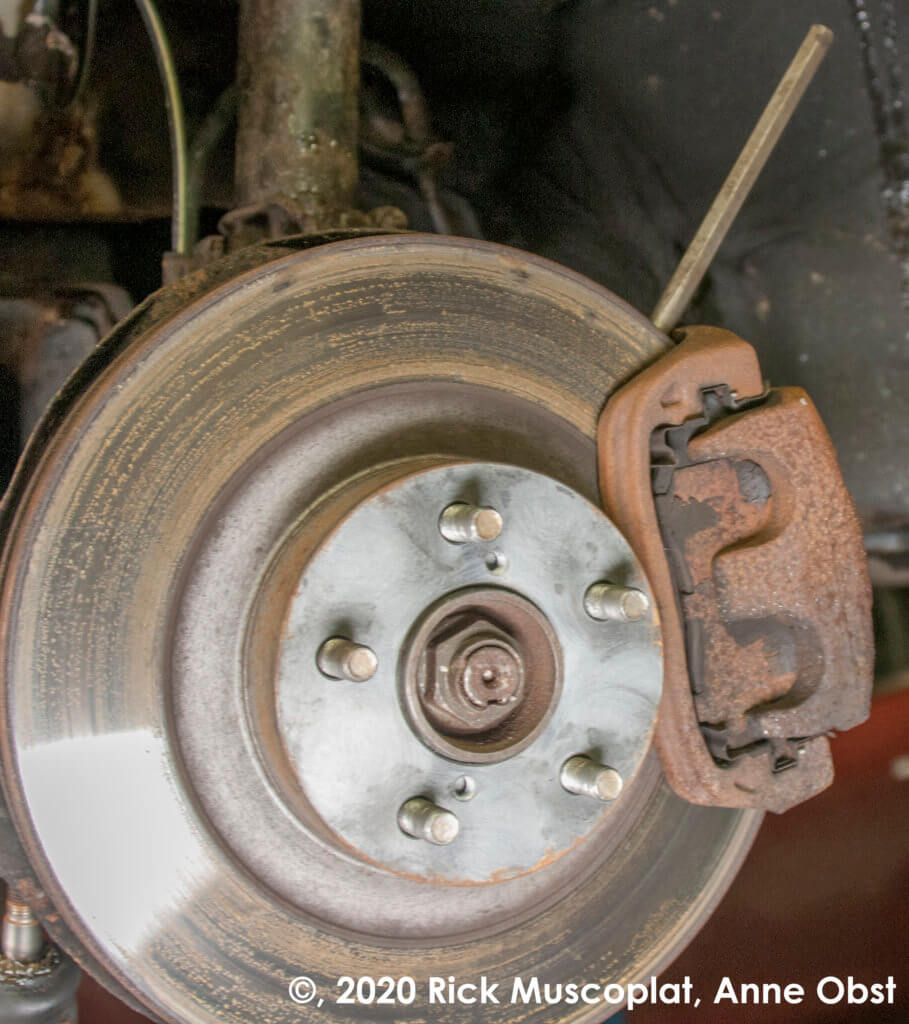
Step 4: Lock the axle
Since you want the spider and bearings to go back in the same place, prevent the axle from rotating during the repair by inserting a punch into one of the brake rotor vent vanes.
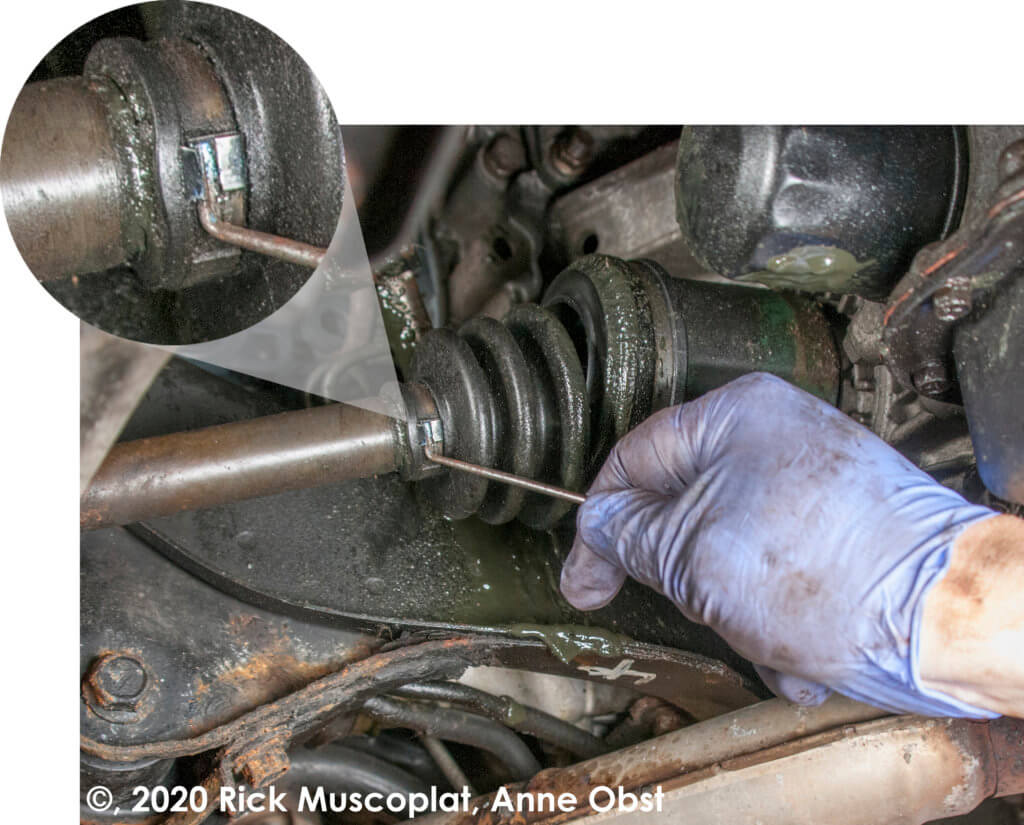
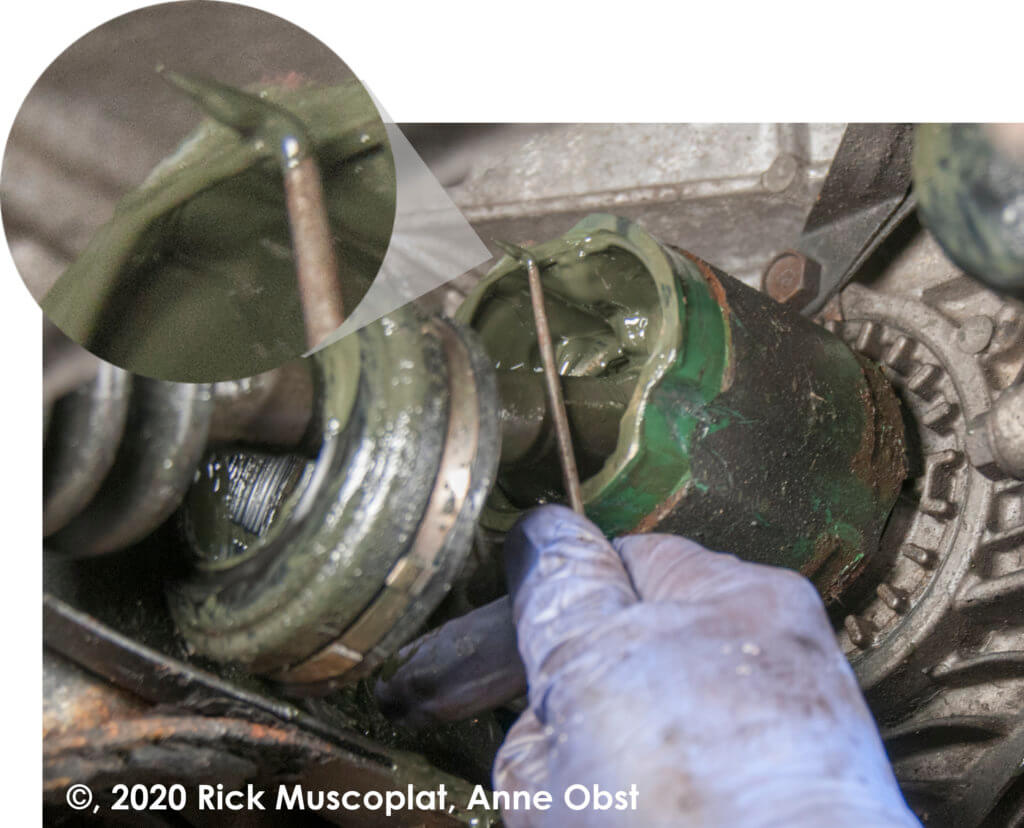
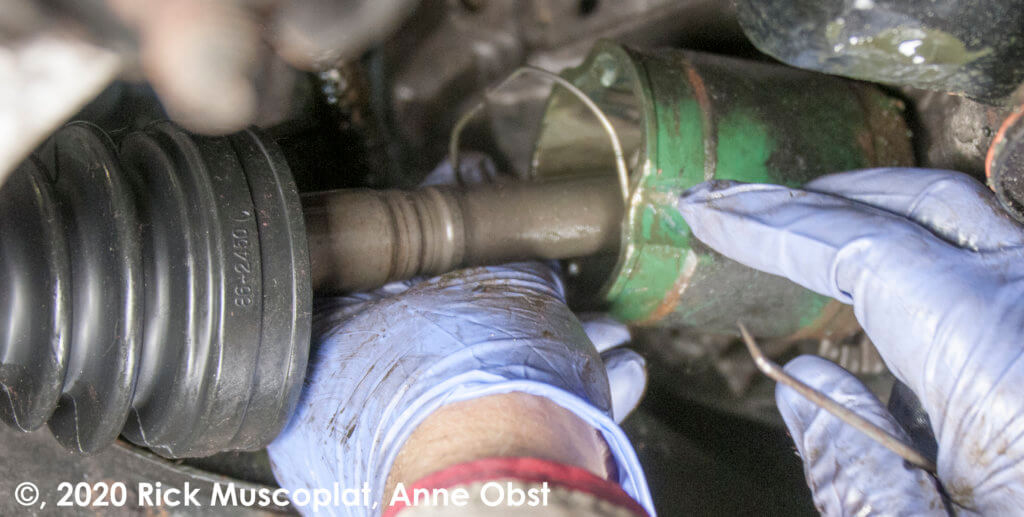
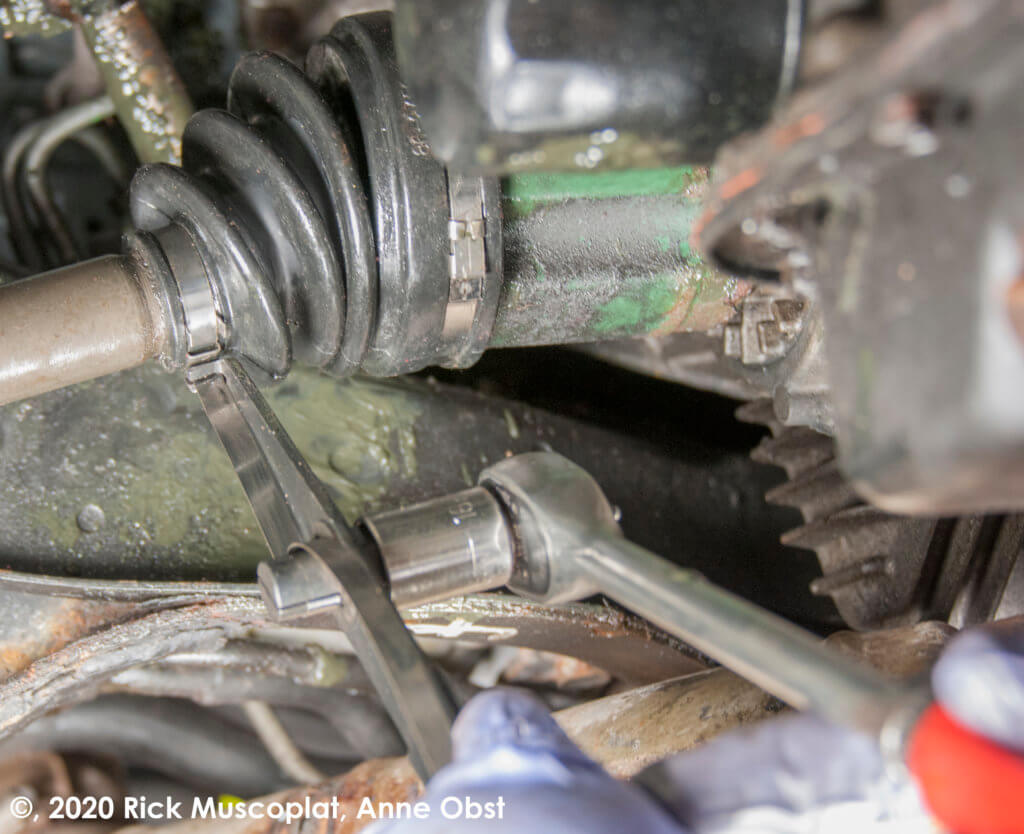
Step 5: Unbend the clamp tabs
Unbend the clamp tabs using a pick or small screwdriver. Then remove the band clamp. Repeat on the other boot clamp
Step 6: Remove the retaining clip
Some inboard CV joints use a retaining clip to prevent the spider and bearings from coming out of the tulip. Simply use a small pick to disengage the clip from the groove in the tulip. Save the clip, it must be reinstalled in the same location.
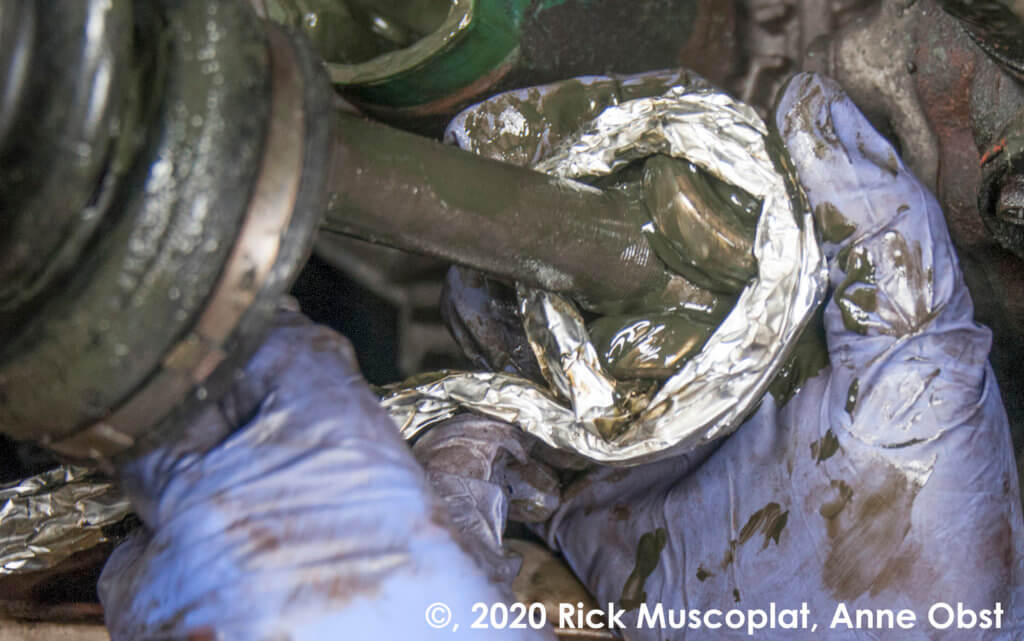
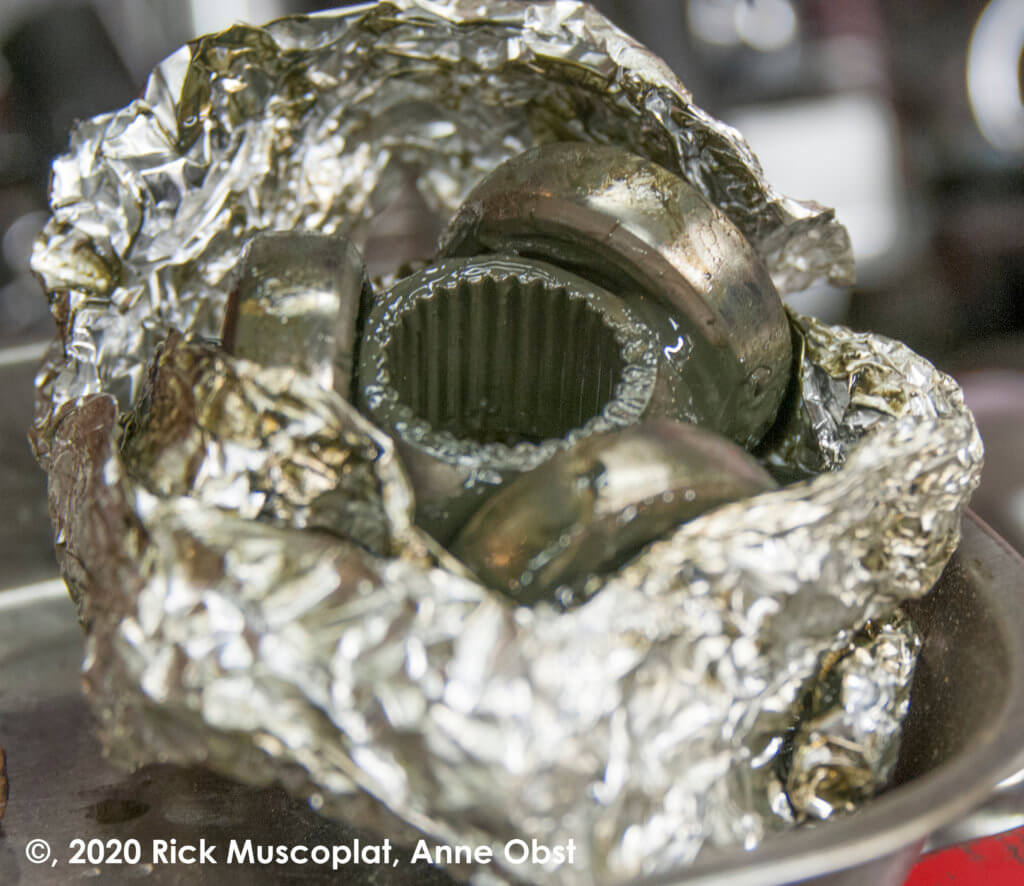
Step 7: Secure the bearing with tin foil
Before you remove the spider and bearings from the tulip, prepare a long sheet of tin foil by rolling it into a 1″ strip. You’ll wrap that strip around all three bearings once you remove them from the tulip. The tin fold will hold them in place.
Pull the wheel hub away from the vehicle while you guide the spider and bearings out of the tulip. Place a block of wood between the hub and frame to hold the hub out. Then wrap the foil around all three bearings to prevent them from falling off the spider. Using a pick or screwdriver, scratch an alignment mark onto the spider and the axle shaft so you can reinstall the spider in the same splines.
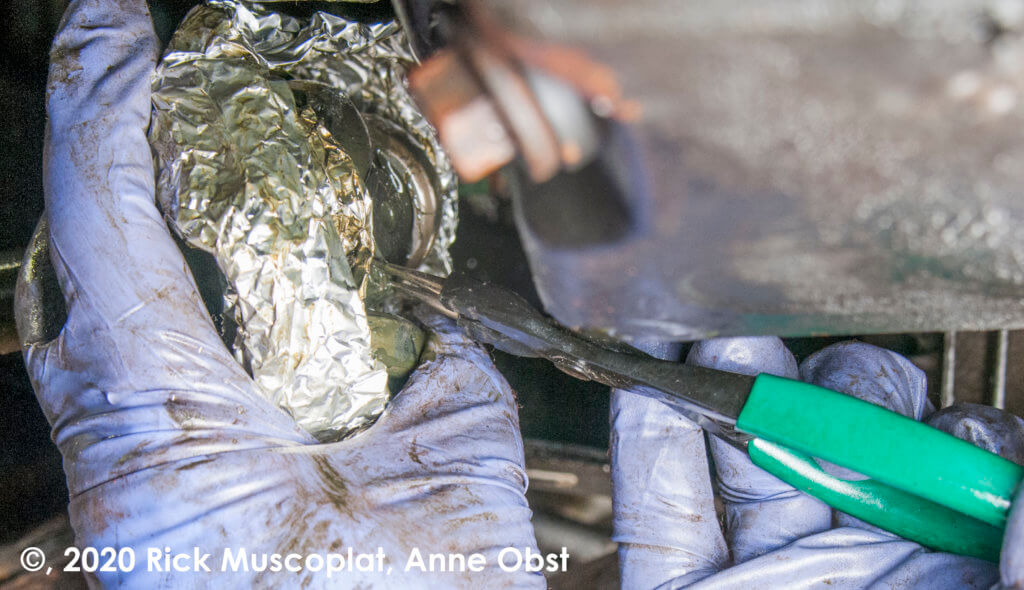
Step 8: Remove the snap ring and spider assembly
Using the snap ring pliers, remove the snap ring. Then slide the spider and bearings off the axle shaft.
Step 9: Set the spider aside in a clean spot
Step 10: Clean the axle shaft and tulip and install new boot
Remove all the old grease with a rag. Then slide the new CV boot onto the axle shaft. Next, reinstall the spider and bearings, making sure you align the spider with the scratched alignment marks you made in step 7. Finish by re-installing the snap ring.
Step 11: Insert the spider into the tulip and re-install the retaining clipt
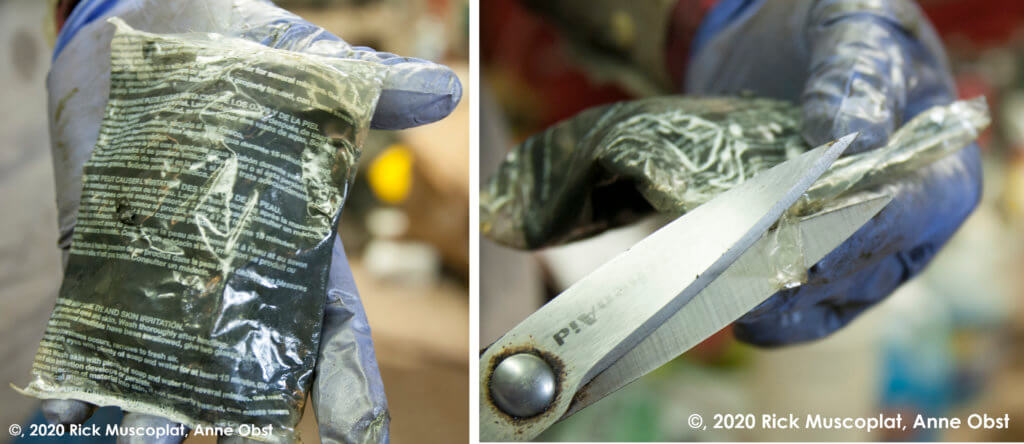
Step 12: Prepare the grease packet
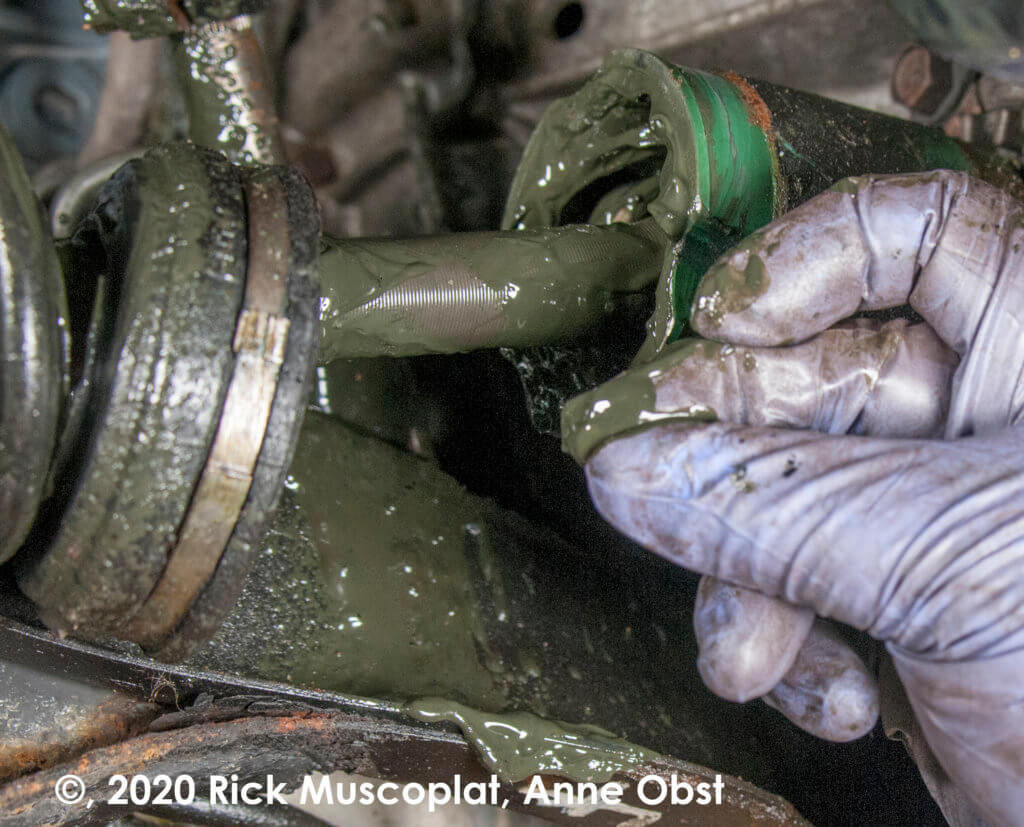
The boot kit will come with a special grease. Do not use any other type of grease. Flatten the packet and clip a corner using a scissors. Slide the new CV boot towards the tulip and squeeze the packet to insert grease into the boot and the tulip
Step 13: Install the band clamp
Wrap the band clamp around the boot end, making sure the clamp sits in the molded recess at the end of the boot. Thread the end of the band into the buckle.
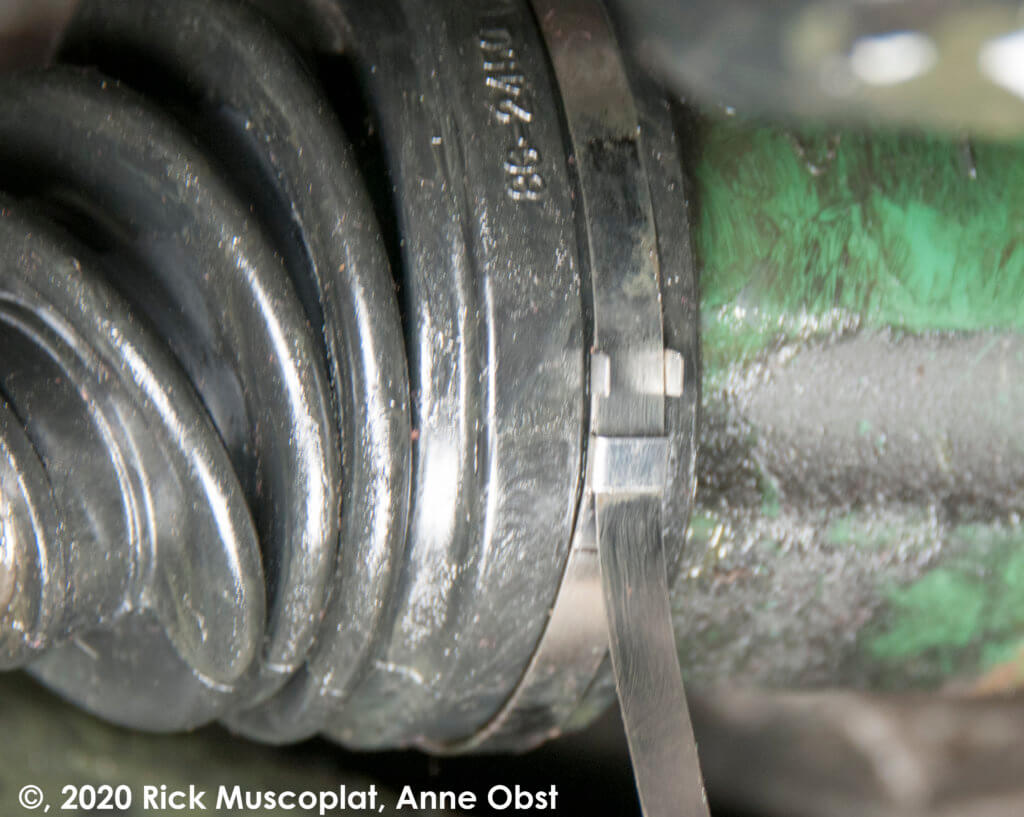
Step 14: Tighten and lock the band clamp
Thread the excess band clamp into the tightening tool and tighten the clamp to specification. Then rotate the tool 90° over the buckle to prevent the band from loosening. Remove the tool. Fold the band clamp another 90° toward the boot. Cut off the excess band. Then close the tabs to lock the band clamp. Repeat on the other end of the boot.
Step 15: Reconnect the ball joint and tie rod end
Tighten the castle nuts to spec and install new cotter pins.
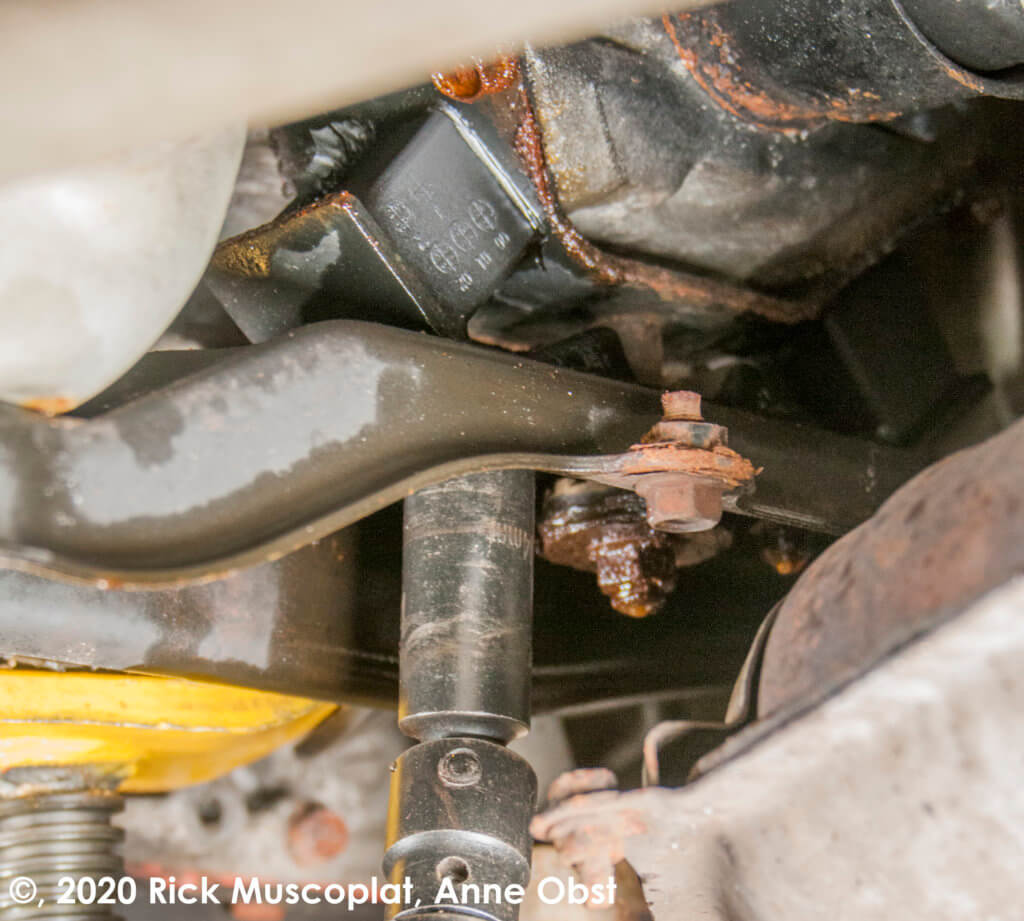
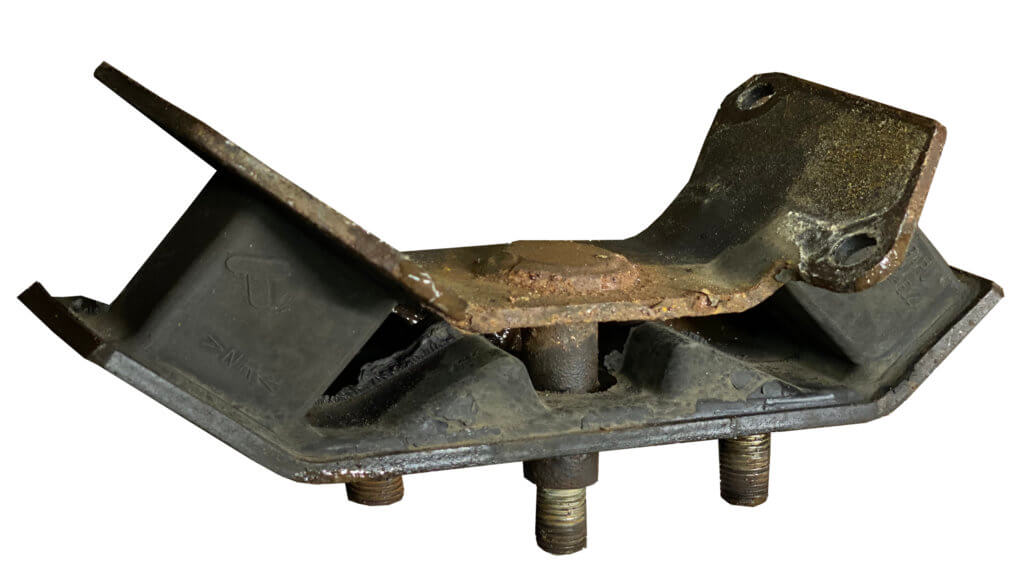
Prevent future CV boot failures on Subaru
The most common cause of inboard CV boot failures on Subaru vehicles is a degraded rear transmission mount. Due to the nature of the boxer engine, a worn rear transmission mount allows too much side-to-side play. That causes excessive outward pull on the inboard CV boots, causing premature failure. The fix is to install a new rear transmission mount.
Lower the exhaust. Then remove the cross brace bolts and remove the old transmission mount.
©, 2022 Rick Muscoplat and Anne Obst