
How to Perform an Alternator Voltage Drop Test
Troubleshooting Electrical Connections with Alternator Voltage Drop Test
An alternator voltage drop test is done to detect issues in the electrical connections between the alternator B+ out and the positive battery terminal and the alternator’s case grounding to the battery – terminal
You’ll need a multimeter set to DC volts to perform the test
Step 1: Test for voltage drop on the positive side of the alternator circuit
Touch one lead to the B+ terminal on the back of the alternator and the other lead to the + battery terminal. Record the value. Then, move the battery probe to the positive battery post and record the value.
The voltage drop should not exceed 0.25 volts. If the result is higher than 0.25 when you touch the probe to the battery terminal but lower when you touch the probe to the battery + post, the terminal/post have corrosion and high resistance. Clean both and repeat the test. If the result is still high, check for corrosion between the cable and the terminal.
Step 2: Test for voltage drop on the ground side of the alternator circuit
Touch one lead to the alternator case and the other lead to the – battery terminal. Record the value. Then, move the battery probe to the positive battery post and record the value.
The voltage drop should not exceed 0.25-volts. If the result is higher than 0.25 when you touch the probe to the battery terminal but lower when you touch the probe to the battery – post, the terminal/post have corrosion and high resistance. Clean both and repeat the test. If the result is still high, check for corrosion between the cable and the terminal.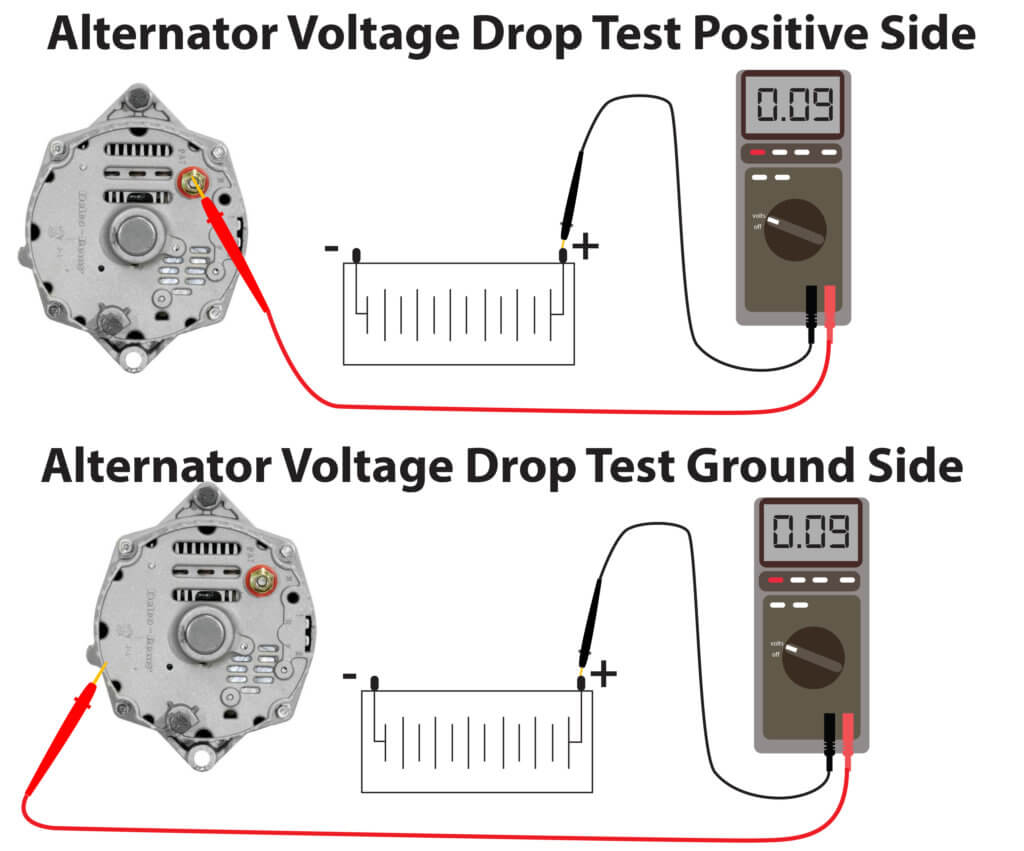
©, 2022 Rick Muscoplat
Posted on by Rick Muscoplat