
How to Detail a Car: Mastering Exterior Car Detailing
The Ultimate Guide to Detailing Your Car’s Exterior
Detailing a car’s exterior is more than just a simple wash; it’s a meticulous process that involves cleaning, restoring, and protecting all visible parts of a vehicle’s exterior. Whether you’re preparing for a car show or just want to enhance your car’s appearance, detailing can make your vehicle look like new. Here’s a comprehensive guide on how to detail a car exterior effectively.
This is the second part of a two part series on how to detail a car. This portion deals with exterior car detailing. If you haven’t read the part about interior detailing, click here to start at the beginning.
Anybody can detail a car interior if they have the time and patience. Here’s a list of the tools and products you’ll need:
Exterior car detailing tools and supplies
Two 5-gallon buckets
Grit guard
Microfiber wash mitt
Microfiber towels
Hybrid Ceramic Wax or Paint Sealant
Glass Cleaner
Bug Sponge
Wheel brush
Polishing/compounding machine and foam pads
Car wash soap
Polishing compound
Aquapel glass protectant
Step-by-step directions on how to wash your car
Car washing tips:
Tip #1 NEVER wash your car in direct sunlight! The sun will dry the water too quickly and you’ll wind up with water spots. Wash your car in a shaded area.
Tip #2 NEVER WAX your car in direct sunlight. The sun will dry the wax before you can wipe off the excess. Wax your car in a shaded area
Tip #3 NEVER use dishwashing detergent to wash your car. Dishwashing detergent can dissolve and remove oils and resins from your car’s paint).

Use a microfiber wash mitt to wash your car
1) Insert the grit guard into the bottom of one bucket. This will be the “dirty” bucket. Fill with water.
2) Fill the second bucket with water and the correct amount of car wash soap
3) Rinse the entire vehicle with plain water to remove surface dust. Don’t skip this step! You don’t want to begin rubbing the paint surface without a rinse or the dust and grit will scratch the paint.
4) Spray wheel cleaner onto your allow wheels or wheel covers. Don’t scrub at this point. We’ll come back to the wheels later. You just want to give the cleaner time to work.
5) Start with the roof. Dip your wash mitt into the soapy water and wipe the roof in two directions. Avoid circular motions; they leave unwashed areas that you’ll have to redo later.
6) Rinse the wash mitt in the “dirty” bucket. Wipe the mitt across the grit guard at the bottom of the bucket to dislodge any dirt captured in the microfiber. The grit will fall to the bottom and your wash mitt will be clean and free of the kind of debris that can scratch the paint.
7) Dip your wash mitt in the sudsy water and continue washing. Once the roof is clean, move down to the front and rear windshields, pillars, hood/trunk, then doors and fenders. Rinse often in the dirty bucket. Empty the dirty water and refill several times during the wash.
8) Use the bug sponge to remove bug splatter from the grille area
9) Dry the car using microfiber towels.
Polish the paint
The polishing process bring out the shine in your paint and removes the light scratches. The pros use a high speed buffer, but DIYers should use a dual action compounding machine. It turns at a much slower speed to avoid burning the paint.

Apply the polish to the polishing pad making an X on the pad
Follow the machine’s recommendations for pad selection. Apply the polish to the pad. Then, wipe the pad across a small section of the paint. Don’t tackle a section that is too large, and don’t overdo it by applying too much polish. Applying the polish to the pad and then wiping it on the paint reduces the amount of polish that gets flung off the pad.
Operate the compounding machine in rows, overlapping each row so you don’t miss a section of paint. After completing one section, wipe off the excess polish and continue wiping until you get a high gloss.
Repeat across all the painted surfaces.

Apply synthetic car wax
Car lovers always like to debate whether to use a Carnauba or synthetic wax. I think it’s a no brainer—use a synthetic wax. Here’s why.
Carnauba wax produces a warmer and deep gloss, but that gloss doesn’t last long. You’ll be re-waxing in another month or two if you want to maintain that same look. Next, Carnauba wax is harder to apply. It takes a lot more elbow grease to achieve the shine.
Synthetic car wax, on the other hand, is much easier to apply, last far longer and provides a 3-dimensional look.
Apply synthetic wax to a foam applicator and wipe on in small circles, moving in overlapping rows. Tackle one component at a time, like just the hood or a single fender. Once dry, wipe off the excess and continue wiping until you get a shine. Then, move on to the next section.
Finish car detailing by cleaning the wheels
Re-wet the wheels with additional wheel cleaner. Use a brush  to clean the spokes. Then, rinse and dry with a microfiber towel. Apply synthetic wax to the wheel.
Final comments and car detailing tips:
Skip the clay bar
You’ll notice that I didn’t include the clay bar step. Personally, I don’t think it’s worth the time and effort. The clay bar is supposed to pluck out “rail dust” that’s embedded in your paint. I suppose if you drive a lot around railroad tracks, you might want to consider this step, but even then, I’m not convinced it does anything. If you disagree, great. Knock yourself out.
Don’t apply tire dressing
Yes, I know it makes your tires look great. But that’s all it does. It really doesn’t provide the kind of protection you might think. It washes off fairly soon and usually slings off the tire and deposits on your brand-new wax job.
Treat window glass with Aquapel
Aquapel improves vision in the rain. I think it last much longer than 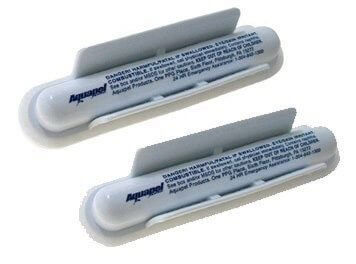 Rain-X. In fact, it lasts almost a year on my windows.
Squeeze the wings to break the glass capsule inside. Wipe across the windshield. Then wipe with paper towels until the haze is gone. Repeat on rear and side windows.
©, 2019 Rick Muscopalt
Posted on by Rick Muscoplat