
Avoid Bondo! Learn the Right Way to Fix a Cracked Bumper
Save Money: Learn How to Fix a Cracked Bumper
So you hit the parking ramp barrier, and now you have a cracked bumper? The body shop wants a fortune, and you want to fix a cracked bumper yourself. Fortunately, with the right tools and materials, you can fix a cracked bumper cover yourself, saving money on repair costs. This step-by-step guide will show you how to fix a cracked bumper cover, ensuring a professional-looking finish.
If you’ve searched the Internet and watched all the youtube videos that show you how to fix a cracked bumper yourself using Bondo DON’T DO THAT! If you follow the instructions and use Bondo, you’re wasting your time!
Epoxy and Bondo are rigid materials, but your bumper cover is flexible. If you use those products, they’ll break off the instant your bumper flexes. The crack will open up again, and you’ll have to redo the repair from scratch.
What you need to repair a cracked bumper
If you want to repair your cracked bumper the right way, you’ll have to spend some money on a crack stitching tool and a special plastic welding kit to fill in the crack. A plastic welding kit contains a hot iron that will melt the bumper plastic but not destroy it.
Step 1 to fix a cracked bumper cover
Remove the bumper cover from the vehicle
Refer to a shop manual to find the procedure to remove the bumper cover from your vehicle. In most cases, it’s just a matter of removing plastic rivets and some screws. It looks much harder than it really is.
Step 2 Stitch the crack from the backside using hot staples
The hot staple method is the fastest and most long-lasting. Start by cleaning the painted and backside of the bumper cover and cracked edges with a wax remover. Then, close the gap between the two cracked sections and clamp them together using small wood blocks and a vice grip type locking pliers or wood clamp.
Next, load a staple into the heat gun and press the trigger. Wait
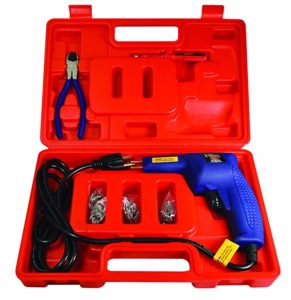
Astro Hot Staple Gun 7600 Kit
for the staple to get red-hot before plunging it into the middle of the crack.
Push it into the plastic to a depth of no more than half the thickness of the plastic while twisting it slightly. Allow the staple and plastic to cool before releasing the staple from the gun. Repeat the operation by alternating the staple rotation direction along the crack. Once you’ve stitched the crack, cut the protruding staple legs with a side cutter.
Find the Astro 7600 Hot Staple Gun Kit for Plastic Repair Kit on Amazon for about $90. It comes with a heating gun and an assortment of stitching staples. See this video below for usage.
Step 3 Fill the cracked bumper from behind with a plastic welding rod
Purchase a plastic welding kit like the Polyvance 5700HT Mini Weld Model 7 Airless Plastic Welder. The kit comes with all the types of bumper cover plastics commonly used by carmakers
6027 HT Standard Welding Tip
6031 Tear Drop Airless Welding Tip
200 Watt Ceramic Core Heating Element
2045W Reinforcing Mesh
6124WB Stainless Wire Brush
Starter Pack (15 ft) of round Polyurethane Welding Rod
Starter Pack (15 ft) of round Polypropylene Welding Rod
Starter Pack (15 ft) of round ABS Welding Rod
Starter Pack (15 ft) of round LDPE Welding Rod
Starter Pack (15 ft) of round TPO Welding Rod
Starter Pack (15 ft) of round Nylon Welding Rod
Starter Pack (4 ft) of round Polycarbonate Welding Rod
Starter Pack (15 ft) of flat FiberFlex Universal Welding Rod
Follow the instructions in this Polyvance video showing how to stitch the backside of the bumper with stainless steel screen and groove and fill the front side using FiberFlex filler material
Step 4: Sand the repair
Start with 120-grit sandpaper to smooth the filled area. Feather into the non-damaged areas. Finish sanding with 220 grit to achieve a smooth finish.
Step 5: Prime with a flexible primer
Once you complete the plastic repair and the surface is sanded smooth, apply an
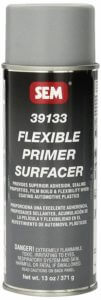
SEM 39133 flexible primer
automotive-grade flexible primer like SEM 39133 flexible primer (semproducts.com).
Step 6: Paint the cracked bumper with automotive paint with a flex additive
Locate a professional auto body paint supplier that has the capability to load your paint into an aerosol can along with a flex agent. That will allow the paint to flex and not crack off like ordinary touch-up paints.
Step 7: Reattach the bumper to your vehicle
Reverse the steps used to remove the bumper. If any of the plastic rivets were damaged during removal, you can buy new ones at any auto parts store.
Understanding bumper construction
The bumpers on modern vehicles are made with three pieces; the bumper cover (which is the part that cracked), the energy absorber (which probably also got damaged during the impact) and the impact bar (the actual bumper). Here are illustrations for a front and rear bumper from a 2015 Toyota Camry. You can see that the bumper has three components: bumper cover, energy absorber, and the impact bar.
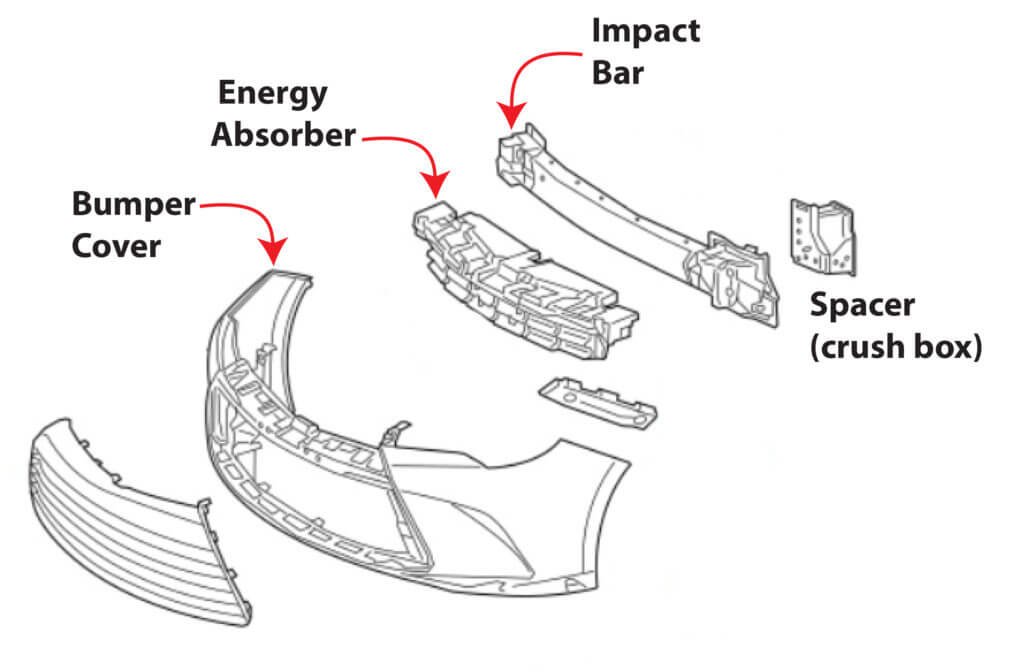
Three-piece bumper construction
The bumper cover material is made from flexible plastic. But car makers use a variety of plastics to form their bumper covers, and the filler plastic you use to repair the crack must match the base material. If you use any other type of filler to fix a cracked bumper cover, it won’t last. It will simply crack off. Here’s a list of the most popular materials:

Rear Toyota bumper
TPU TPUR = Thermoplastic Polyurethane
It’s used in bumper covers, soft filler panels, gravel deflectors, rocker panel covers.
TPO, EPM or TEO = Polypropylene + Ethylene Propylene rubber
It’s used in bumper covers, valence panels, fascia panels, air dams, dashboards, grilles.
PP=Polypropylene (polyolefin)
It’s used in bumper covers, deflector panels, interior moldings, radiator shrouds, inner fenders
PC + PBT= Polyphenylene Ether + Polyamide Bumper covers
If you use any other type of filler to fix a cracked bumper cover, it won’t last. It will simply crack off.
Do some Internet research or use a shop manual to determine the type of plastic used in your bumper cover.
©, 2019 Rick Muscoplat
Posted on by Rick Muscoplat