
Flush a heater core
Reverse flush a heater core to remove clog and get more heat
If your heater core doesn’t output heat or outputs too little heat, it may be clogged with corrosion debris or degraded coolant. Many times you can reverse flush a heater core to restore heater core operation. You can do this yourself with a flush kit from an auto parts store and an adapter from a home center. Or you can buy a special flush gun.
What are the symptoms of a bad heater core? See this post
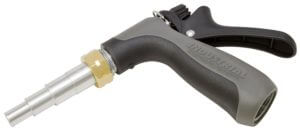
Lisle Tool 60900 Heater Core Backflush Tool
If you opt for the flush kit, you’ll also need a garden hose-to-5/8” O.D. barbed fitting and some 5/8” I.D vinyl tubing. See photo below.
Locate the inlet hose to heater core
If your vehicle has a heater control valve, it will always be located on the inlet hose to the heater core. If your vehicle doesn’t use a heater control valve, trace the two heater core hoses down to the engine. The inlet hose is the one located near the top of the engine, usually near the thermostat housing. The return hose is usually located near the water pump. So the normal coolant flow is from the top of the engine, into the heater core and returning back to the engine at the water pump. You’ll want to reverse flush the heater core, so it’s really important to identify which hose is the inlet hose. If you mess this up, you can actually make the clog worse.
Remove the heater core hose clamps
The rubber hoses are held in place by worm drive clamps, spring clamps or crimped clamps. Remove a worm drive clamp with a screwdriver or socket and ratchet. Remove a spring clamp with a pump pliers or a special spring clamp removal tool. To remove a crimped on connector, you’ll need a rotary tool with a cut off wheel. Simply cut through the crimp sleeve enough to insert a flat blade screwdriver. The pry the crimp sleeve off. You can replace the crimped connector with a worm drive clamp when you’re done.
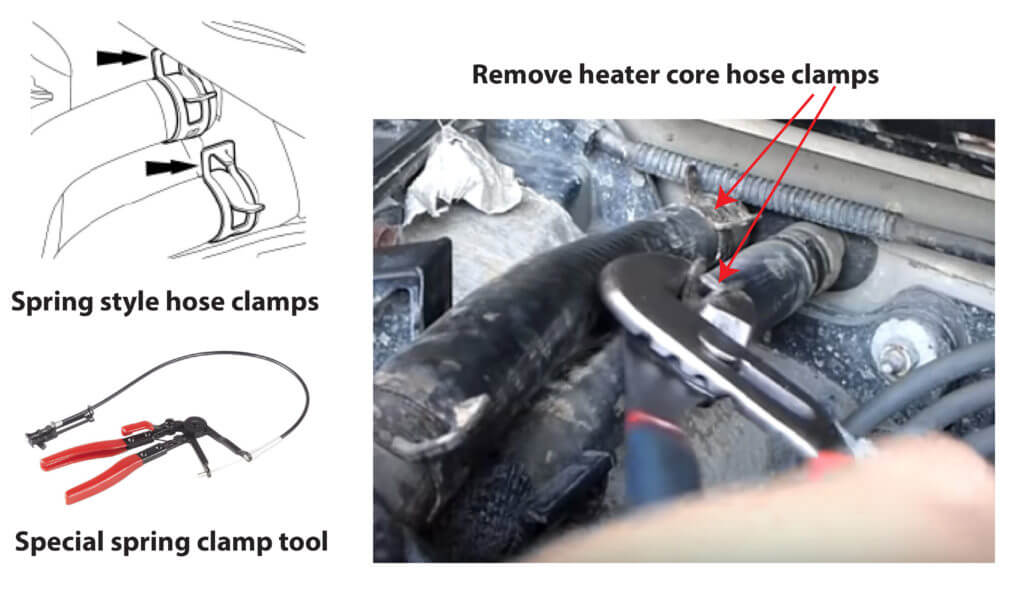
Remove heater core hose clamps
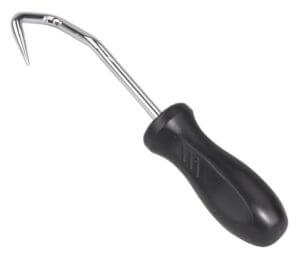
Remove the heater hoses from the heater core
WARNING: The heater core tubes that go through the firewall are attached to the
OTC 4521 Hose Removal Tool New
heater core with welds or solder. Do NOT exert twisting force on these tubes; you can break them loose from the heater core, causing leaks that will require complete dash removal and heater core replacement.
Slide a hose removal tool between the heater core tube and the heater hose to break it free. Rotate the tool all around the tubing. Then gently twist and pull it off the heater tube.
Connect the flushing hose to the heater core outlet
Connect the flushing adapter to a garden hose and then install the garden hose-to-5/8” barbed adapter. Connect the vinyl hose to the barbed adapter. Then attach the other end of the vinyl hose to the heater core outlet.
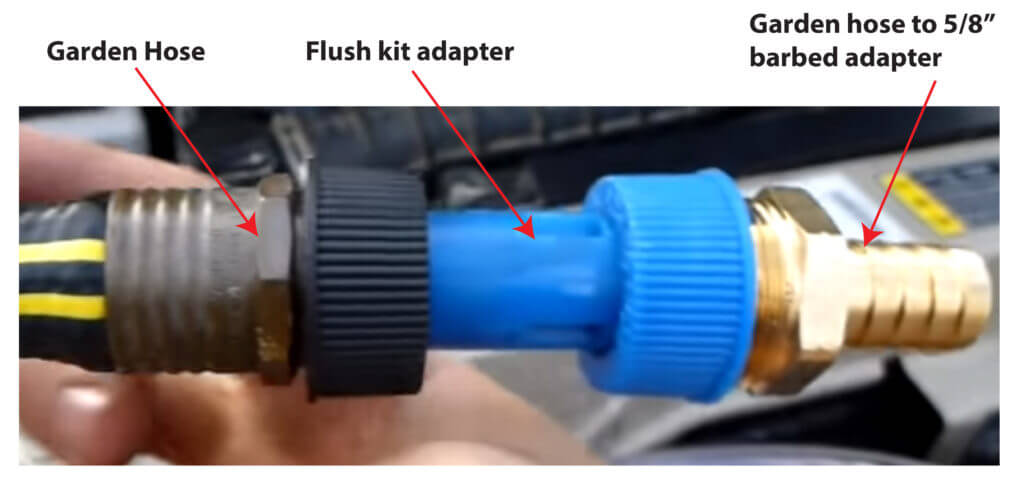
Flush adapter and barbed adapter
Connect a second vinyl hose to the heater core inlet and route the other end to a 5-gallon bucket.
Reverse flush a heater core using low flow from your garden hose
Normal house water pressure is 40-60-psi. That’s way too high for a heater core, which usually only sees around 10-psi. With the engine shut off, crack open your home’s hose bib just enough to get water flowing into the heater core. Watch the exiting water to make sure the flow is more than a trickle, but not full force.
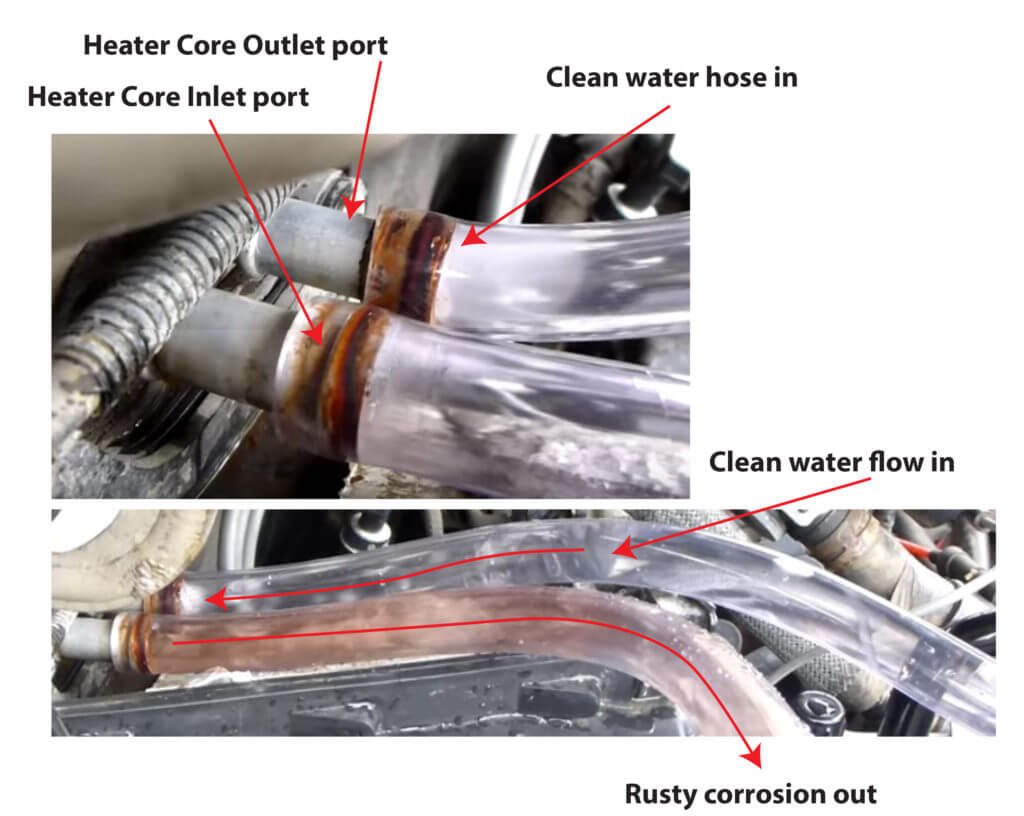
How long to reverse flush a heater core
Continue the reverse flow through the heater core until the outlet water flows clear.
Refill heater core with coolant
Disconnect the flushing adapter and garden hose. Using a funnel, pour the proper coolant into the inlet vinyl hose to purge water from the heater core. Continue adding coolant until the exit hose no longer shows water coming out. Then remove the vinyl hoses and reconnect the heater hoses to the heater core. Install the hose clamps. Start the engine and run until it’s up to proper operating temperature. Then turn on the blower motor and set the heat control to maximum.
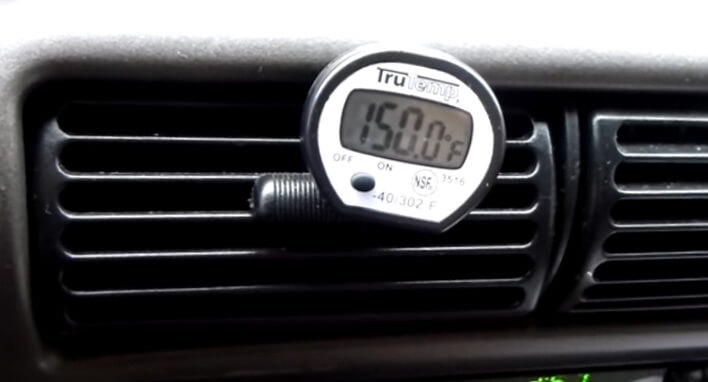
Check heater core operation with a thermometer
With the engine at full operating temperature, heater control set to high, blower motor, mode set to vent and a thermometer in the center vent, the thermometer should read 130°F to 150°F.
©, 2018 Rick Muscoplat
Posted on by Rick Muscoplat