
Grinding noise when braking: The most common causes
Learn the most common causes of grinding noise when braking
A grinding noise when braking is a common complaint. Grinding, scraping, and squealing complaints all fit into the same category of the most common brake noises. A grinding noise when braking can be caused by worn friction material, worn noise reduction shims, heat-degraded or rusted anti-rattle (abutment) clips, a grooved rotor, binding brake pads, or a seized caliper.
Grinding noise when braking — diagnose and fix
Metal-to-metal contact due to worn-out brake pads
Worn brake pads are the most common cause of brake grinding noise. It’s caused when the friction material has worn off and the metal backing plate presses against the rotor face. In other words, you’ve used up all the brake pad friction material, and you’re now destroying the rotors. To fix the problem, replace the brake pads and rotors.
Here’s an image of worn-out brake pads and rotor damage.
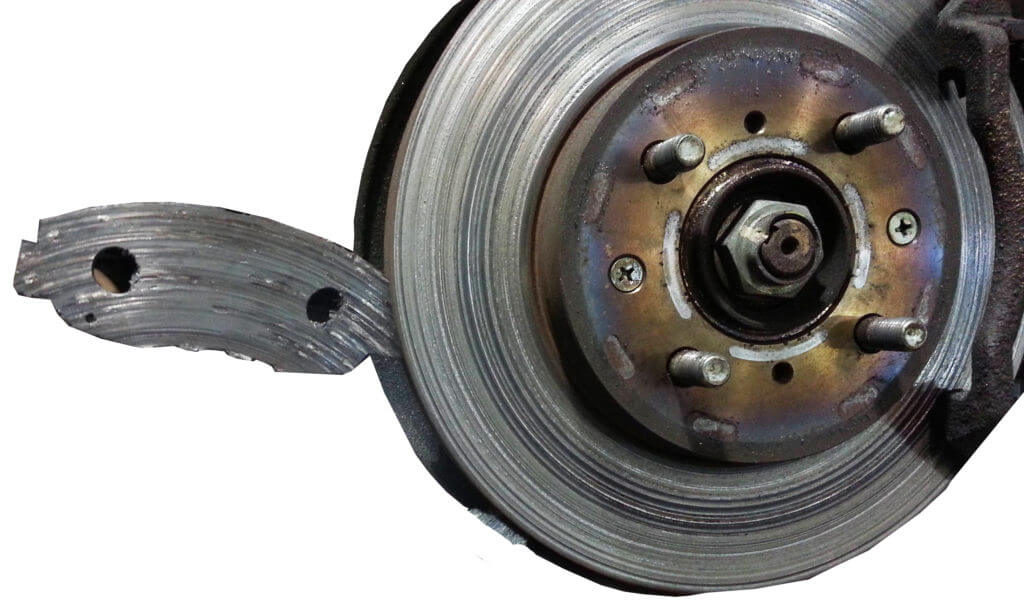
Worn-out brake pad and grooved brake rotor
Brakes grind due to seized brake pads or seized caliper
Brake pads must move in the abutment areas and release slightly when you take your foot off the pedal. Rust formation in the abutment areas (known as “rust jacking”) decreases the free space above and below the pad “ears.” When that happens, the pad binds and stays in contact with the rotor face. That causes the friction material to overheat and glaze over, resulting in a grinding noise.
To fix the problem, remove rust on the abutment, install new abutment clips and brake pads and free up and lubricate the caliper slide pins with high temp brake grease.
Brakes squeal— What causes it?
Over time, the rotors and drums can develop grooves, and the brake pads ride in the grooves, generating a high-pitched squeal, much like a stylus on an LP record. Another possible cause for brake squeal is worn brake pads equipped with a wear sensor. The sensor comes into contact with the rotor when the friction material wears down to about 3mm. The wear sensor then scrapes along the rotor, making a high-pitched squealing noise.
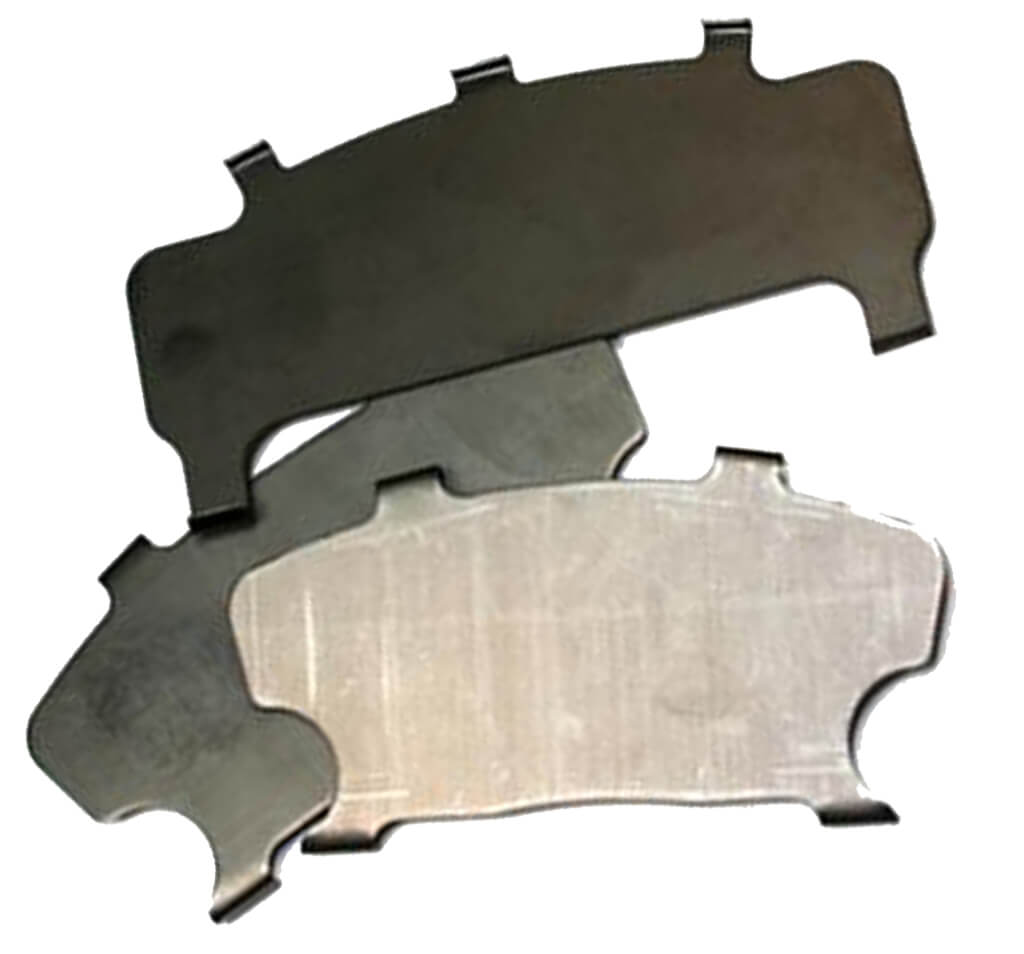
Brake pad noise reduction shim
Worn noise reduction shims cause a brake squeal
Most brake pads require a noise reduction shim to prevent vibration transmission from the brake pad backing plate to the caliper. However, the quality of the noise reduction shim is directly related to the quality level of the brake pad. Install cheap pads, and you will get cheap shims.
Noise reduction shims look like stamped pieces of soft metal, and that’s all the cheap ones. But the better shims are a multi-layer design with a rubber membrane sandwiched between metal layers. For more information on brake shim construction, see this post.
As noise reduction shims deteriorate, they transmit more noise. The shims are supposed to be replaced during a brake job. But some shops and DIYers try cutting corners and reusing old shims. That’s a really bad idea. The same thing applies to abutment hardware anti-rattle clips. These stainless steel clips are designed to maintain enough pressure on the brake pad backing plate to prevent vibration while allowing the pad to slide so it can be applied and released. As the abutment hardware is heated by brake application and ages, it loses spring tension. That allows the brake pad backing plate to vibrate. In addition, abutment hardware can rust and prevent the brake pad from retracting, causing it to remain in contact with the rotor for prolonged periods. Both conditions cause the brakes to squeal.
To correct the situation, replace the noise reduction shims and abutment hardware, clean the abutment areas shown in these photos, and apply a light coating of high-temperature synthetic brake grease to the brake pad backing plate ears and abutment hardware. The brake grease lubricates and cushions the vibration.
On drum brakes, ensure adequate friction material remains on the shoe web. Then, clean and lubricate the three pivot points for each shoe. Make sure the automatic adjuster is free of rust and turns freely. Install new retraction and hold-down springs. Then, adjust the shoes.
Rusted or heat-degraded anti-rattle clips cause brake squeal

Abutment hardware – new versus old and rusted
Anti-rattle clips also reduce vibration transmission. During a new brake job, the technician applies a light film of high-temperature synthetic brake grease to the slide areas on the clips. That helps the brake pad “ear” move slightly with each brake application.
However, anti-rattle clips lose their tension over time and rust. Once that happens, normal brake vibration is conducted directly from the brake pad backing plate to the caliper, causing a squeal.
Brakes clunk— The most likely cause
If you hear and feel a clunk when you change from reverse to drive, chances are you’ve got abutment-wear grooves. The wear allows the brake pad to move up or down during reverse, then slam in the opposite direction when you shift to drive. Worn abutment clips can also cause a brake clunk noise. Check for abutment wear and replace if you find that.
What causes brake pad binding?
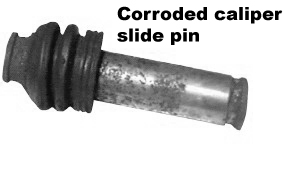
A corroded caliper slide pin can cause the caliper to bind
However, unlike the high-pitched squeal noise, grinding noise is often caused by a binding condition.
Floating brake calipers must move freely on the caliper slide pins. Even small slide pin corrosion can prevent the caliper from releasing properly. That keeps pressure on the brake pads, causing them to vibrate, overheat, and create a grinding sound.
To diagnose a grinding condition, compress the caliper piston

New caliper pins
slightly, remove the caliper, and check the slide pins for ease of movement. If they don’t slide freely, try applying a high-temperature synthetic brake grease. If they still don’t slide freely, replace the pins or brackets. Depending on the condition of the brake pads, you may need to replace them. And, if the rotor is heavily scored, replace it. To break rotor glaze, some shops use a random orbital sander with 120-grit sandpaper to apply a non-directional finish to the rotor. If you have a random orbital sander, you can try this approach. If that’s not enough to return the rotor to a non-grinding condition, replace the pads and rotors as a set.
©, 2013 Rick Muscoplat
Posted on by Rick Muscoplat