
How to check tire pressure
How to check tire pressure and refill the right way
Keeping your tires filled to the recommended pressure extends their life and provides maximum stopping traction. Overinflated and underinflated tires have less tread-to-road contact and that reduces traction and increases your stopping distance.
It’s important to check tire pressure regularly because all tires lose 1 to 2 psi per month due to air permeation (air molecules seeping through the rubber). I’ll show you how to find the right tire pressure for your car or truck, how to check your tire pressure, and how to refill them to factory specs.
Find the recommended tire pressure for your car
The recommended pressure is based on cold tires, and you can find that pressure listed on a label inside of the driver’s side door, on the pillar area. “Cold tires” means that the wheel has not been in motion for at least three hours or less than five miles. Tire temperature is important because as your tires heat up, its air pressure increases. If you check tire pressure after driving for a while and adjust pressure when they’re hot, you’ll be driving on under-inflated tires once they cool.
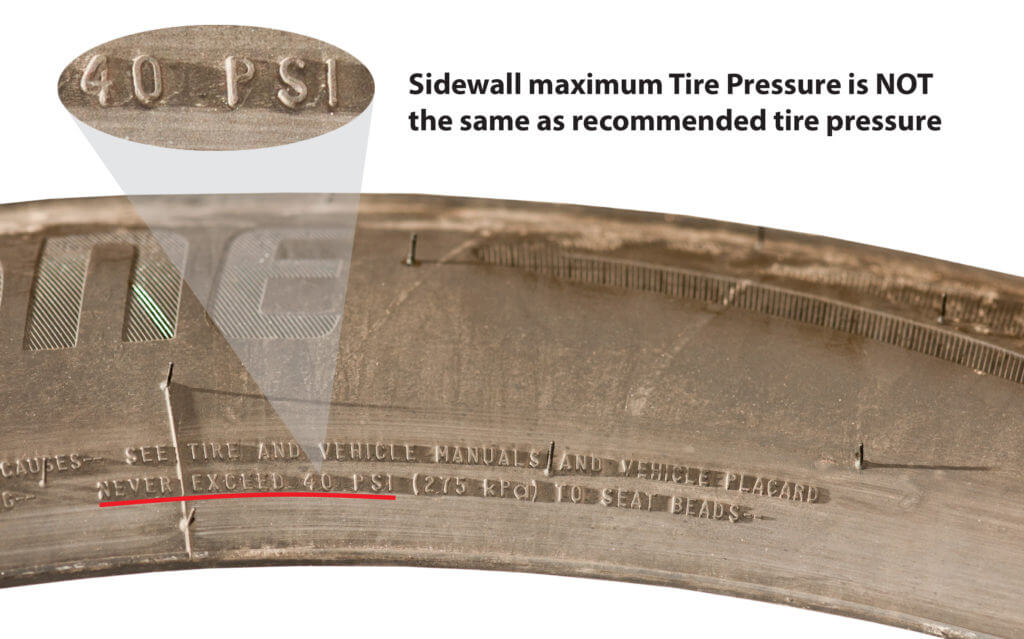
NOTE: Do not use the pressure shown on the sidewall of the tire. That’s the maximum amount of pressure that the tire can hold when the vehicle is carrying the maximum payload listed by the car or truck maker.
The tire pressure label may list different pressures for the front and rear tires. The front is usually heavier than the rear due to the placement of the engine and transmission.
If your vehicle is equipped with a space-saver spare (also called a doughnut), the tire pressure label will list a much higher pressure for that tire—almost twice the pressure of a normal tire. That’s because space-saver spares are built differently, with shallower tread and thinner sidewalls, so they need more pressure to maintain their shape.
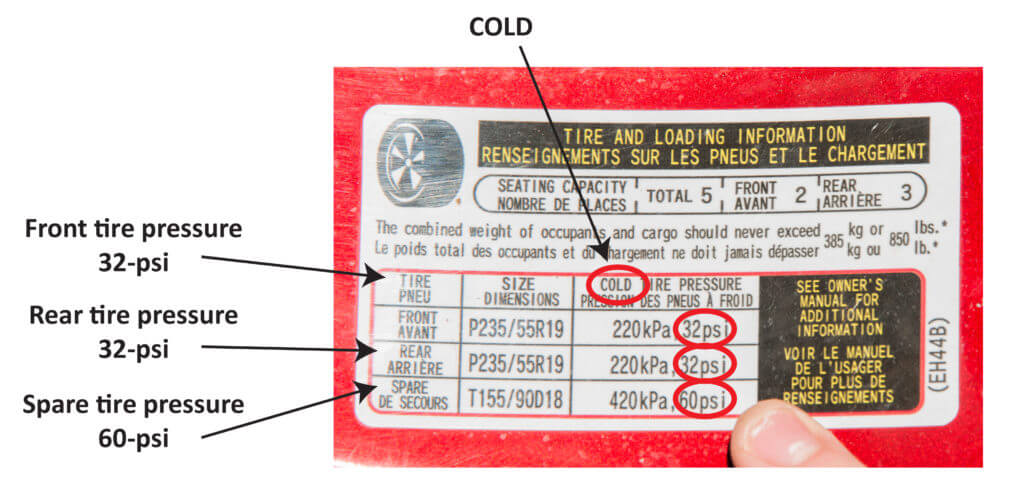
This image shows a typical tire pressure label posted in the driver’s door pillar area
How carmakers arrive at a recommended tire pressure
Tires hold up the weight of your vehicle. So car makers take the total weight of the vehicle and divide the weight by four. Then, they determine how much tire tread must contact the road to support that tire’s share of the vehicle weight.
Here’s an example using a Chevrolet Malibu weighing 3,051 lbs.
3,051-lbs ÷ 4 = 762=lbs per tire. So, each tire must support 762 lbs.
If the tire’s contact patch (the amount of tread in contact with the road) measures 6-in. wide by 4-in. long, it will have 24-sq/inches of tread touching the pavement.
Divide 762-lbs. by 24-sq/inches, and you get 31.75=psi. That’s the car makers’ starting point. Then, they test drive the vehicle with the tires set at that pressure to see how it handles during braking and turns. They’ll tweak the air pressure for the best handling while achieving maximum tire tread life. In other words, it’s a compromise.

I like the digital tire pressure gauge
Steps to checking your tire pressure
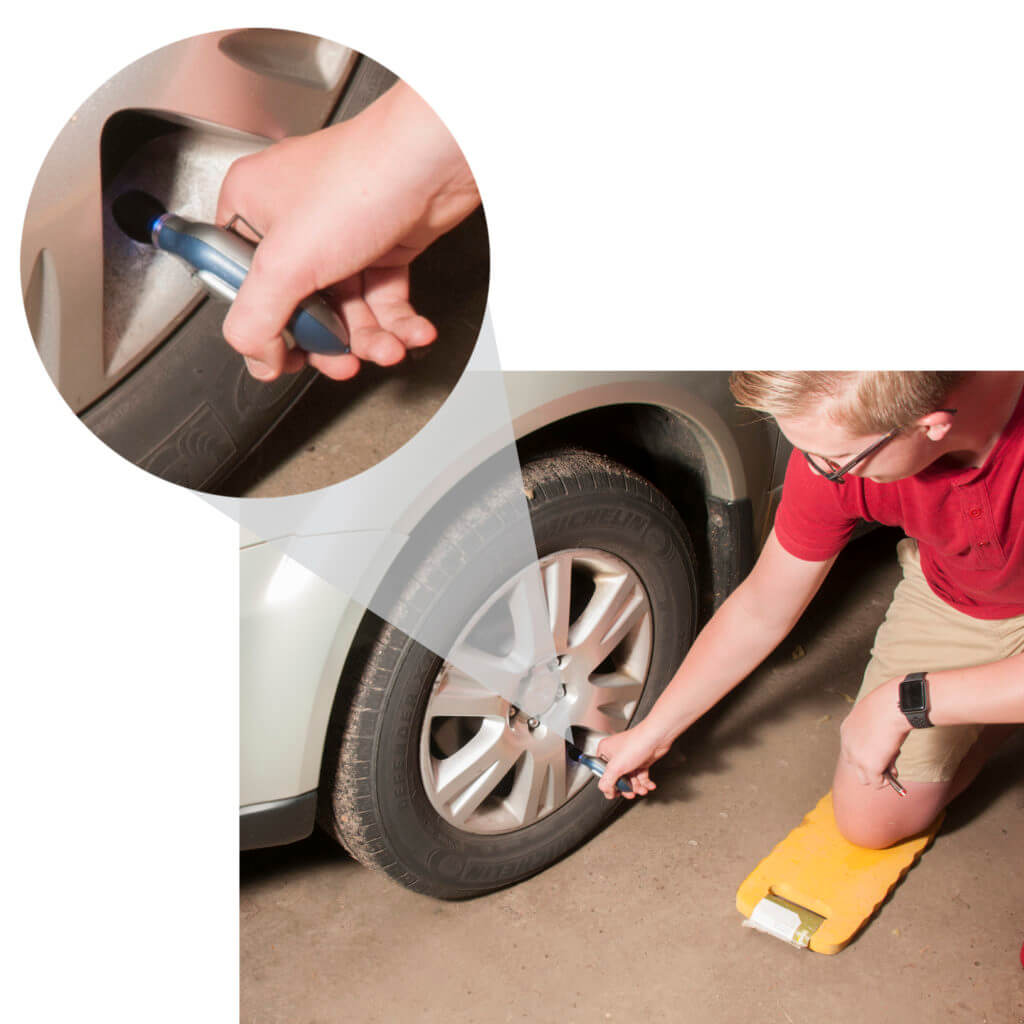
Step 1 Remove the valve stem cap
Unscrew the valve stem cap and put it in a safe place like your pocket. Do NOT place it on the ground. That’s the best way to lose it or for it to pick up dirt which can damage the tire valve.
Don’t lose the valve stem cap. Put it in your pocket
The valve cap isn’t just for looks; it is a critical part of the tire valve because it keeps dirt out of the tire valve. Plus, if the cap is metal, it’s often a critical part of the tire pressure sensor’s antenna. If your car or truck comes with a metal cap, do NOT replace it with a plastic style.
Step 2 Position the tire pressure gauge
Align the tire pressure gauge directly above the valve so you can force it straight onto the valve in one quick movement. If the gauge is misaligned, it’ll leak air out of the tire and you’ll get a false reading.
Step 3 Push the tire pressure gauge onto the valve
Push the digital or pencil gauge directly onto the valve. You’ll hear a quick spurt of air, and the digital gauge will register a reading, and a pencil gauge will extend the pressure scale. You don’t have a good seal if you hear air seeping out. Press the gauge  harder against the valve. Then, remove the gauge and read the tire pressure.
This gauge shows just 28-psi., 5-psi less than the car maker’s recommended pressure. So I’ll have to add air
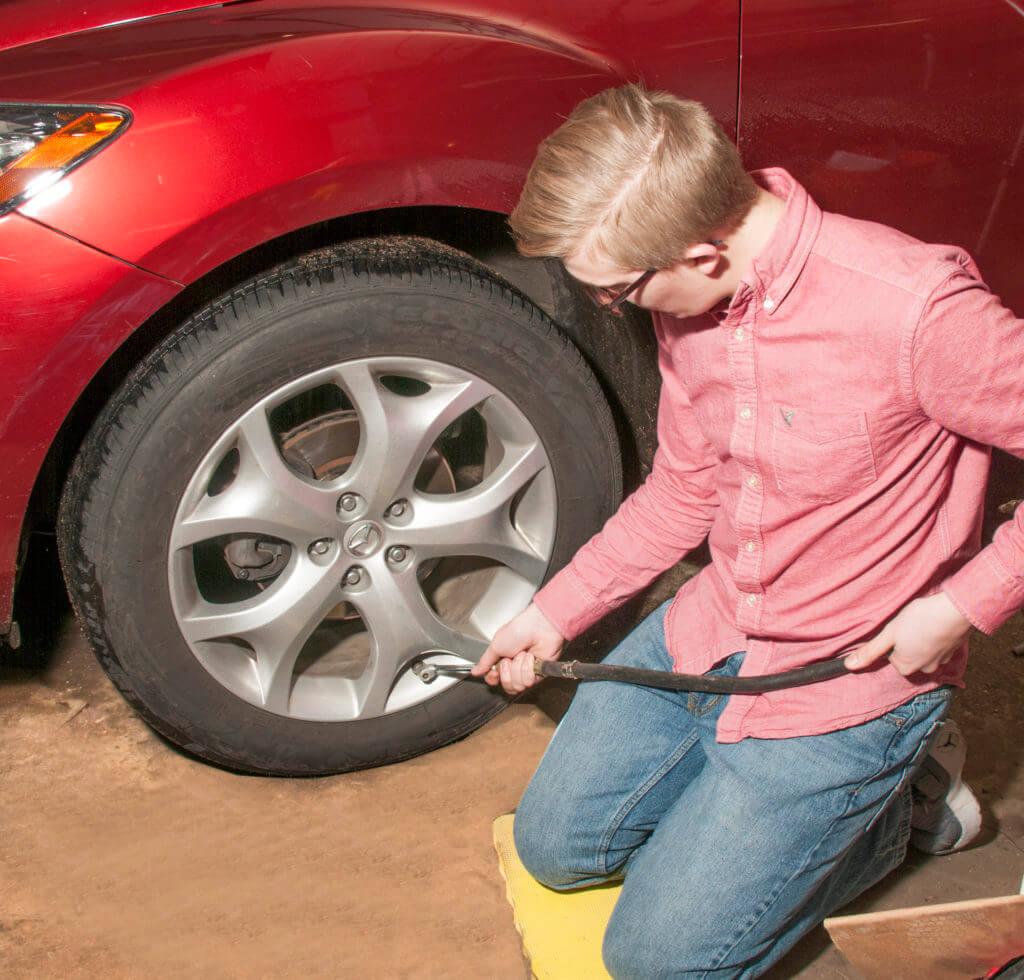
Step 4 Add air
Using the air hose from a gas station or your home compressor, push the air chuck directly onto the tire valve until you hear air flowing. This tire is 5-psi. low, so press the air hose onto the tire valve for about 5 seconds and then release. Then, recheck tire pressure with the gauge. If it’s still low, add more air. If it’s too high, release some air by depressing the pin in the center of the tire valve.
Finish the job by replacing the valve stem cap.©, 2019 Rick Muscoplat Alex Steil
Posted on by Rick Muscoplat