
How to Remove a Stripped Screw: Effective Tricks and Tips
Step-by-Step Guide: Removing a Stripped Screw
Whether it’s a flathead or Philips, we’ve all run across a stripped screw
 that is almost impossible to remove. But there are a few tricks to remove stripped screws that work. I’ll cover them in this post. If you’re dealing with a stripped bolt or stripped nut, see this post.
Tip #1 Get a better grip on a Philips head screw using kitchen cleanser
Grab a can of powdered sink cleanser, pour a small amount into the spoon, and add a couple of drops of water to form a paste.
 Push the paste into the stripped screw head and then try your screwdriver again. The gritty particles help the screwdriver grip the channels better.
Tip #2 Rust penetrant and a hammer to remove a stripped screw
If Tip #1 fails, it’s time to up your game. Soak the screw head with a high-quality rust penetrant. Let it soak for at least 15 minutes. After soaking, insert your screwdriver into the head and tap the screwdriver end with a hammer. This sets up vibrations that allow the rust penetrant to break up any rust, and it also helps the penetrant seep under the screw head and down into the screw threads. If light tapping doesn’t work, give the screwdriver a good smack with the hammer to shock the screw. Then try loosing.
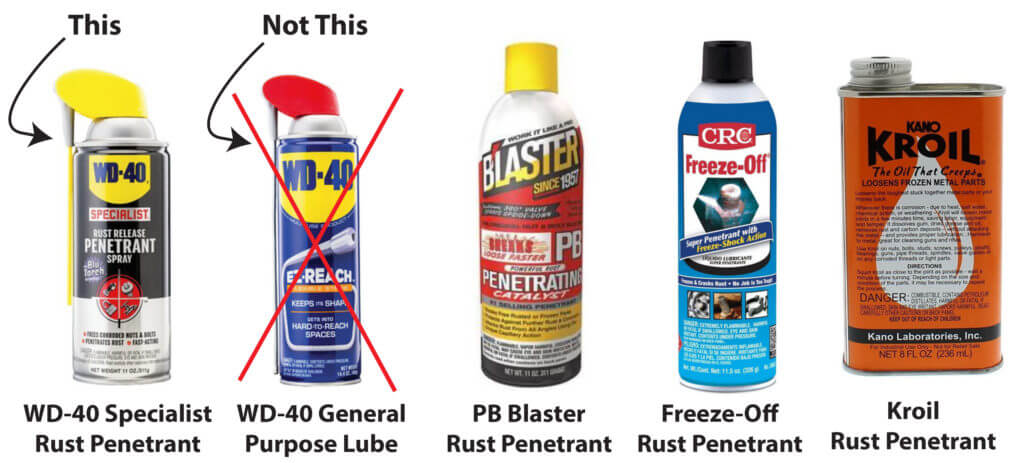
Best rust penetrants
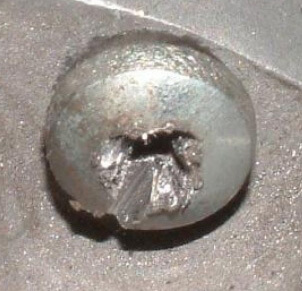
Tip #3 Cut a slot into the stripped screw head
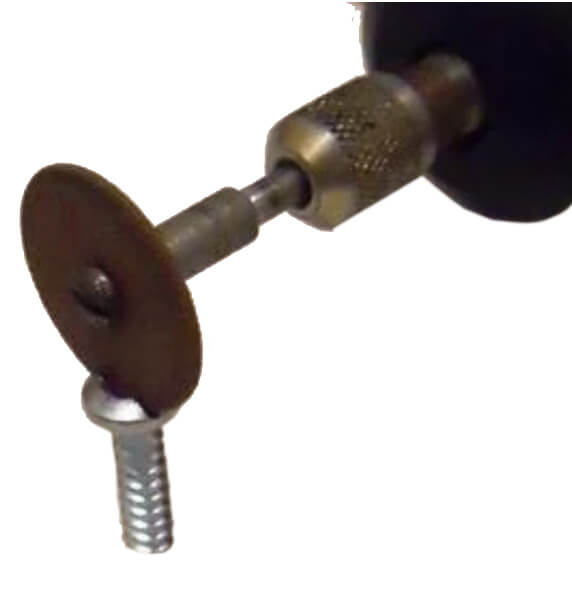 Yup, forget about trying to remove the screw using your Philips screwdriver. Break out a metal hacksaw blade or a rotary tool with a cutting wheel and just cut a straight slot deep into the screw head. Then use a flat-blade screwdriver to unscrew the screw. If you can’t come up with enough torque to turn the screw, see the next tip
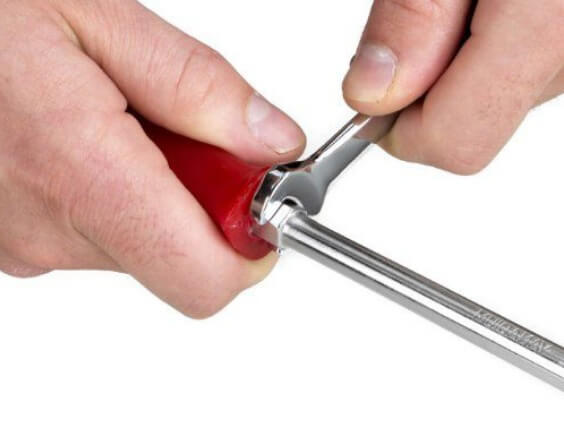
Tip #4 Slap a wrench on the screwdriver bolster
If you own a set of screwdrivers with hex bolsters, now is the time to use that feature. The bolster is used with a combination wrench to give you extra leverage to generate more torque. This image shows the user sliding the open end of a combination wrench onto the hex flats of the screwdriver. You can do that, but there’s a better way. Instead of using the open end of the wrench, slide the box end over the hex flats. The box end won’t slip off the screwdriver as easily as the open end.
Position the screwdriver in the screw head and locate the wrench on the flats so you’ll have maximum leverage to turn. Then lean into the screwdriver to prevent it from slipping and turn the wrench.
Tip #5 Purchase a reverse thread screw extractor kit
I’m not a huge fan of these tools because they don’t always work as well as advertised. But since they do work sometimes, I’m including them, but further down the list.
A damaged screw head extractor kit comes with an assortment of combination bits. One end of the bit contains a reverse thread drill to drill deep into
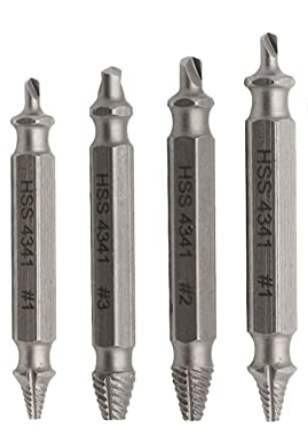
Screw extractor set
the screw head. Many times the counter-clockwise force from the drilling can loosen the screw head, so you don’t have to use the extractor end of the bit. However, if that doesn’t work, flip the bit around and use the reverse thread extractor. Using your drill, start slowly and engage the reverse threads into the newly drilled hole. The reverse threads will dig into the hole and begin loosening the screw. The most common mistake DIYers make is to run the drill too fast. That will just strip out the hole faster. Go SLOWLY
Remove a stripped hex head screw
Many of the tips listed above also work with stripped hex head screws, cleanser, rust penetrant, and hammer, reverse thread extractor, and cut a slot.
But there’s another trick. If you have a set of Torx or star bit, simply find a bit that’s slightly larger than the stripped hex head and pound it straight into the stripped hex head screw. The sharp edges of the Torx bits will cut new channels into the screw head.
Use a pliers
If you’re trying to remove a pan head screw and none of these techniques work, try grabbing the edge of the screw with a locking plier. That works sometimes but can also damage the surrounding area.
Finally, drill out the stripped screw head
If all else fails, choose a drill bit the same diameter as the screw head and drill straight into the head until all that’s left is the shank of the screw. Remove the attached components so only the shank is exposed. Then, soak the shank with rust penetrant and grab it with locking pliers to remove it.
©, 2020 Rick Muscoplat
Posted on by Rick Muscoplat