How to Replace Rusted Brake Lines: A Step-by-Step Guide
Replacing Rusted Brake Lines Yourself: Essential Tips for Safe Repairs
If you own a mid-2000 Subaru, chances are you’ve got corroded and leaking brake lines. Subaru issued a recall and the recall involved replacing leaking brake lines and spraying an anticorrosive wax on the lines that weren’t leaking. But they spray the wax on top of the corrosion, so it really doesn’t work. So you’re stuck with replacing all the leaking Subaru brake lines. With the right tools, you can replace rusted Subaru brake lines for a fraction of what a shop would charge
Here are the parts and tools you need to replace rusted Subaru brake lines
- 25’ spool of S.U.R. & R. copper nickel brake line
- New flare fittings (remove one factory fitting and buy new ones from any auto parts store).
- Several auto-grade flare couple/unions to splice onto good portions of the factory lines
- A high quality inverted flare tool. (Titan Tools #51535 Flaring Tool or S.U.R. & R. PFT 409 Piston Grip Flaring Tool Kit)
- Bending pliers
- Tubing cutter
See this post to learn more about double flare tools.
See this post for general tips on replacing brake lines
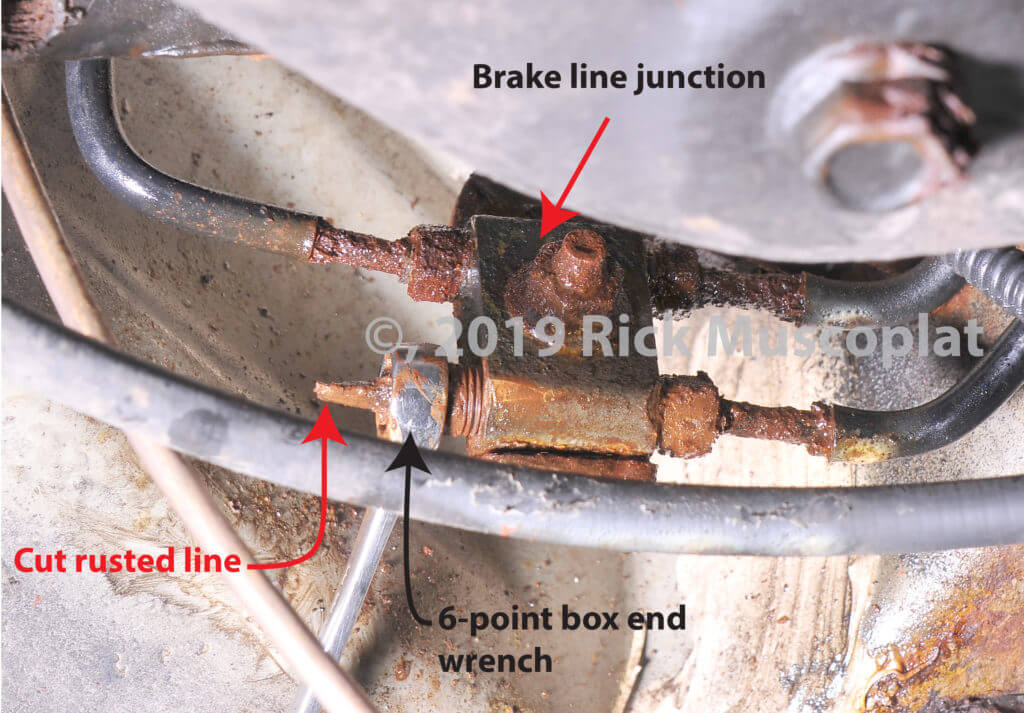
How to remove stuck brake flare fittings
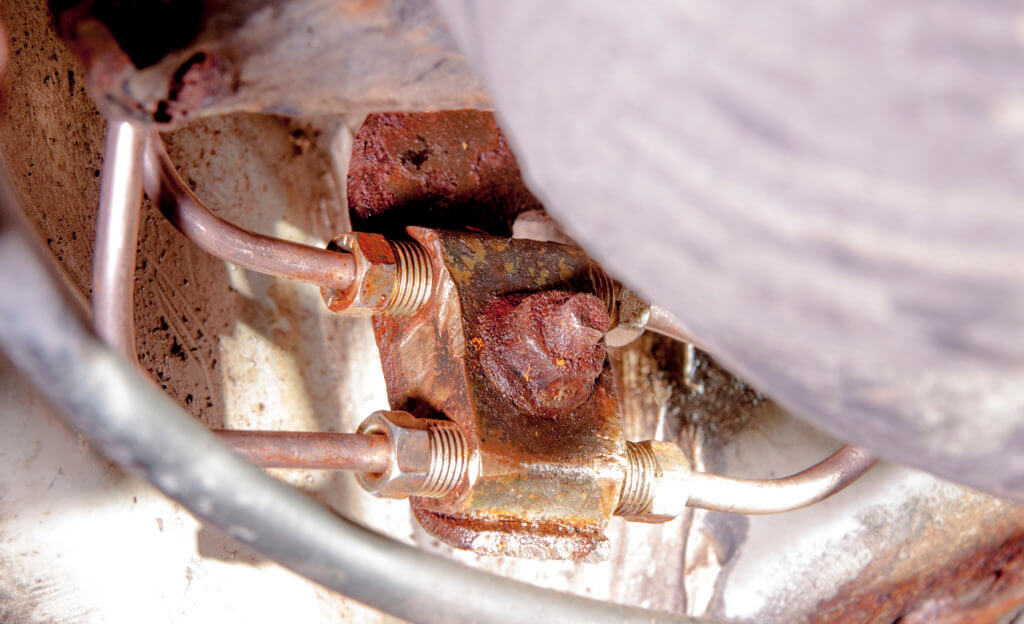
Many of the rusted brake line sections are near a junction like this one. The rusted flare nuts are hard to remove because the steel brake line is actually seized to the inside of the flare fitting. That’s not a battle you want to fight. Instead, cut the rusted line near the flare nut. Soak the fitting with rust penetrant like P.B. Blaster (NOT W.D. 40-which is not a rust penetrant). Then use a socket/ratchet or a 6-point box end wrench to remove the rusted flare nuts.
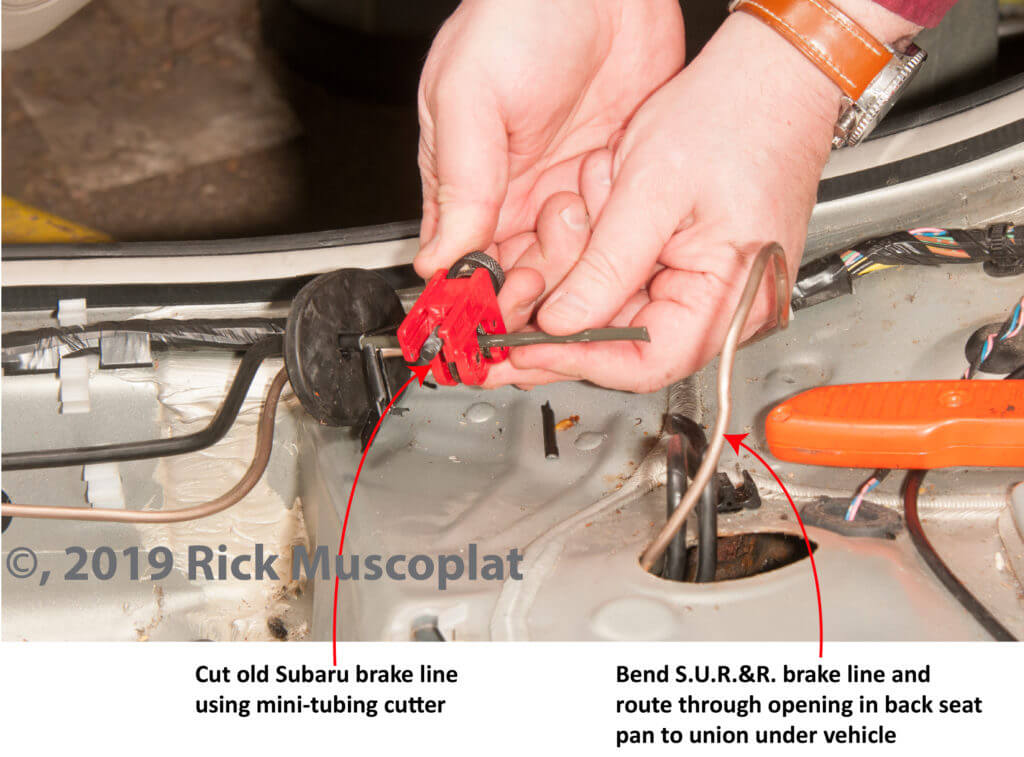
Remove the back seat and make the splice there
Route the fresh line from the junction block up into the back seat area. Cut the factory line using a small tubing cutter. See this post about making a brake line splice properly
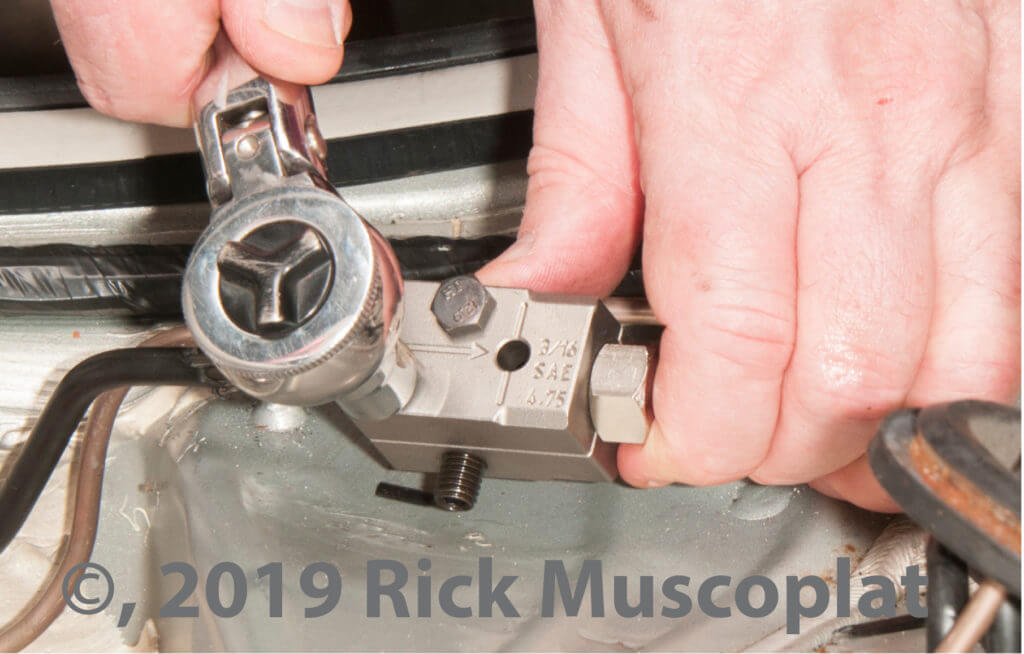
Make the inverted flare splice
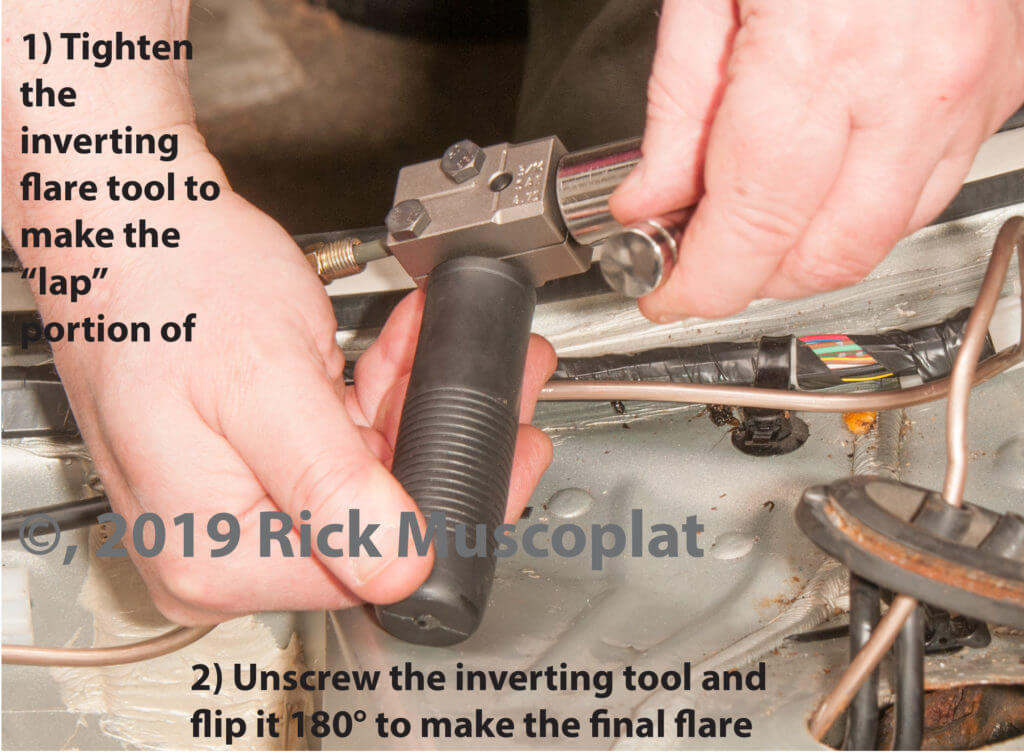
Using an auto-grade coupler/union, splice the new S.U.R. & R. line onto a good section of the factory line under the back seat. Load the recently cut line into the flaring tool and set the depth using the inverting tool. Then tighten the flaring tool using a socket/ratchet or wrench.
Install the holding handle onto the flaring tool and tighten the inverting flare tool using a socket and ratchet. Once the inverting flare is made, unscrew the inverting tool and flip it 180° to make the final flare. See this post for more information about making an inverted flare with the Titan Tool flaring tool.

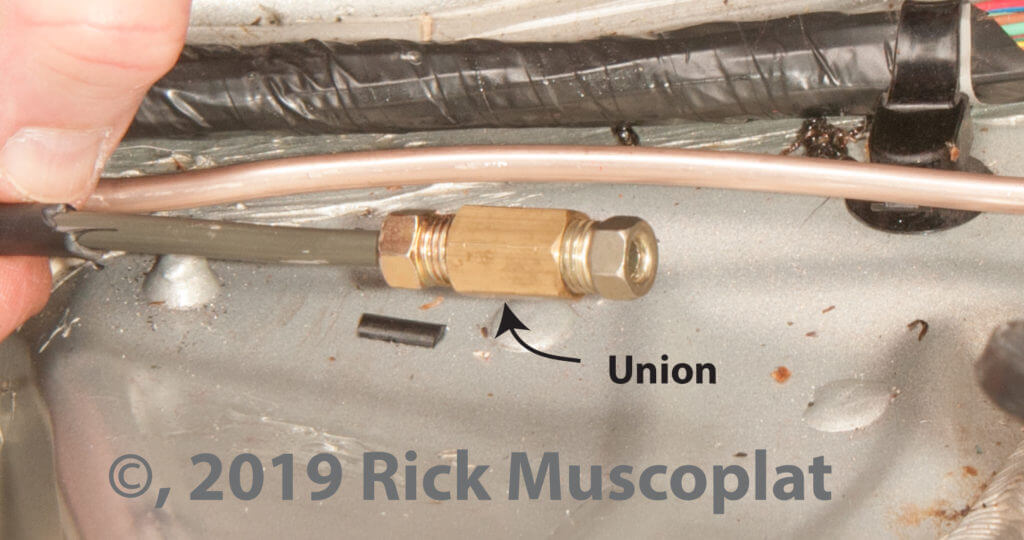
Add the union and make the splice
Connect the newly flared factory brake line to the union and tighten. Repeat the procedure on the new brake line coming up from the junction block—invert, flare and tighten.
Brake line bending tips
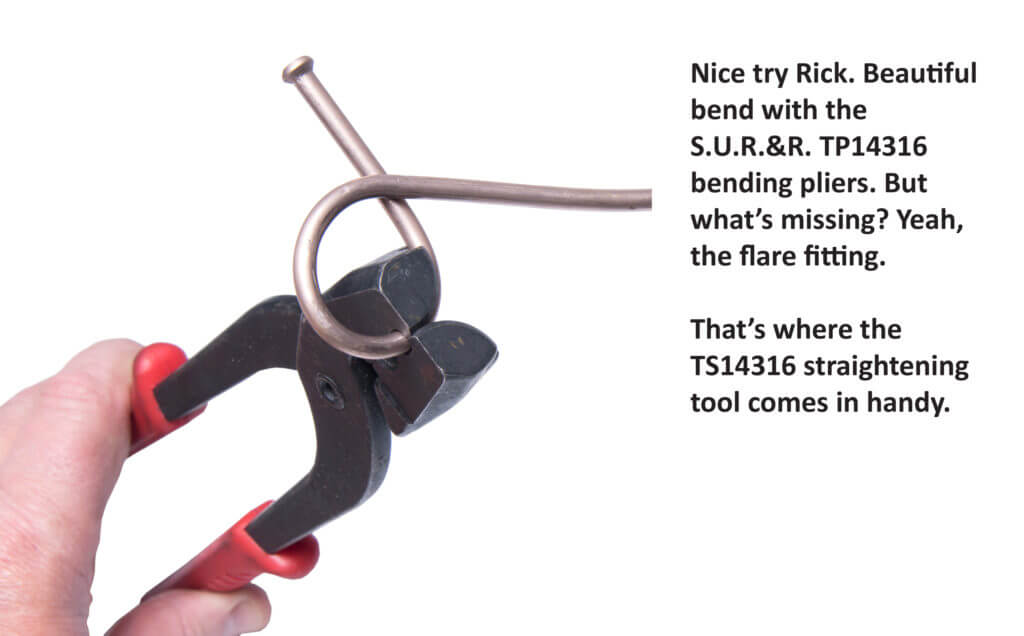
The S.U.R.& R. brake line is easy to bend by hand for large diameter bends. But you’ll need a bending pliers to make really tight bends near the junction block and at the calipers.
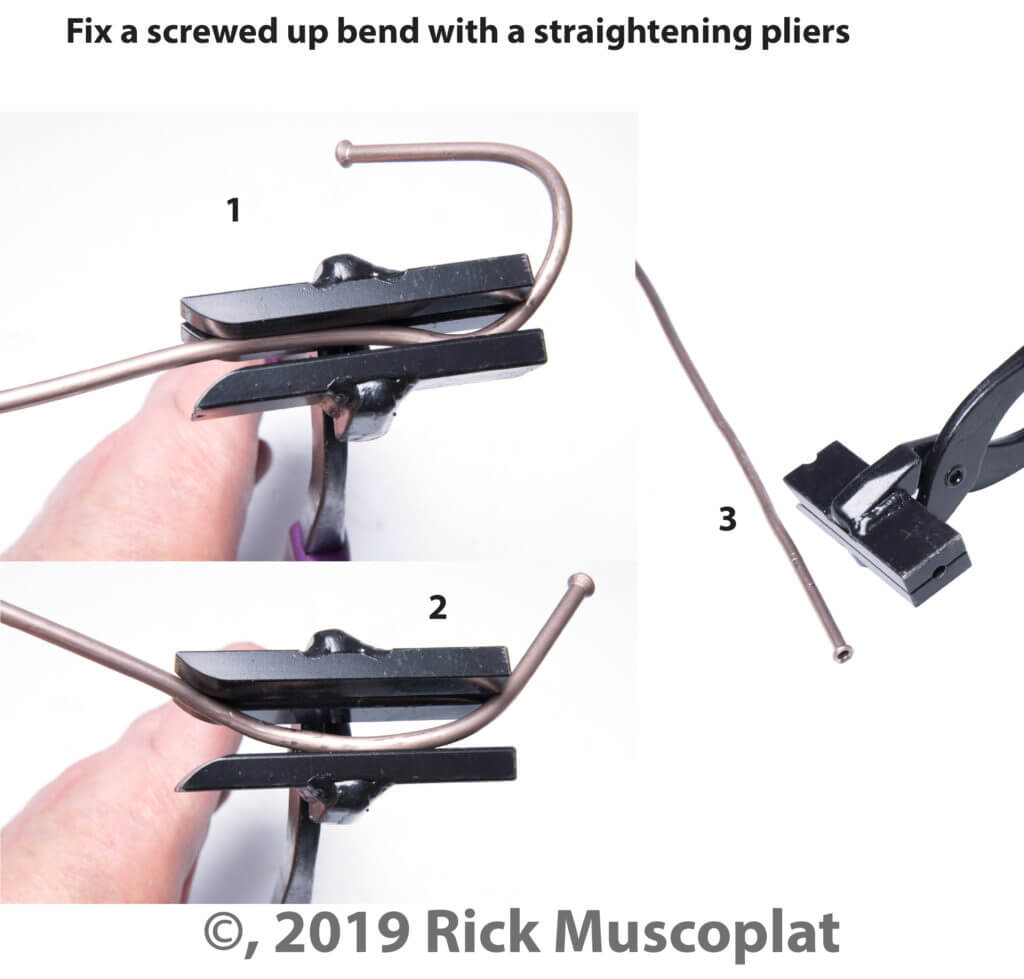
Brake Line Bending TIP #1
PRACTICE. Bending brake line is an art. The best part about using copper/nickel brake line is that you can fix your mistakes with straightening pliers. See this post for more information on brake line bending tools.
Bending TIP #2
Always make the double flare before bending. You’ll won’t be able to fit the flaring tool onto the line after it’s bent.
Make 90° bends and connect to the Subaru brake line junction block
Install new flare nuts, make the inverted flare, and run the new line down to the junction from the back seat area. Then make the 90° bends using bending pliers. Connect to the junction and tighten using a flare nut wrench.
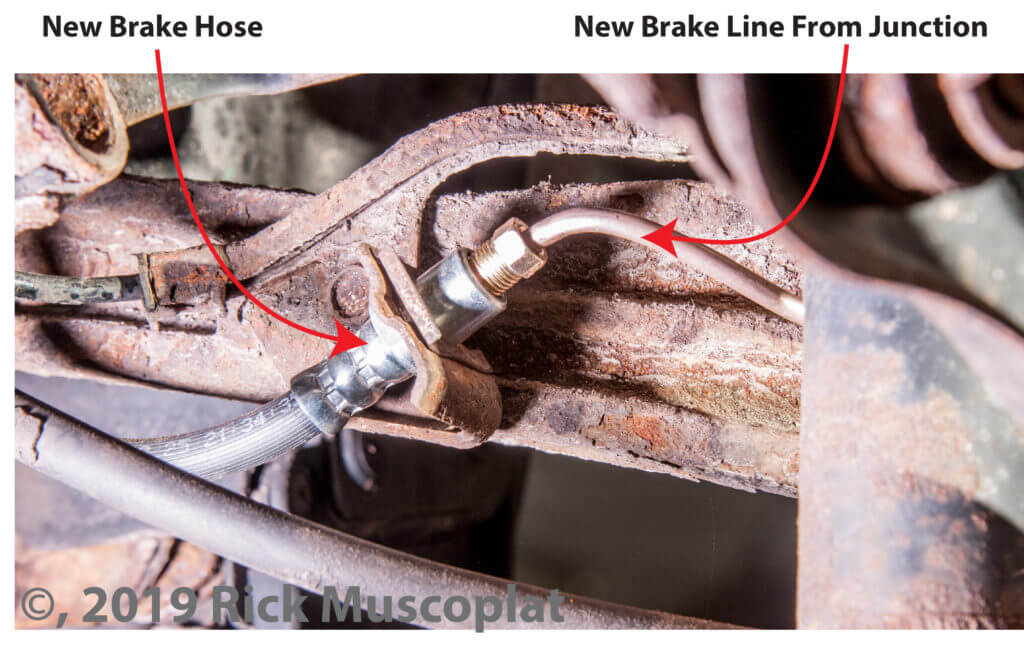
Connect new Subaru brake line to the brake hose
Install the new brake hose to the caliper and install into the bracket. Then bend the new line (with flare and flare fitting already done) to fit into the hose.