
Water pump replacement tips
Professional tips for water pump replacement
If you’re doing a water pump replacement, follow these tips from the pros for the best installation and longest lasting repair.
Find out why the old water pump failed BEFORE you install a new water pump
This is especially important if your water pump failed early, like less than 125K miles. Don’t assume your old water pump failed “just because.” Here are the top reasons water pumps fail early
• Neglecting coolant changes. Old worn out coolant can’t protect
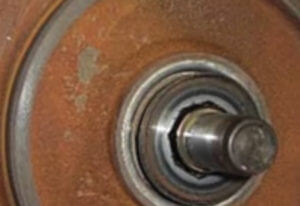
Rusted water pump
against corrosion, so it wears out seals and bearings and causes rust. Worn coolant also contains acid that can attack plastic components. Test your old coolant with coolant test strips before draining the system to see if it played a part in your water pump’s demise.

Coolant test strips measure water/coolant ratio, pH and acid reserve.
• Low coolant level. This causes cavitation. To understand what cavitation does, see this post
• Leaks and worn radiator cap. Anything that causes a loss of cooling system pressure will result in a lowered boiling point and that causes cavitation
• Spinning the new pump when it’s dry. YES. Resist the urge to rotate the pump when you pull it out of the box. Spinning a new pump when it’s dry can damage the seals even before you install it.
• Refilling with the wrong coolant. Don’t use a universal coolant. Wanna know why? See this post on universal coolants and why they’re wrong for your engine.
• Using gasket sealant, or using too much sealant. Trust us, you’re using it when you shouldn’t and you’re using too much
Flush your cooling system BEFORE doing a water pump replacement
I know that sounds like a waste of time, but the last thing you want is all that crud flowing into the new water pump seal and bearing. You don’t have to flush with new coolant, water is fine since you’ll be replacing it with coolant. But flush it!
If you re-use the old coolant, the new water pump will fail early!
Prepare the surface
This is the #1 mistake made by DIYers.
They either don’t clean well enough or they use a metal scraper on the mounting surface and gouge it. If you can’t get the old gasket off, use a spray gasket remover and a PLASTIC scraper. Wash off the mounting surface with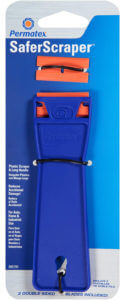 brake cleaner to remove oil and gasket remover.
Which gasket sealer should you use on a water pump?
NONE! You heard me, NONE. The only time you should use a gasket sealer on a
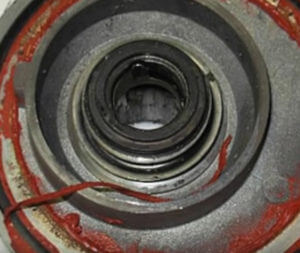
This is what happens when you use RTV sealant on a water pump
water pump is if the manufacturer specifically tells you to, and the only time they do is if they’re providing a metal gasket.
If the water pump comes with a rubber, paper, or paper/rubber combination gasket, they’re meant to be installed DRY. DRY, get it? As long as the mounting surface is clean and you use the proper torque and torque sequence, these gasket don’t need sealant. And, adding sealant can actually reduce water pump life.
Get torque specs and torque pattern before doing a water pump replacement
Water pumps are castings made from fairly soft metal. Yet the fasteners are steel bolts. If you use the wrong torque or the wrong torque pattern, you can distort or warp the casting and cause leaks.
Spin the water pump before installing the belt
Once the system is filled with fresh coolant, spin the water pump by hand about 12 turns to work the coolant into the seal and bearing. This prevents a high RPM spin on a dry bearing the instant you start your engine. Once you complete this pre-lube, install the belt.
Test the old pressure cap or replace it
That’s right, the radiator or reservoir cap is a CRITICAL 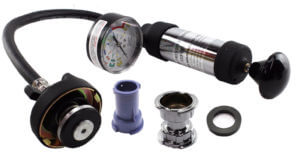 component to maintaining the proper cooling system pressure and preventing cavitation. If you don’t have a tester, rent one. OR, just install a new radiator cap.
©, 2018 Rick Muscoplat
Posted on by Rick Muscoplat