
How to Change Your AC Compressor Without Ruining Your System
DIY Guide: Change Your AC Compressor the Correct Way
Quick Summary
If you want to change your AC compressor correctly, you must follow a strict process—no shortcuts.
• Always drain and measure the oil from the old unit. Drain the oil from the new compressor and add back the amount of new oil you measured from the old compressor.
• Replace the condenser and receiver/drier to prevent contamination failure.
• Flush the system before installing the new compressor.
• Never vent refrigerant—have it professionally evacuated and recharged.
Most compressor failures are caused by contamination or improper oil balance—not the compressor itself.
Why Most DIYers Get It Wrong When They Change Their AC Compressor
I’ll be blunt—most people who attempt to change their AC compressor for the first time focus only on swapping the part. That’s the biggest mistake I see.
In reality, the compressor is just one part of a sealed, oil-balanced system. If you don’t address contamination, oil distribution, and moisture control issues properly, your new compressor can fail within a matter of weeks.
I’ve seen it happen countless times. The system cools… briefly. Then the new compressor locks up, and now you’re doing the job all over again.
If you want to change your AC compressor like a professional, you have to treat the entire system—not just the component.
Step 1: Properly Evacuate the Refrigerant (Don’t Skip This)
Before you even touch a wrench, the system must be evacuated. This is not optional. It’s illegal and environmentally harmful to vent refrigerant. But more importantly, when you have a professional evacuate the system, they’ll measure how much oil came out with the refrigerant. Then you’ll know how much to put back.
That oil measurement is critical, especially if you’ll be reusing the condenser, lines, and evaporator. When I change an AC compressor, I always use that oil measurement as my baseline. Too little oil destroys internal components. Too much oil reduces cooling efficiency.
This is one step I strongly recommend having a shop handle if you don’t have recovery equipment.
Step 2: Remove the Old Compressor and Measure the Oil
Once the system is empty, I carefully remove the compressor.
Here’s how I approach it:
• Remove the belt
• Disconnect AC lines
• Unbolt the compressor
• Drain the oil into a measuring container. Note how much oil comes out.
I don’t rush this. I rotate the compressor shaft and tilt it to extract every drop. That oil measurement is your blueprint for the new install. If you skip this step when you change your AC compressor, you’re guessing—and guessing kills compressors.
Step 3: Set the Correct Oil Charge in the New Compressor
Most new compressors come pre-filled—but that’s where people get into trouble. The amount the factory installs is the total amount of oil for the complete system. The compressor manufacturer assumes you’ll be replacing all the components. If you don’t adjust the amount of oil in the compressor, chances are your AC will be overfilled with oi.
Here’s exactly what I do when I change an AC compressor:
• Drain all oil from the new unit
• Using the measurement from the old compressor, add that amount of new oil back into the replacement compressor.
If you’re not replacing any other components, this method will keep the system oil balanced.
• Too much oil = poor cooling
• Too little oil = compressor failure
Example: You drained the old compressor, and 2.5 ounces came out. You drained the new compressor and saved the new oil in a clean container. Now, pour 2.5 ounces of the new oil back into the new compressor. The new compressor will now have the same amount of oil as the old compressor. For a more detailed description with images, see this post.
Step 4: Replace the Condenser (This Is NOT Optional Anymore)
Modern condensers are not like older ones. They use microchannel designs that trap debris internally. You can’t flush them effectively. So when I change an AC compressor, I automatically replace the condenser. No debate. Condensers don’t cost that much, and they’re a critical component. So it makes sense to avoid the risk associated with a contaminated/clogged condenser when replacing the compressor.
If you don’t replace it, leftover debris from the failed compressor will circulate right back into your new one—and destroy it.
Step 5: Replace the Receiver/Drier or Accumulator
This is another step people try to skip—and it always comes back to bite them. The receiver/drier (or accumulator) contains a desiccant that absorbs moisture. Once it’s exposed to air, it’s done.
When I change an AC compressor, I always install a new one because:
• It prevents moisture contamination
• It protects internal components
• It’s often required for warranty coverage
It’s a cheap part that saves an expensive failure.
Refer to this article to learn how much oil to add to the system when replacing parts.
Step 6: Flush the System Thoroughly
Now we’re getting into what separates a proper repair from a shortcut job. Before installing the new compressor, I flush:
• AC lines
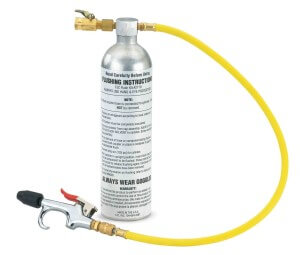
Flush it with an AC-compatible flush kit.
• Evaporator
I use a proper AC flush solvent and compressed air—not brake cleaner, not guesswork.
This step removes:
• Metal particles
• Sludge
• Old oil residue
If you don’t flush when you change your AC compressor, you’re installing a new part into a dirty system.
That never ends well.
Step 7: Install the New Compressor Correctly
Now—and only now—do I install the new compressor.
Here’s what I focus on:
• Use new O-rings or seals
• Lubricate seals with the correct refrigerant oil
• Torque bolts properly
• Reconnect electrical connectors
This part is straightforward, but attention to detail matters. A pinched O-ring or loose connection can undo everything you’ve done up to this point.
Step 8: Evacuate and Recharge the System Properly
Once everything is installed, the system must be:
• Pulled into a deep vacuum
• Held to check for leaks
• Recharged with the exact specified refrigerant weight, not pressure
I never “top off” a system. When I change an AC compressor, I use a scale—every time. Too much or too little refrigerant affects pressures, cooling, and compressor life.
My Professional Take on Compressor Replacement
If there’s one thing I want you to understand, it’s this:
When you change your AC compressor, you’re not replacing a part—you’re restoring a system.
Most compressor failures aren’t random. They’re caused by:
• Low oil due to a refrigerant leak
• Contamination due to air and moisture in the system
• Improper recharge procedures
If you follow the process I’ve outlined, you’ll avoid all of those issues and end up with a repair that lasts.
Cut corners, and you’ll be doing the job again.
TIP: Have a shop evacuate the air from the system, then recharge it using an AC refrigerant scale. See this chart for the proper amount of refrigerant to add if you’ve replaced the receiver/dryer and condenser.
©, 2020 Rick Muscoplat
Posted on by Rick Muscoplat