
How to Replace an Inner Tie Rod: Step-by-Step Guide
Inner Tie Rod Replacement: Everything You Need to Know
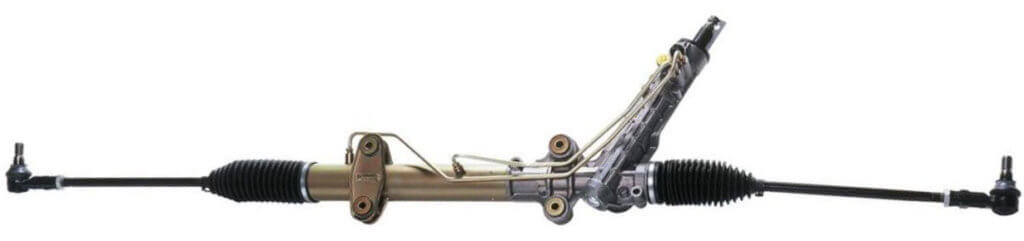
On a vehicle with rack and pinion steering, inner tie rods connect to each end of the rack. The inner end of the rod contains a ball and socket joint that allows the tie rod to pivot up and down as the wheel and tire move with each bump in the road. The inner tie rod joint assembly is completely covered with a rubber boot to protect it from the elements. However, when the joints wear, it creates slop in the steering. At that point, you have to replace your inner tie rods.
The inner tie rod actually consists of the rod and the inner tie rod end. You purchase the unit as a single piece. You can’t replace just the inner tie rod ball joint assembly.

How to diagnose a worn inner tie rod
The inner tie rod end ball joint is designed to rotate up and down in its socket, so up/down movement is normal. However, as the joint wears, you can detect in/out movement as you turn the wheel. The wear creates sloppiness in the steering. If you find you’re constantly correcting your steering to maintain direction, you may have a worn inner tie rod. Raise the vehicle, grab the tire in the 3:00 and 9:00 position, and wiggle the tire. Look for in/out movement on the inner tie rod. If you see movement, the inner tie rod is worn and must be replaced.
How to replace an inner tie rod
Replacing the inner tie rod requires special tools like an inner tie rod removal wrench set and a pin punch.
Start by removing the outer tie rod end from the steering knuckle. Then, remove the outer tie rod end from the inner tie rod by unscrewing it. You must remove the outer tie rod end in order to remove the protective boots from the rack and the inner tie rod.
Turn the steering wheel to extend the rack to the side you’re working on. Hold the rack with a pliers while you unscrew the inner tie rod end.
Caution: Some inner tie rod ends are secured with a roll pin. If your vehicle has a roll pin, remove it before attempting to unscrew the tie rod end.
Install the new tie rod following the directions in the shop manual. Apply a thread locker to the tie rod end threads when needed and torque them to the specified value. Reinstall the roll pin if needed.
Install the outer tie rod end and have the vehicle aligned.
Inner tie rod replacement cost
Installation costs vary by year, make, and model and the labor cost depends on the working space in the vehicle. But here’s the inner tie rod replacement cost for a 2012 Chevrolet Malibu
The inner tie rod part costs $120 for a genuine GM part
Labor: one side 1.2 hours, both sides 1.8 hours plus an alignment
At an hourly labor rate of $110/hr, the inner tie rod replacement cost would be around $528 for both sides (including an alignment).
©, 2021 Rick Muscoplat
Posted on by Rick Muscoplat