
How to Install and Repair a Toilet Flange
Common Toilet Flange Installation Mistakes
Quick Summary
If your toilet rocks, leaks around the base, or won’t stay securely bolted to the floor, there’s a good chance the toilet flange is the culprit. In this guide, I’ll explain how to install a toilet flange, when a toilet flange repair is sufficient, and when replacement is the only smart option. You’ll also learn the correct toilet flange height, the most common installation mistakes, and the best repair methods for cracked, corroded, or improperly positioned flanges.
How to Install and Repair a Toilet Flange
After decades of working around plumbing repairs and home improvement projects, I’ve learned that many toilet problems trace back to one small component hidden beneath the toilet: the toilet flange.
What Is a Toilet Flange?
A toilet flange serves two critical functions:
1) Connects the toilet to the drain pipe
2) Anchors the toilet securely to the floor
Without a properly installed flange, the wax ring can’t seal correctly, and the toilet can move every time someone sits on it. Over time, that movement can damage flooring, loosen bolts, and cause leaks.
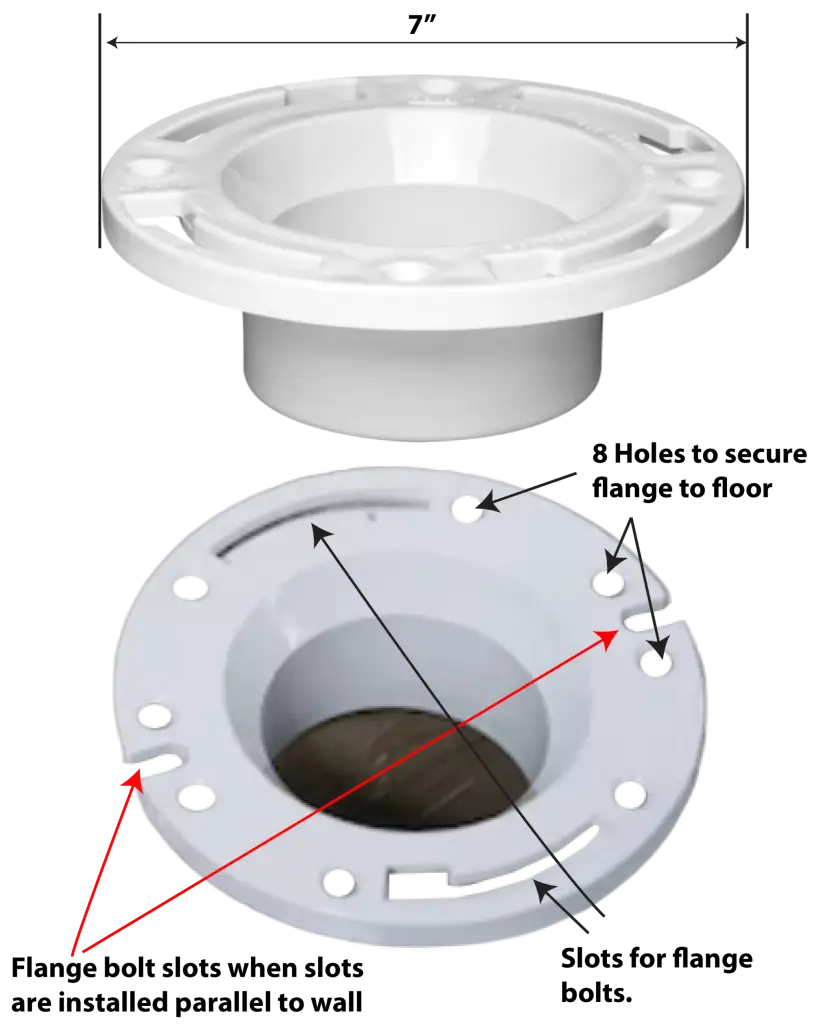
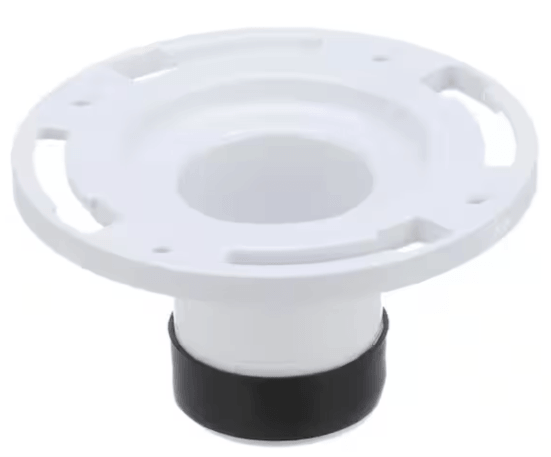
Typical plastic toilet flange
The Correct Toilet Flange Height
One of the most searched plumbing questions is: What is the proper toilet flange height? You’ll see lots of answers saying it should be flush with the floor. Not true. The official recommendation for a toilet flange is this:
The top of the flange should sit directly on TOP of the finished floor.
This image from flange manufacturer Oatey shows the correct installation of a toilet flange on top of the finished floor. The flange is about 1/4″ thick. When you add a normal wax ring and set the toilet, you’ll get the perfect amount of wax spread to create a water-tight seal.
That means:
• Above tile
• Above vinyl flooring
• Above laminate flooring
• Above finished hardwood
Many flange problems occur after a bathroom remodel when new flooring is installed around an existing flange.
Signs Your Toilet Flange Is Too Low
• Toilet rocks after installation
• Wax ring leaks
• Sewer odors appear
• Water stains around the toilet base
If the flange sits below the finished floor, you can correct the problem with:
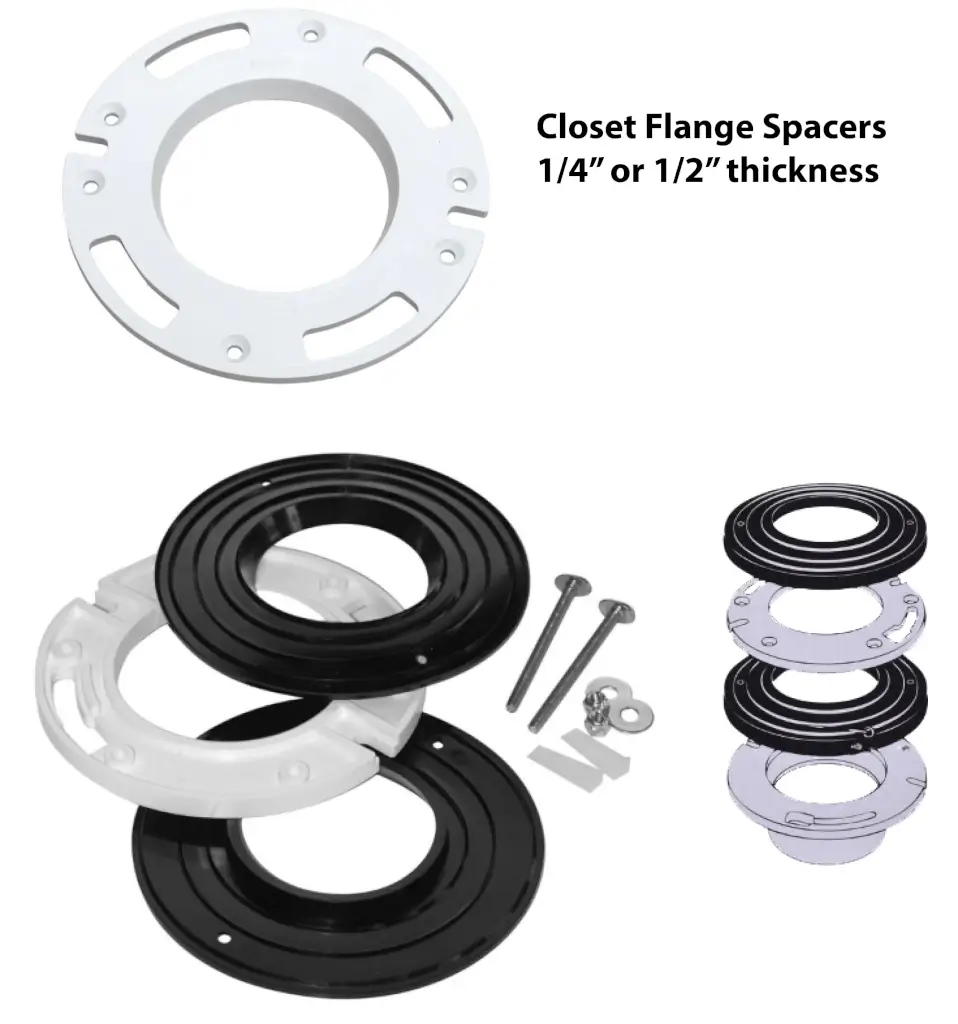
• Toilet flange spacers
• Flange extender kits
• Repair rings
These solutions are usually much easier than cutting out and replacing the entire flange.
Step-by-step guide to installing toilet flange spacers
1) Thoroughly clean the old flange — Scrape off all old wax residue from the flange surface. Use a hair dryer to melt the wax to speed up the process. Use a spray household cleaner to remove any remaining wax or debris.
2) Inspect the existing flange carefully for cracks or broken slots — Spacers are not designed to compensate for a cracked or otherwise compromised flange. If your current flange is cracked or heavily corroded, replace it before continuing.
3) Measure how much additional height is needed to bring the top of the spacer assembly flush with the finished floor.
4) Secure the spacer to the flange and floor — Insert the extra-long toilet bolts. Apply 100% silicone sealant between the top of the existing flange and the bottom of the spacer. If you’re using a kit with gaskets, apply 100% silicone to both sides of the bottom gasket. Then add the plastic spacer. Apply silicone to the top of the plastic spacer and then apply the top gasket.
5) Affix the washers and nuts —Install the flat washers and 1/4″ nuts onto the bolts to compress and lock the assembly in place. For added stability, secure the spacer or spacers to the subfloor using the four pre-molded holes.
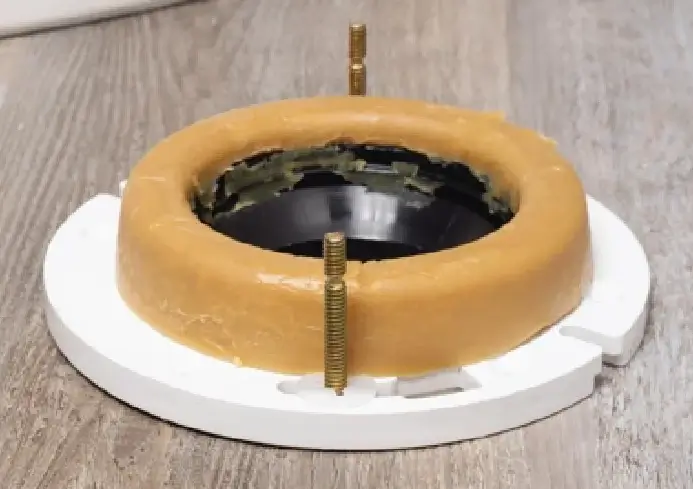
6) Install a wax ring — Use a normal height wax ring and complete the toilet installation normally.
Important: Never substitute one of the kit seals for the wax ring. Without a proper wax seal, the toilet will leak every time it is flushed.
How to Inspect a Toilet Flange To Determine If It Requires Repair
Clean the flange and look for:
1) Cracks — Plastic flanges commonly crack around:
• Bolt slots
• Mounting holes
• Outer ring
2) Corrosion — Metal and cast-iron flanges can rust severely.
Watch for:
• Missing metal
• Flaking corrosion
• Loose closet bolts
• Broken Bolt Slots
If the closet bolts no longer stay secure, the toilet cannot remain stable.

The cracked and rusted toilet flanges must be repaired before setting the toilet
3) Rotting Subfloor — Repair the floor before reinstalling the toilet. A flange is only as strong as the floor beneath it.
If you find:
• Soft plywood
• Water damage
• Rotting OSB
Toilet Flange Repair Options
Not every damaged flange requires replacement. In many cases, a repair kit provides a permanent solution.
Repair Rings — Many professional plumbers use repair rings because they eliminate the need to remove the existing flange. A stainless-steel repair ring is often the best solution when:
• The flange body is intact
• Bolt slots are broken
• The metal ring has corroded
Repair rings:
• Restore bolt retention
• Strengthen the flange
• Prevent future corrosion
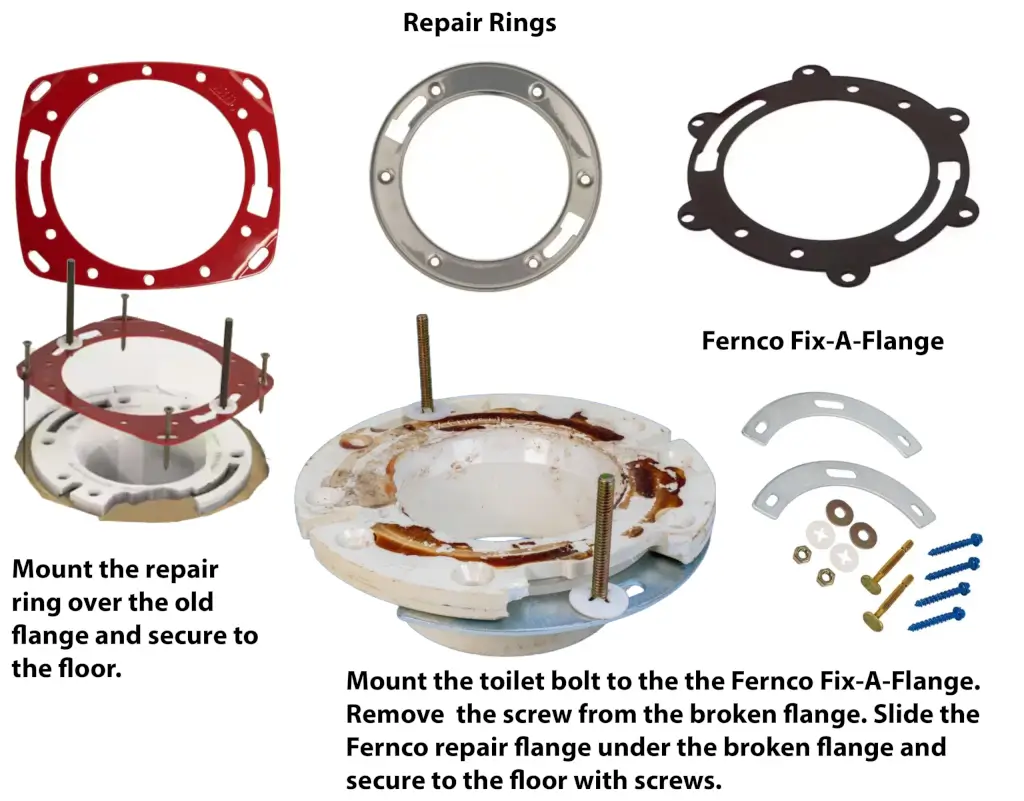
Common flange repair rings
Inside-Fit Repair Flanges
When removing the original flange is difficult, an inside-fit replacement flange can be installed inside the existing drain pipe. These are particularly useful when the original flange is embedded in concrete.
Advantages include:
• No demolition required
• Fast installation
• Reliable seal
Inside fit toilet flange
When Toilet Flange Replacement Is Necessary
Sometimes repair isn’t enough. In these situations, replacement is the only long-term fix. Trying to patch a severely damaged flange often leads to leaks and additional repairs later.
Replace the flange when:
• More than half the flange is broken
• The hub connection is cracked
• Cast iron has severe corrosion
• Closet bolts won’t hold securely
• Previous repairs have failed
How to Install a New Toilet Flange
Step 1: Remove the Old Flange — Disconnect the toilet and remove:
• Wax ring remnants
• Old bolts
• Damaged flange components
Step 2: Clean the pipe thoroughly.
Step 3: Verify the Finished Floor Height — Always determine the finished floor height before installing the flange. This is where many DIY installations go wrong. The flange installs on top of the finished floor.
Step 4: Test fit and align the new flange — Position the flange so the closet bolt slots are:
• Centered left and right
• Parallel to the back wall
Mark the flange and the floor using a Sharpie, so it’s fully aligned as you twist it into place during the next step
Step 5: Glue the flange to the closet bend — Use the proper glue for the materials; ABS glue for ABS pipe or PVC primer and PVC glue for PVC materials. TIP: Heavy-duty PVC glue is thicker and a bit slipperier than regular PVC glue, and it stays “open” a bit longer. That makes it easier to push and rotate the flange into place.
Step 6: Secure the flange to the floor and install the closet bolts. Use corrosion-resistant screws and test the flange to make sure it doesn’t move.
Step 7: Install a New Wax Ring — Never reuse an old wax ring. If the height is correct, install a standard wax ring
Step 8: Set the toilet — Lift the toilet over the closet bolts and align before setting the toilet down onto the wax ring. Then apply pressure, making sure you feel the resistance as the wax ring spreads. Tighten the closet bolt nuts and apply the decorative caps.
Avoid These Common Mistakes
Here are the mistakes I see most often.
Stacking Wax Rings — This is a temporary fix that frequently fails. Use spacers or extenders instead.
Installing the Flange Too Low — Improper toilet flange height causes:
• Leaks
• Rocking
• Seal failures
• Ignoring Subfloor Damage
A damaged floor will eventually destroy even a new flange.
Reusing Old Hardware — The cost is minimal compared to removing a leaking toilet later. Always replace:
• Closet bolts
• Wax rings
• Corroded fasteners
Final Thoughts
Most toilet flange problems are easier to fix than homeowners expect.
If the flange body is still solid, a toilet flange repair using a repair ring or extender often solves the problem permanently. However, when corrosion, cracks, or structural damage affect the pipe connection itself, replacement is the better long-term solution.
Most importantly, always pay attention to toilet flange height. A flange installed on top of the finished floor creates the strongest connection, the best seal, and the lowest chance of future leaks.
Get the flange right, and your toilet installation will likely remain leak-free for decades.
©, 2026 Rick Muscoplat
Posted on by Rick Muscoplat