
Tail lights not working but brake lights are: Here’s the fix
Troubleshooting Guide: Tail Lights Not Working But Your Brake Lights Work
Many automobile manufacturers utilize dual filament bulbs for brake lights and tail lights. The brighter filament serves the brake lights and turn signal function, while the smaller, dimmer filament is designated for the tail lights. If your tail lights don’t work but the brake lights do, one of the filaments within the dual filament bulb has likely burnt out.
In this image, you can see the dual filaments.
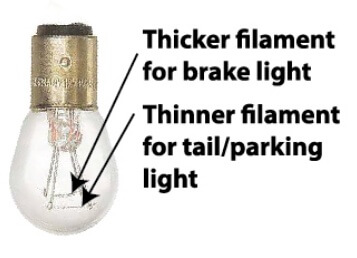
Dual filament bulb
Step 1: Remove the bulb and check for a burned-out or broken filament
If only one side isn’t working, chances are that the bulb is bad, so remove the bulb and inspect it.
While you’re doing that, check for corrosion inside the bulb socket. Look for green corrosion. If you find any, scrub it off with a small nail file. Once clean, try the new bulb. If it works, you’ve fixed the problem. But don’t stop there. Prevent further corrosion by applying a light coat of dielectric grease to the terminals in the socket. Find a small packet of dielectric grease at any auto parts store. Apply it with a cotton swap or the tip of a small screwdriver.
If the new tail light bulb doesn’t work, check for power and ground in the socket
If the new bulb doesn’t work, check for power in the bulb socket. 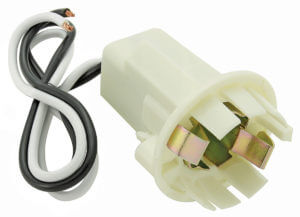
Use this test procedure if you’ve removed the bulb, and it only has a single filament (two wires coming into the socket). You’ll need an automotive test light or a digital multimeter.
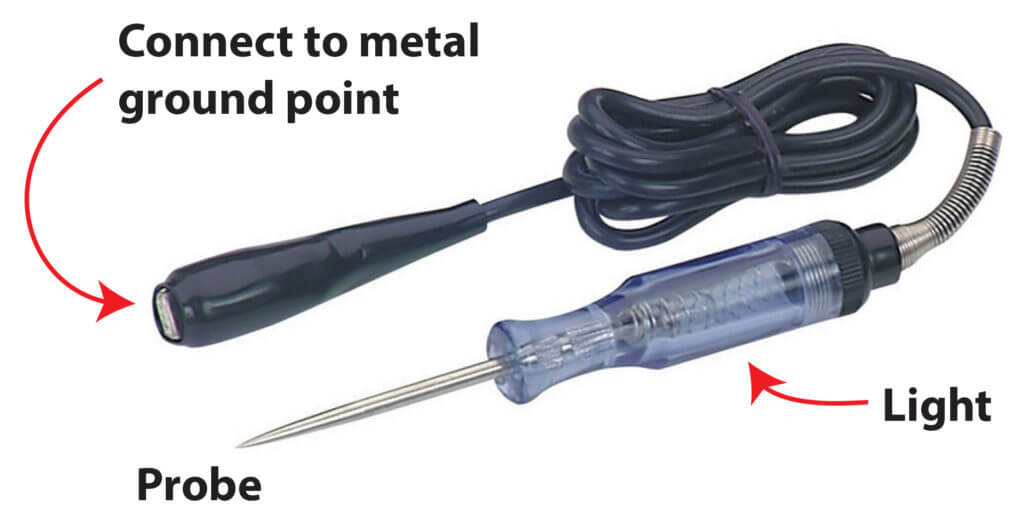 Connect the ground clamp to any clean metal surface. Then turn on the parking lights and probe both terminals in the socket. If there’s power
  running to the socket, the test light will light. If the test light lights up but the bulb doesn’t work, you either have a defective bulb or you’ve got a faulty ground connection for the socket. Consult a shop manual to find where the ground connection is located.
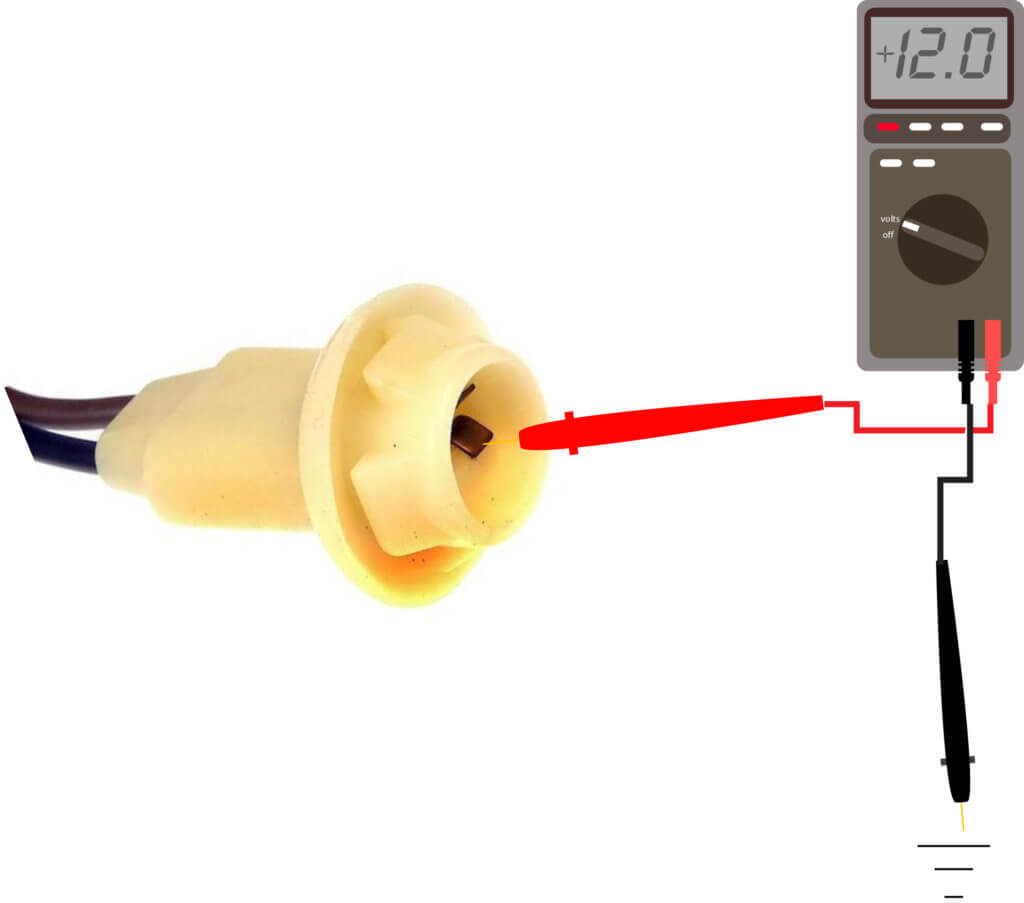
Test the tail light bulb socket with a digital multimeter
Set the meter to 12 volts DC. Touch the black probe on a clean metal surface. Then, probe the two terminals in the socket. You should see +12 volts.
If the test light doesn’t light, power isn’t reaching the socket. If the tail light on the opposite side works, it’s not a fuse problem. For most makes and models, both tail lights are powered by the same fuse. In that case, the problem is either a wiring harness issue or a problem with the body control module (BCM).
In late-model vehicles, the headlight switch doesn’t actually switch power to the tail lights. It only acts as an input to the body control module or other smart switching device. In that case, you’ll need a professional diagnostic to solve the problem.
If you have a dual filament tail light bulb
The socket will have three wires. One supplies 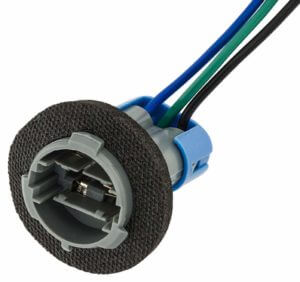 power to the tail light filament, one supplies power to the turn/stop light filament and the third provides ground. Testing a three wire socket is similar to the two wire socket. With the tail lights turned on, probe all three terminals. Only one should have power. If the test light lights up, the problem is with the new bulb or the ground connection.
If the tail lights go out when you turn on the headlights or any other electrical accessory
This is a sign of a poor ground connection. Get a wiring diagram to locate the point where the tail light ground wire connects to the body. Remove and clean that ground connection and reconnect.
©, 2019 Rick Muscoplat
Posted on by Rick Muscoplat