Test a window motor and replace a regulator
How to test a window motor and replace a regulator
Replacing a broken window regulator can be a do-it-yourself project if you have a basic set of tools and the patience to mark fastener locations. If your window isn’t rolling up/down or moves just one direction, chances are the problem is the switch, not the regulator. This article shows you how to test a window motor and replace a regulator it if it’s broken.
This article shows how to replace a window regulator on a 2002 Oldsmobile Alero. But other makes and models are similar. Once you understand how the system bolts together, it’s really a matter of unbolting and re-assembling in the same order.
Before you can test a window motor, you have to remove the door trim panel
Then test for power and ground
Most power window motors only have two wires. The window switch literally toggles the power and ground on those two wires. To power the window down, the master switch provides 12 volts on one wire and ground on the other. To move the window up, it reverses the polarity. Yes, it’s that simple.
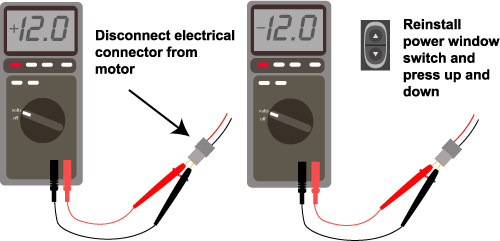
To test for power and ground, disconnect the electrical connector from the motor in question and reconnect the window switch assembly from the door trim panel to the window wiring connector. Set your multimeter to volts. Connect the red and black probes to the two wires on the connector you just removed. Then turn the ignition key to the RUN position. Toggle the window switch up and down. If the meter reading toggles between +12 volts and -12volts, the switch is good. The motor is getting power, and so the problem lies in the window regulator/motor assembly..
Power window regulator buying tip
If the motor is getting power but not operating, you may be tempted to replace just the motor. DON’T. Most often the motor fails due to excessive strain caused by broken or binding cables or friction in the window channels. Plenty of DIY’ers have tried to save money by buying just a replacement motor. Afterwards, they discover a problem elsewhere in the regulator and have to replace that as well. Save yourself a lot of headaches by buying window regulator/motor assembly.
Power window regulator warning
This guide pertains to cable operated window regulators. If your vehicle has a scissor style, you must lock the spring in place before removing the regulator. Failure to do so may result in injury. Consult a shop manual for instructions on replacing a non-cable actuated regulator.
If you have power and ground, replace the entire regulator, not just the motor
Step #1 Disconnect the window glass from the regulator and remove
The window glass is attached to the regulator with glued-on clips called sash guides, sash clips, or door glass attaching clips. These clips are either bolted or riveted onto the regulator. If you have rivets, you’ll have to drill them out. You can replace them with a nut and bolt on reassembly as long as you coat the threads with thread locker to prevent them from coming loose.
The best way to remove the glass is to raise it to its uppermost position and hold it in place with shipping tape. Don’t use masking tape—it won’t hold and the glass will come crashing down.
But if the regulator is broken, you might not be able to access the sash clip bolts. In that case, simply cut the cables with a side cutters. Make sure you hold the glass while you do this.
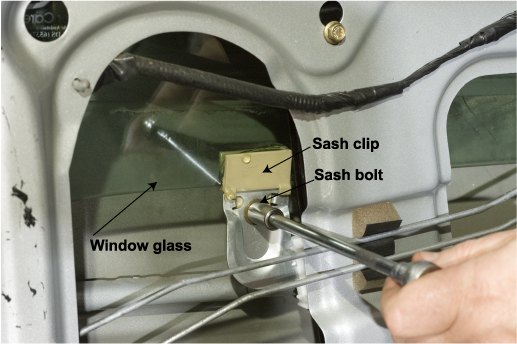
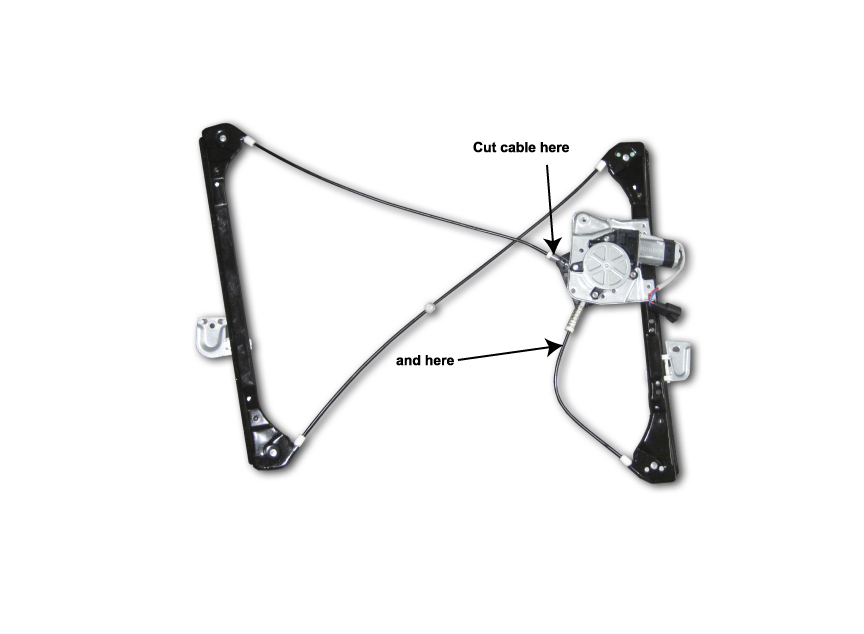
TIP: Attach shipping tape to the outside of the glass and run the tape around the top of the door and attach to the inside of the glass to hold the window up while you work on the regulator. But slip a piece of paper under the tape to prevent it from sticking to painted surfaces. That will make clean-up a lot easier and protect your paint.
TIP #2: If you have to remove the glass from the door to replace the sash clip, simply tilt the front edge (hinge side) of the glass down into the channel. Lift the left hand (jamb side) out of the window channel and raise it up. Then lift the hinge side of the glass up and out. Reverse to install.
Step #2 Remove Arm Rest Strut
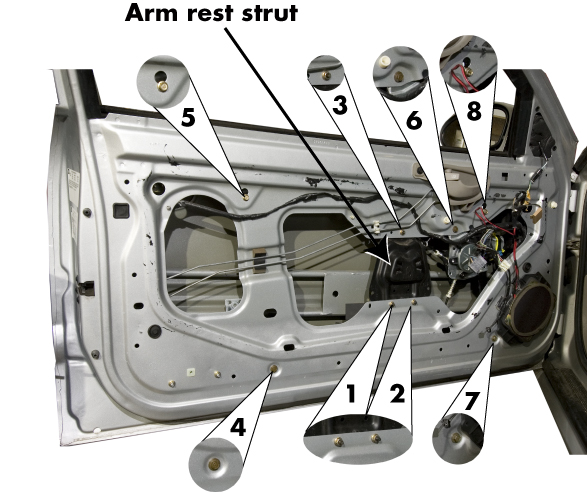
You won’t be able to remove the cable tracks without first removing the arm rest strut on this 2002 Oldmobile Alero. (Other makes and models may or may not have this type of obstacle) Removing the strut will give you an opening large enough to maneuver the tracks out. So remove nuts 1, 2, & 3 and remove the strut.
Step #3 Remove the left cable track
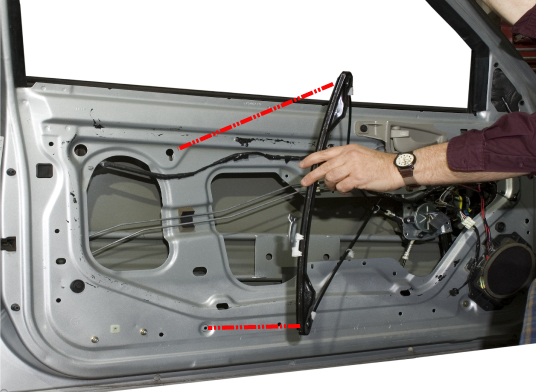
Remove bolt #4 and loosen bolt #5. Then slide the track up and pull the upper bolt out of the keyhole. Twist the track so it’s horizontal and pull it through the opening. See photo below.
Step #4 Remove the right side track and motor
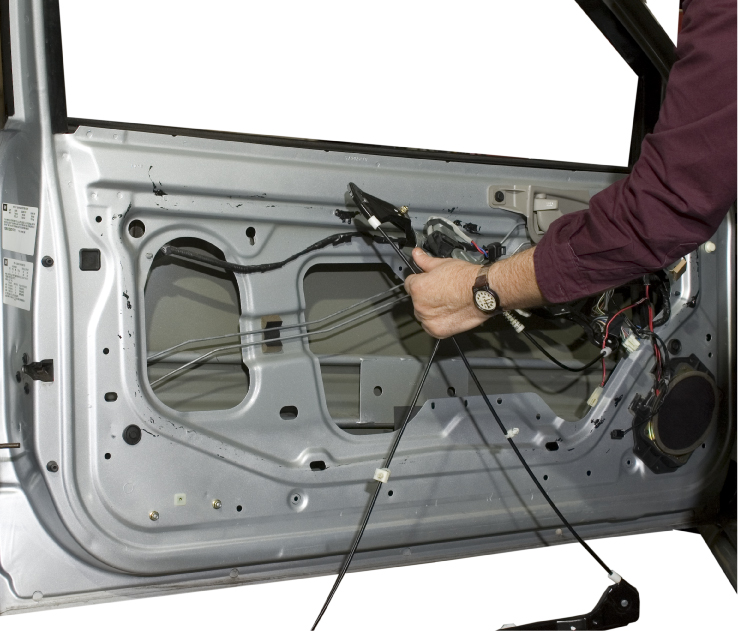
Make sure you disconnect the electrical connector from the motor. Then remove bolts #6 and #7 and loosen bolt #8. Slide the track up and pull the upper bolt out of the keyhole. Twist the track and motor so it’s horizontal and pull it through the opening.
Step #5 Check the condition of the sash clips and install new ones if broken
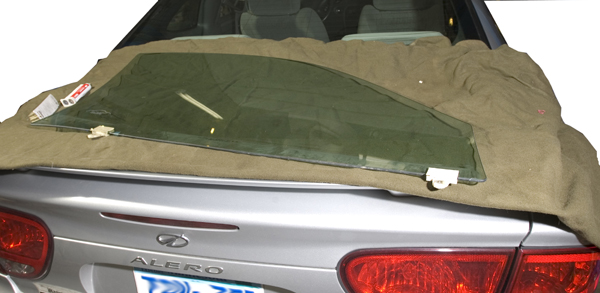
Some car makers have a high failure rate on their plastic sash clips. Often that’s all that’s wrong with your power window. You can replace these clips yourself. Buy replacement door glass attaching clips from www.rockauto.com. Spread an old blanket on your workbench or the trunk of your car and lay out the window to work on it.
Step #6 Remove broken sash clip and glue new one in place.
Mark each side of the broken clip with tape so you can position the new guide in the exact place. Warm the clip with a hair dryer (NOT a heat gun—you’ll crack the glass). Then break off the old clip using a sharp chisel and small hammer. Be gentle! Don’t scratch the glass or you’ll be buying a new window. If you can’t get all the old adhesive off, don’t worry. The new epoxy will bond to it. Note the position of the threaded portion of the old clip and install the new clip facing the same direction. Buy the proper epoxy adhesive (3M #08641) from an auto body supplier or the dealer, Squeeze out equal portions, mix, and apply to the inside of the sash clip. Install the clip onto the glass and wait the recommended time for it to cure before installing the glass in the door.
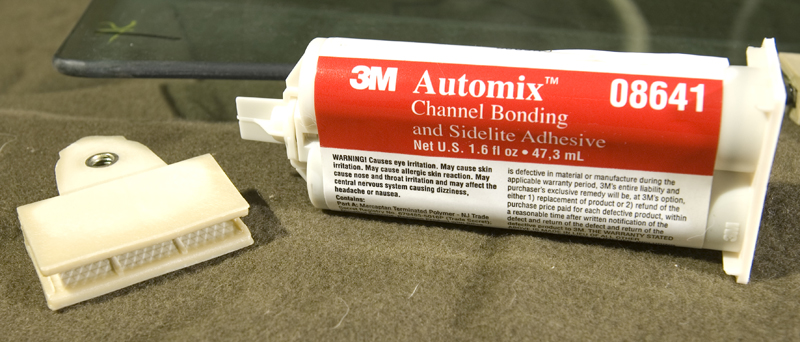
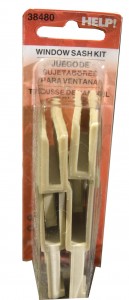
Dorman 38480 window sash kit
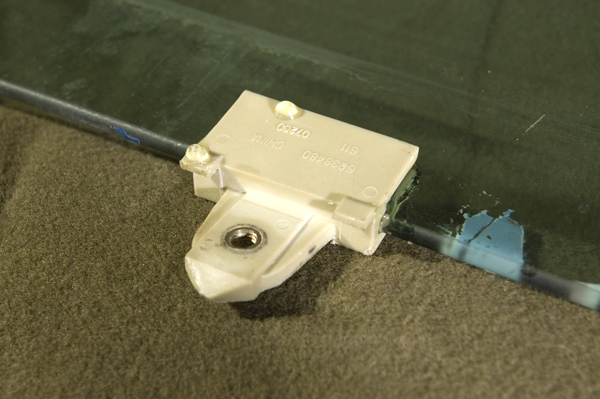
New sash guide installed on glass
Step #7 Reassemble
Reverse all the above steps to install the new regulator. Make sure you attach all nylon clips in the proper position. Spray the left and right glass channels with silicone spray or dry teflon spray lube. Lubricated channels reduce the load on the cables and regulator motor and make all the components last longer. Plug in the new motor and test the operation of the regulator before you re-install the door trim panel
© 2012 Rick Muscoplat
Posted on by Rick Muscoplat