What is a drive cycle and how to perform one
What is a drive cycle?
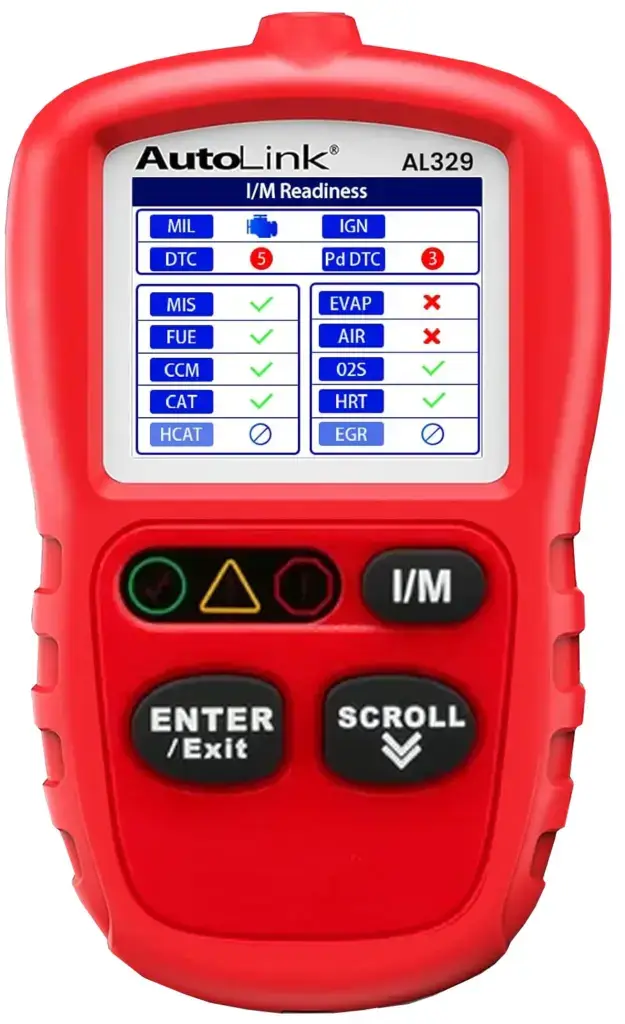
Simply put, a drive cycle is a set of driving maneuvers the vehicle must complete for the engine computer to determine that an emission system is operating as intended and is ready for emission testing. Once the drive cycle is complete and the system passes, the “readiness monitor” is set to READY. That tells emissions testing officials that the vehicle is ready for additional emissions testing.
Drive cycle prerequisites
Every drive cycle has a set of requirements that must be met before the testing can even begin. Here are some common prerequisites:
• the battery must be fully charged
• certain trouble codes must not be set as a “current” or “pending.”
• the engine must be cold before starting OR up to full operating temperature
Every drive cycle is unique to the system, engine, and carmaker
Every carmaker has established their own drive cycle and it’s unique to the year, make, model, and engine. So you can’t use one car maker’s drive cycle on any other vehicle.
Here’s an example of a Ford 2014 Catalytic Converter drive cycle
In order to test for a P0420 or P0430 catalyst efficiency the following conditions must be met:
• Computer has tested the oxygen sensor response time and the sensors have all passed
• Codes P0133/P0153 must NOT be stored in the computer
• The secondary air pump must not be stuck in the ON position and codes P0412/P1414 must not be set
• No evaporative emissions codes are set— No P0442/P0456
• No EGR stuck open codes are set — No P0402
• The following sensors must be operational ECT, IAT, TP, VSS, CKP, and MAF
• No misfire or ignition coil codes set
• No fuel monitor codes set
• No electronic throttle body codes set
• Time since start must be greater than 330-seconds (from a 70°F startup temp
• Time since the computer went into closed loop must be at least 30-seconds
• Engine coolant must be at least 170°F
• Intake air temp must be at least 20°F
• Rear O2 sensor inferred temp must be at least 900°F
• EGR flow must be at least 1%, but no more than 12%
• Throttle position must be part throttle
• Vehicle speed must be greater than 5-mph but not greater than 70-mph
• Fuel level must be at least 15%
• First Air Mass Cell must be 1.0-lb/min and no more than 2.0-lb/min
• Front O2 sensor must switch at least 50 times
• Second Air Mass Cell must be 2.0-lb/min and no more than 3.0-lb/min
• Front O2 sensor must switch at least 70 times
• Third Air Mass Cell must be 3.0-lb/min and no more than 4.0-lb/min
• Rear O2 sensor rich since last monitor attempt 0.45 volts
• Rear O2 sensor lean with injectors off (voltage needed to enter monitor) 0.1 volts
•Rear O2 sensor reads rich after fuel turned back on (voltage needed to complete monitor) 0.45 volts
How to perform a drive cycle
Prepare your vehicle before starting a drive cycle
• Make sure the fuel tank is between 30% and 70% full. If the tank is near empty, some vehicles won’t even begin the drive cycle testing
• The battery and charging system must be in good shape.
• The drive cycle starts with a cold engine; that means after sitting unused for at least 8 hours. The engine temperature must match the ambient air temperature in order to establish an accurate baseline for the testing.
The key fobs must be far enough away from the vehicle during the 8 hours to ensure the computers go into sleep mode.
Start the engine
• Let it idle for two to three minutes in park or neutral. While idling, turn on the head lights, heater/defroster, and rear defroster for a three to five minute warm-up phase. Make sure the idle settles down to “warm” normal speed.
• Drive through city streets at about 25 mph while accelerating to 35 to 40 mph a few times before slowing down to stop. Make full stops at stop signs (no rolling stops).
Drive a short highway trip
• After warming up on city streets, enter the highway on-ramp and apply 1/2 to 3/4 throttle acceleration up to freeway speed.
• Drive at a steady speed of 55 to 60 mph for a minimum of five miles; use the cruise control to help you maintain speed.
• Head for an off-ramp and fully release accelerator to let the vehicle coast down until it stops under its own power. Try not to use the brakes to slow down.
More city driving
• Perform more city driving at 35 to 40 mph a few times and then maintain a city speed of 25 mph before slowing down to stop.
• Pull in to a parking place and let the engine idle for one to two minutes and then shut it off.
Attach a scan tool and check the status of the readiness monitors
Drive cycles and permanent codes
Many trouble codes can be cleared using a code reader or scan tool. However, permanent codes are different. A permanent code CANNOT be erased. You must fix the original problem. Then you must complete the specific drive cycle and it must pass all the testing criteria. ONLY THEN will the ECM clear the permanent code.
Where to find drive cycle criteria
Professional grade shop manuals list the carmakers’ drive cycle for each trouble code.
©, 2017 Rick Muscoplat
Posted on by Rick Muscoplat

