
What is an auto dimming rear view mirror
How an auto dimming rear view mirror works
Driving at night presents unique challenges, particularly when it comes to visibility. Glare from the headlights of vehicles behind you can be not only irritating but also dangerous, as it can impair your vision and distract you from the road ahead. One of the innovations designed to combat this issue is the auto dimming rearview mirror, also known as an electrochromic or self-dimming mirror. This article delves into how auto-dimming rearview mirrors work, their benefits, and considerations for installation
How Auto Dimming Rearview Mirrors Work
Auto dimming rearview mirrors reliy on electrochromism, a phenomenon where certain materials change color or opacity in response to an electrical voltage. Auto dimming rear view mirror consist of several layers:
• Glass and Reflective Layer— The front layer of the mirror is standard glass, similar to conventional mirrors, while the reflective layer is coated onto the glass’s surface.
• Electrochromic Layer— Sandwiched between the layers of glass and the reflective layer is an electrochromic layer. This layer contains materials that darken when an electrical voltage is applied, reducing the amount of light reflected by the mirror.
• Sensors— The auto-dimming mirror has sensors—typically two. The forward-facing sensor detects ambient light levels outside the vehicle, while the rear-facing sensor detects the intensity of light from vehicles behind you.

Light enters the mirror, goes through the Electrochromic material and hits the reflective layer. Sensors in the mirror detect the amount of light coming in and apply power to the Eleectrochromic material, causing it to darken and reduce the glare to the driver.
When the rear sensor detects bright light from headlights, it sends a signal to the mirror’s electronics. This triggers a small electrical current to pass through the electrochromic layer, causing it to darken. The level of dimming is proportional to the intensity of the light detected. As a result, the mirror reduces glare, allowing you to see more clearly without being blinded by bright lights. When the light diminishes, the mirror returns to its normal state.
Benefits of Auto-Dimming Rearview Mirrors
Auto-dimming rearview mirrors offer several significant advantages, making them a valuable addition to any vehicle.
• Enhanced Nighttime Driving Safety— Glare from headlights can cause temporary blindness and discomfort, leading to unsafe driving conditions. By automatically adjusting to reduce glare, auto-dimming mirrors help drivers maintain clear vision, reducing the risk of accidents, especially on dark or poorly lit roads.
• Reduced Eye Strain— Constant exposure to bright lights at night can lead to eye strain and fatigue. Auto-dimming mirrors reduce the strain on your eyes by softening the light that reaches them, making nighttime driving less tiring.
• Improved Focus— With reduced glare, drivers can maintain better focus on the road ahead, minimizing distractions. This is particularly important in high-traffic situations or when driving at high speeds, where concentration is critical.
Professional vs. DIY Installation
While some drivers may feel confident installing an auto-dimming mirror themselves, others may prefer to have it professionally installed. Professional installation ensures that the mirror is properly connected to the vehicle’s electrical system and that all features function correctly. If your vehicle is under warranty, professional installation may also prevent potential issues with warranty coverage.
They Need A Power Source
Auto-dimming mirrors require a power source to operate. In most cases, this power is drawn from the vehicle’s existing electrical system. During installation, it’s important to ensure that the mirror is wired correctly to a power source that is active only when the vehicle is on, preventing battery drain when the car is turned off. If you don’t already have power at the mirror, you will have to run power up the A-pillar and behind the headliner.
Additional Features:
If the auto-dimming mirror includes additional features, such as a compass, temperature display, or garage door opener, make sure to factor these into your installation plans. Some features may require additional wiring or connections to other systems in your vehicle.
Cost:
The cost of an auto-dimming rearview mirror can vary significantly depending on the brand, features, and whether you choose professional installation. Basic models without additional features are generally more affordable, while mirrors with integrated electronics or premium materials may be more expensive. Installation costs should also be factored into your budget.
Which mirror to buy
Gentex is popular aftermarket brands. They made four models, starting at $125 for # ADVGEN2A a basic unit, then $230 for ADVGEN20A with a built in compass, ADVGEN40A4 $260 with HomeLink garage door opener buttons and ADVGEN45AB5 $340 for HomeLink and a compass. Purchase the mirror from Voxx Electronics or shop online for a cheaper price.

The three most popular models of auto dimming mirrors by Gentex
How to install the mirror in your car or truck
These mirrors require two wires; power and ground. My advice is to buy a short subscription to alldatadiy.com or eautorepair.net to download the diagrams to remove the headliner and the driver’s side A-pillar trim, as well as the fuse box layout.
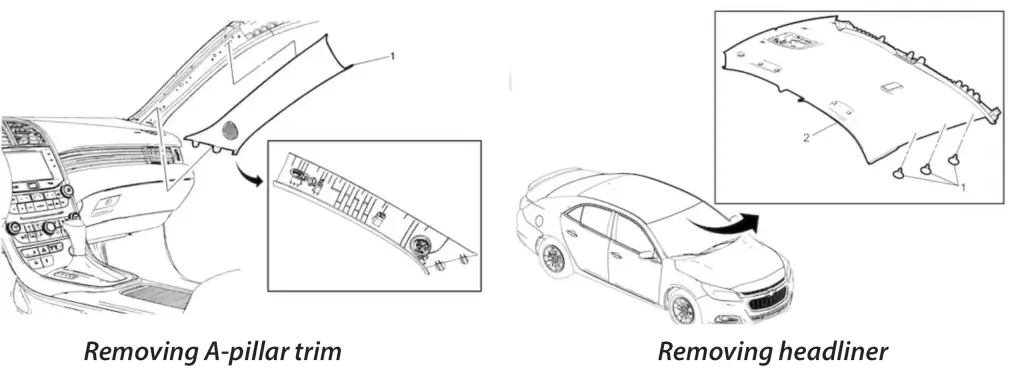
This is an example of the removal diagrams for a 2014 Chevrolet Malibu using Alldatadiy.com
Removing the A-pillar trim is not difficult if you have the diagram. You just need to know where the clips are. It just snaps in place. The a same is true with the headliner. Here are the steps
• Remove your current mirror. Using a hex wrench. loosed the set screw holding it in place. Slide it up and off the windshield mount
• Remove the A-pillar trim on the driver’s side
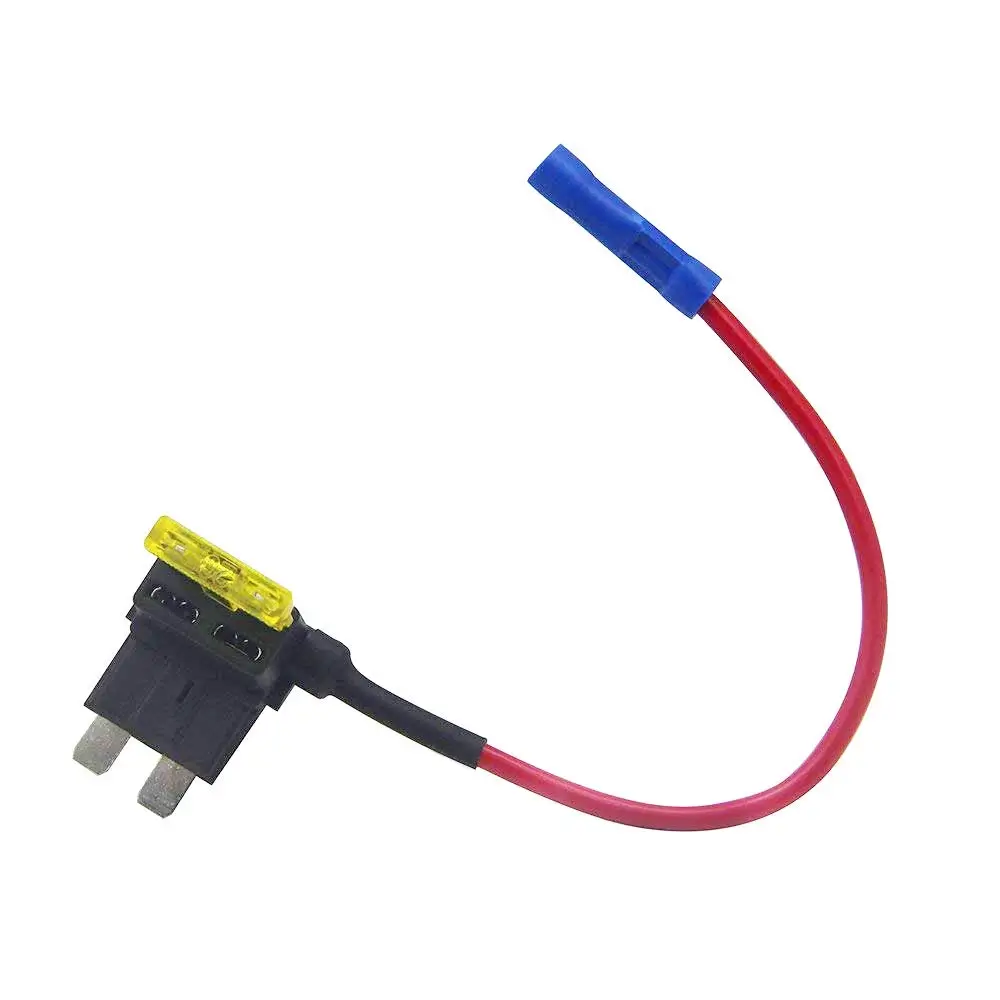
Add-a-fuse adapter
• Unclip the headliner, starting at the A-pillar and over to the mirror
• Run a cable from the under dash fuse box up through the A-pillar and tuck it behind the headliner
• Connect the new cable to the auto-dimming mirror and mount it to the windshield mount. Tighten with hex wrench
• Use an Add-a-fuse adapter to an switched existing fuse and crimp the power wire to the crimp connector. Connect the ground wire to any existing ground point under the dash
• Reconnect pillar trim and headliner
©, 2020 Rick Muscoplat