
How to Detail a Car Like a Professional Auto Detailer
How to Detail a Car Step by Step
Quick Summary
With the right knowledge, the right tools, and a free Saturday afternoon, you can achieve results that rival any professional detail shop. This guide walks you through every step of the process — from a thorough pre-wash decontamination to a finished, protected surface that practically glows. No shortcuts, no guesswork. Just a methodical approach to making your car look its absolute best.
Article
The Right Order When Learning How to Detail a Car
I’ve detailed everything from lightly used daily drivers to absolute disaster interiors, and the truth is this: most people overcomplicate the process. When teaching someone about car detailing, I don’t focus on fancy tools. Instead, I emphasize order and discipline.
Detailing isn’t about scrubbing harder. It’s about working smarter.
Break the Car Into Zones
One of the most overlooked car detailing tips I give beginners is this: break the vehicle into sections. I always work in three stages: the rear cargo area or trunk first, the middle seating section second, and the driver’s area last. When you approach it this way, you avoid walking over cleaned areas, and you maintain momentum.
Start by emptying the vehicle completely. Remove everything from the trunk. Fold the seats forward if possible. Move the front seats all the way back. You need space to work.
I also recommend wearing gloves. After 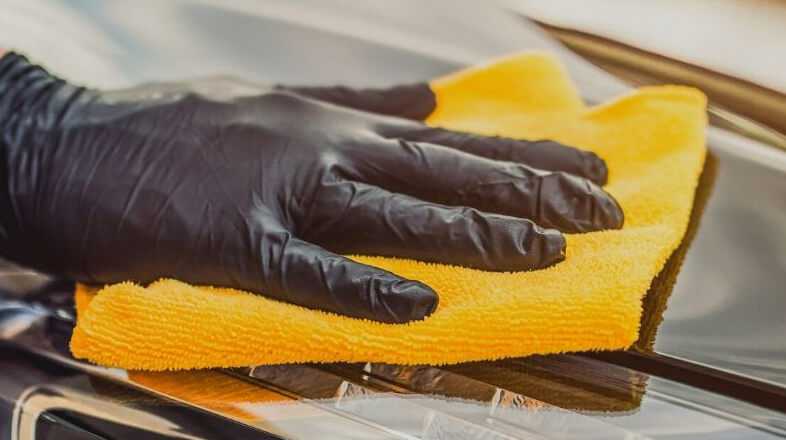 decades in this industry, I’ve learned that under-seat surprises are real—and not pleasant.
Always Work From the Top Down
Dirt falls. So it’s self-defeating to clean the seats and move up to the dash and headliner, since all the dirt and dust will fall back onto the seats and carpet. That’s why I always start at the highest point inside the vehicle—the headliner.
The headliner must be treated gently. Light agitation only. Spray cleaner onto your brush, not directly onto the roof, and use circular motions. Don’t soak it. Over-wetting can weaken adhesives and cause sagging. That’s a common DIYer mistake, and it’s easy to avoid.
After agitation, wipe with a clean, light-colored microfiber towel. I prefer white or yellow towels so I can see how much dirt is coming off. This is one of those small but powerful car detailing tips that separates amateurs from pros.
Clean The Glass, Dash and Door Trim Properly
When it comes to removing dirt from textured plastic, keep in mind that agitation matters more than product strength. Use a quality interior cleaner that’s safe for plastics, vinyl, and leather. Spray the cleaner onto the surface or onto the brush, depending on the location. Agitate with soft detailing brushes. If you’re on a budget, soft paint brushes or makeup brushes work surprisingly well.
Here’s another car detailing tip: when cleaning areas above your head or near glass, spray the cleaner onto your towel, not the surface. You don’t want chemicals dripping into your eyes or leaving residue on windows.
Work top to bottom. Upper trim, then door cards, then lower panels
TIP: Keep the doors closed when possible. Wind carries pollen and dust. There’s nothing more frustrating than cleaning a panel only to have airborne debris settle back onto it.
Seats: Fabric vs. Leather
For leather seats, you’ll need a dedicated leather cleaner. A safe interior cleaner and a soft brush often handle general maintenance perfectly. Follow with a microfiber wipe.
For cloth seats, vacuum thoroughly before applying fabric cleaner. If you don’t, you’ll just grind the dirt deeper into the cloth upholstery. Apply the fabric cleaner and agitate with a brush. Don’t oversaturate. If the seats are heavily stained, a wet extractor may be necessary. For more information on cleaning cloth seats, see this article.
One of the most important car detailing tips I can give you is this: less water equals fewer problems. Over-wetting leads to odors and long drying times.
How to Clear Car Carpets and Floor Mats
Vacuuming becomes dramatically easier when the front seats are folded forward. That extra space can shave several minutes off the job.
For floor mats, use a stiff brush to lift embedded dirt before vacuuming. Household vacuum attachments often work great for agitating carpet fibers.
If you need to shampoo carpets, spray fabric cleaner lightly and scrub. Again, you don’t need to soak the floor. If stains persist, step up to extraction.
Glass Cleaning the Right Way
Glass can ruin an otherwise perfect detail. I prefer minimal chemical use, but sometimes a dedicated glass cleaner is necessary.
Lower the windows slightly to clean the top edges—those scum lines drive me crazy. Spray the towel, not the glass, to reduce overspray. Use one towel for cleaning and a second dry towel for buffing.
A perfect glass job is one of the clearest indicators that someone truly understands how to detail a car.
Final Touch: Dressing and Protection
I’m not a big fan of plastic dressing. If you are, make sure you buy a matte-finish product, not a glossy one. Glossy finishes reflect in the glass, reducing your visibility, especially at night. Here’s another tip: Buy a plastic dressing that doesn’t contain silicone — it attracts and holds dust.
Some interior cleaners have anti-static properties, which help reduce dust attraction. That’s a bonus I appreciate.
The Big Lesson Most People Miss When Detailing Their Cars
If you take one thing away from this guide on how to detail a car, let it be this: you don’t need dozens of products. You need discipline, the right order, and smart car detailing tips.
Work in stages.
Work from top down.
Spray onto towels when necessary.
Use separate tools for dirty areas.
Don’t oversaturate fabrics.
Keep doors closed to reduce contamination.
Posted on by Rick Muscoplat