
How to Find and Repair a Coolant Leak Fast
How to Fix a Coolant Leak in Your Car: Find the Leak Before You Repair It
Quick Summary
If you need to fix a coolant leak, don’t reach for a bottle of stop-leak until you’ve identified exactly where the coolant is escaping. In my experience, diagnosing the source of the leak is the most important part of the repair.
In this guide, I’ll show you:
• How to find a coolant leak quickly and safely
• The most common places coolant leaks develop
• Which leaks can be repaired and which require part replacement
• When coolant stop-leak products can help—and when they’ll make matters worse
• How to permanently repair your cooling system before engine overheating causes • expensive damage
How to Fix a Coolant Leak the Right Way
I’ve diagnosed hundreds of cooling system problems during my career, and I’ve learned one lesson that never changes: Never try to fix a coolant leak until you know exactly where it’s coming from.
Too many DIYers assume every coolant leak comes from the radiator. Others dump a bottle of stop-leak into the system and hope for the best. Sometimes that works—for a very small leak—but most of the time it simply delays the inevitable while increasing the risk of overheating.
The good news is that most coolant leaks are straightforward to diagnose once you know where to look.
Why You Should Repair a Coolant Leak Immediately
Modern engines operate within a very narrow temperature range. Even a slow coolant leak can eventually lower coolant levels enough to cause:
• Engine overheating
• Warped aluminum cylinder heads
• Blown head gaskets
• Cracked engine blocks
• Heater failure
• Premature water pump damage
A repair that might cost $30 to $200 today can easily become a $3,000 engine repair if ignored.
How to Find a Coolant Leak
I always start with a completely cold engine. Never remove the radiator cap on a hot engine because the cooling system may be under 15-20 PSI of pressure, and escaping coolant can cause serious burns.
Once the engine is cold, begin inspecting these common leak locations.
1. Radiator — Plastic radiator tanks commonly crack as they age from repeated heat cycling. Look for:
• Wet fins
• White or green crusty deposits
• Pink, orange, yellow, or blue stains depending on coolant type
• Cracks in plastic end tanks
• Leaking seams
2. Radiator Hoses — Many coolant leaks occur where hoses connect to the radiator or thermostat housing rather than through the hose itself. Inspect both upper and lower radiator hoses for:
• Soft spots
• Swelling
• Cracks
• Loose clamps
• Wet hose connections
3. Thermostat Housing — Look for dried coolant deposits surrounding the housing. Thermostat housings frequently develop leaks because:
• Gaskets shrink
• Plastic housings warp
• Corrosion damages aluminum sealing surfaces
4. Water Pump — Once a water pump begins leaking, replacement is the only permanent repair. The water pump has a small weep hole designed to indicate seal failure.
Signs of a failing water pump include:
• Coolant dripping behind the pulley
• Streaks below the pump
• Rust-colored residue
• Bearing noise along with coolant leakage
5. Coolant Reservoir — Fortunately, reservoir replacement is usually inexpensive. Expansion tanks commonly crack around:
• Hose fittings
• Molded seams
• Mounting brackets
• Cap sealing surfaces
6. Heater Hoses — Follow both heater hoses to the firewall.
Check for:
• Loose clamps
• Cracked hoses
• Damaged quick-connect fittings
• Coolant residue
7. Heater Core — A heater core leak requires replacement. Stop-leak may temporarily slow a tiny seep but rarely provides a lasting repair. Signs of a leaking heater core include:
• Sweet antifreeze smell inside the vehicle
• Fogged windshield
• Wet passenger-side carpet
• Poor heater performance
Use a Cooling System Pressure Tester
If you can’t find a coolant leak visually, use a cooling system pressure tester. This is one of my favorite diagnostic tools because it pressurizes the cooling system without running the engine. Many slow leaks that disappear while driving become obvious during a pressure test.
Simply:
• Remove the radiator cap.
• Install the pressure tester.
• Pump the system to the pressure listed on the radiator cap.
• Watch for coolant appearing anywhere in the system.
Can UV Dye Help Find a Coolant Leak?
Absolutely. If the leak only occurs while driving, add UV dye designed for coolant systems.
After driving for a day or two, inspect the engine with a UV light. Even tiny leaks become easy to identify.
Can Stop-Leak Products Fix a Coolant Leak?
People often ask me whether radiator stop-leak products actually work. The answer depends entirely on what’s leaking.
Fiber-Based Stop-Leak Tablets— Best for:
• Tiny radiator pinholes
• Small heater-core seeps
• Minor gasket seepage
Downside:
• Using too much can clog small cooling passages, especially the heater core.
Polymer-Based Sealers
May temporarily seal:
• Plastic radiator tank seams
• Porous castings
• Minor radiator leaks
These products must be compatible with your coolant chemistry.
Sodium Silicate (“Liquid Glass”)
Generally marketed for:
• Head gasket leaks
• Small combustion-to-coolant leaks
This is rarely a permanent repair and should only be considered a temporary measure before replacing the failed component.
Rubber Seal Conditioners
These products may reduce minor seepage around aging rubber seals but will not repair worn bearings, cracked seals, or damaged gaskets.
What Stop-Leak Products Won’t Repair
In my experience, stop-leak products will not permanently repair:
• Water pump leaks
• Split radiator hoses
• Broken hose connections
• Cracked thermostat housings
• Large radiator cracks
• Heater hose failures
• Freeze plug leaks
Those components must be replaced.
Don’t Overuse Stop-Leak
One of the biggest mistakes I see is adding more than the recommended amount.
More isn’t better.
Excess sealant can settle inside the heater core, reducing coolant flow and heat output. Replacing a clogged heater core is far more expensive than replacing most leaking cooling system components.
Always follow the manufacturer’s dosage instructions.
The Best Way to Permanently Fix a Coolant Leak
The most reliable repair is replacing the failed component.
For example:
• Replace cracked radiators
• Install new radiator hoses
• Replace leaking thermostat housings
• Replace failing water pumps
• Install a new coolant reservoir
• Replace leaking heater hoses
• Replace defective radiator caps
After the repair:
• Refill with the correct coolant.
• Bleed trapped air from the cooling system.
• Pressure test again to verify the repair.
• Confirm that the cooling fans operate normally.
Final Thoughts
When people ask me how to fix a coolant leak, my answer is always the same:
Diagnose first. Repair second.
Finding the exact source of the leak saves time, money, and frustration. While stop-leak products occasionally have their place for tiny radiator pinholes or minor seepage, they should never replace proper repairs on damaged cooling system components.
A properly repaired cooling system will keep your engine running at the correct temperature for years, while a shortcut often leads to overheating and much more expensive repairs. leaks.
Here’s my recommendation for the best way to stop minor coolant leaks
For small leaks, I like Bar’s radiator stop leak pellets. Just follow the dosing instructions for the number of pellets to use with your system.
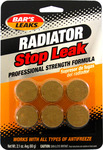
Radiator stop leak pellets
Crush the pellets inside a rag and dump them into the radiator (not the coolant reservoir). Drive the vehicle to circulate the particles. Remember that if you change the coolant down the road, you must re-dose the system, or the leak will return.
For medium leaks, use one of Bar’s liquid products. But read the label and get the right formula for your particular coolant. All coolant formulas are different, and the stop leak must be compatible with your coolant.
© 2012 Rick Muscoplat
Posted on by Rick Muscoplat