
How to Remove a Stuck Delta Bonnet Nut Safely
How To Remove a Stuck Delta Bonnet Nut Without Damaging the Valve
Quick Summary
Most DIYers attempt to remove a Delta Monitor series bonnet nut using slip-joint pliers. Bad choice. If the bonnet nut won’t turn with pliers, and you apply more force, you can strip the entire front of the valve off the valve body, costing you at least $1,000 in emergency plumbing charges. More force isn’t the answer here.
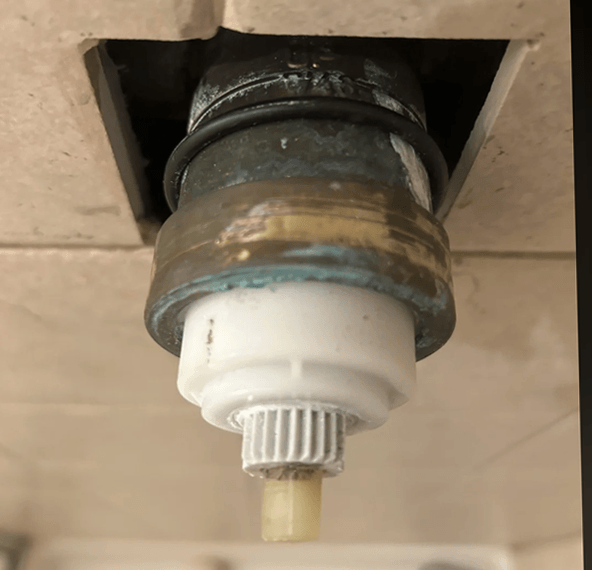
This article covers a few tricks for removing a stuck Delta bonnet nut, and these tips are safer and more effective than using pliers and brute force.
Tip #1: Pre-treat the nut and threads with a good-quality rust penetrant
Tip #2: Use a strap wrench, not pliers
Tip #3: Use a pipe wrench, not pliers
Tip #4: Employ the “Fernco Trick”
Why a Slip-joint Pliers Can Turn a Cartridge Replacement Into a Major Repair
The bonnet nut is the threaded ring retaining the cartridge. Pliers concentrate squeezing force at opposing jaws. On a thin bonnet, that pressure can deform the ring into an oval, tightening its grip on the underlying threads. Squeezing harder can therefore make removal even harder.
Twisting harder creates another danger: torque travels into the valve body and connected plumbing. On older Delta assemblies with three small copper connecting tubes, excessive torque can twist, tear, or effectively wring the front assembly off those tubes. The result is a completely damaged shower valve that requires an emergency repair costing at least $1,000.
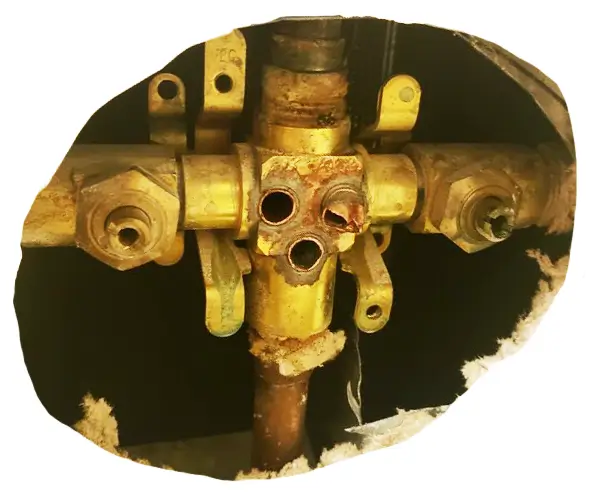
Twisting the bonnet nut with too much force can twist the cartridge holder off the valve body, destroying the shower valve
That three-tube construction is not universal across Monitor valves; identify yours before proceeding. Other designs can still damage solder joints or piping if you twist too hard.
Stop immediately if the valve body moves with the nut.
Prepare the bonnet nut to ease removal
The brass bonnet nut doesn’t actually rust/corrode to the brass valve body. But it can stick due to mineral buildup. Dousing the threads with vinegar can help break up those mineral deposits. But there’s a better way. Use a high-quality rust penetrant.
Most DIYers reach for WD-40 to loosen things up. WD-40 can loosen things up
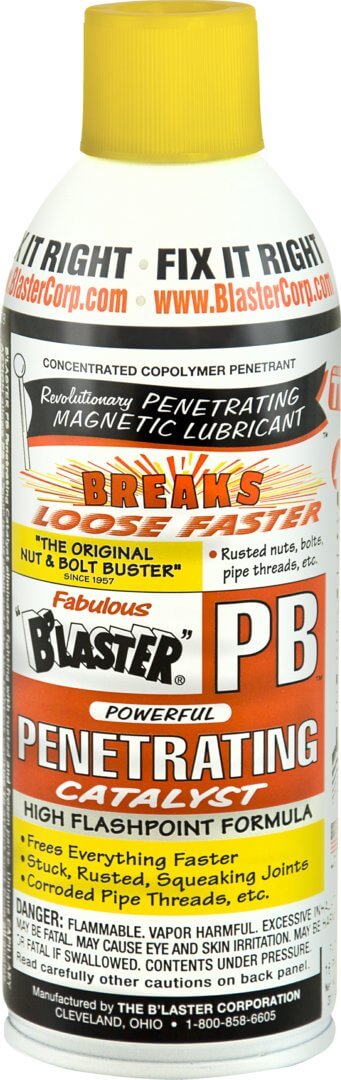 in some cases, but in reality, it’s not a very good rust penetrant. Plumbers use a more effective penetrant like PB Blaster or Kroil. You can find PB Blaster at any hardware or big-box store.
Spray the threads around the bonnet nut liberally. Then, using the plastic handle of a large screwdriver, tap around the bonnet nut to create vibrations that let the penetrant seep into the threads and lubricate them.
In many cases, I’ve found that PB Blaster and screwdriver vibration is all it takes to loosen the bonnet nut.
Why a Strap Wrench Works Better Than Pliers
A strap wrench wraps around the bonnet and 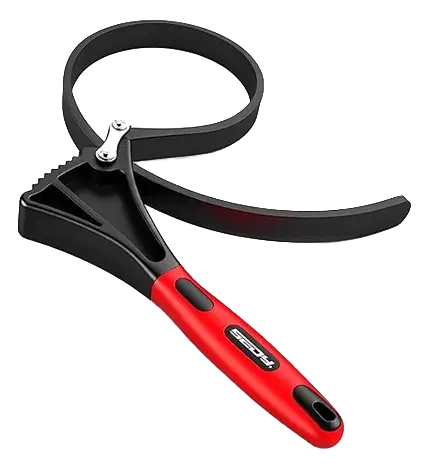 spreads gripping pressure over much of its circumference. That broad contact reduces concentrated jaw pressure and the tendency to distort the ring. Delta specifically recommends strap wrenches for bonnet caps because they distribute pressure and protect the finish.
Keep the Strap Square and the Force Controlled
Clean the outside surface so the strap grips. Position it entirely on the bonnet, clear of surrounding trim. Turn counterclockwise when facing the valve.
Use steady, modest pressure. A strap wrench reduces deformation risk; it cannot guarantee removal or protect fragile plumbing from excessive torque.
Even a Standard Pipe Wrench Works Better Than a Pliers to Remove the Bonnet
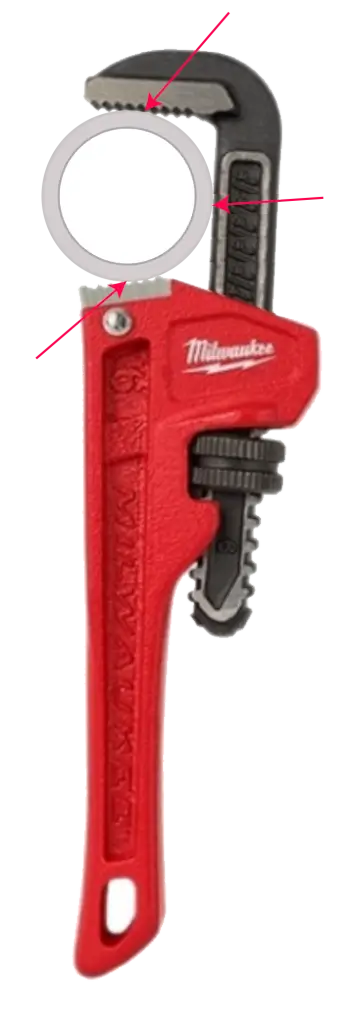
A pipe wrench can sometimes grip a round bonnet more
effectively than pliers because its self-energizing jaws bite as the handle turns. However, its teeth can scar or deform thin brass.
When removing pipes, you only want the jaws in contact with the pipe. But when removing a Delta bonnet nut, you can use the pipe wrench to create three contact points and turn the nut without deforming it.
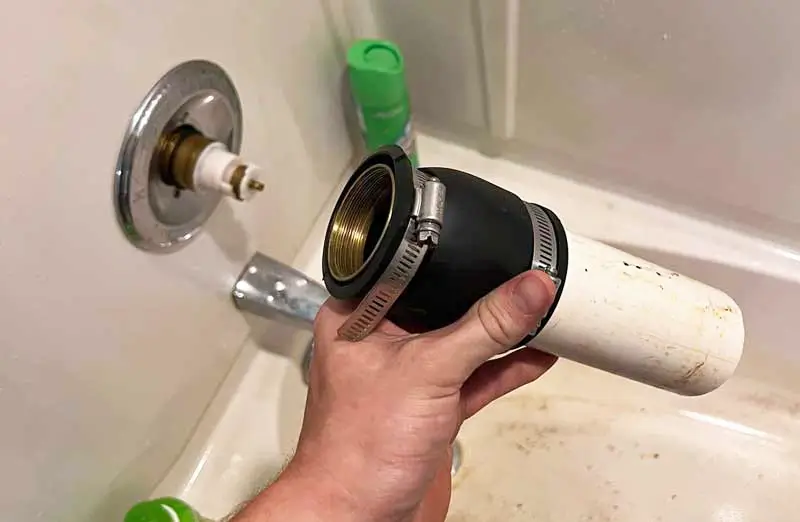
How the Fernco Trick Works to Loosen a Stubborn Bonnet
The Fernco trick uses a flexible plumbing coupling as a gripping sleeve. The coupling’s worm drive clamp applies clamping force 360° and the rubber coupling provides the grip.
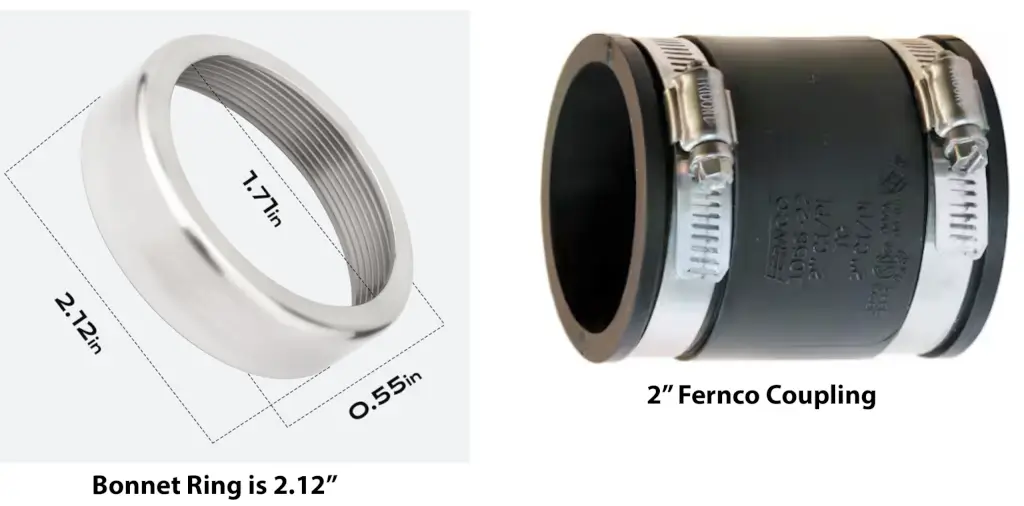
This image shows the size of the delta bonnet ring and the correct Fernco coupling
1) Slide one end over the bonnet only. 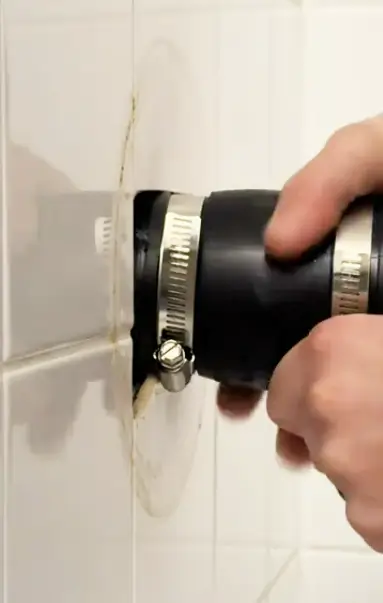
2) Tighten its clamp enough to prevent slipping.
3) Try turning the coupling counterclockwise.
If this method doesn’t provide enough leverage, install a 12″ piece of 2″ PVC pipe into the open end of the Fernco coupling and tighten the clamp. 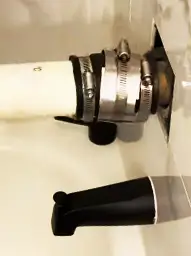
Turn the attached fitting counterclockwise with controlled force.
Why Can It Succeed After Other Tools Slip?
The sleeve conforms closely to the bonnet, while the clamp maintains contact. This can improve grip compared with a slipping strap. Its advantage is better torque transfer, not permission to apply unlimited force.
If All Else Fails, It’s Time to Cut and Split the Bonnet Nut
Obtain the replacement nut first. Find one at most big-box stores for about $8. 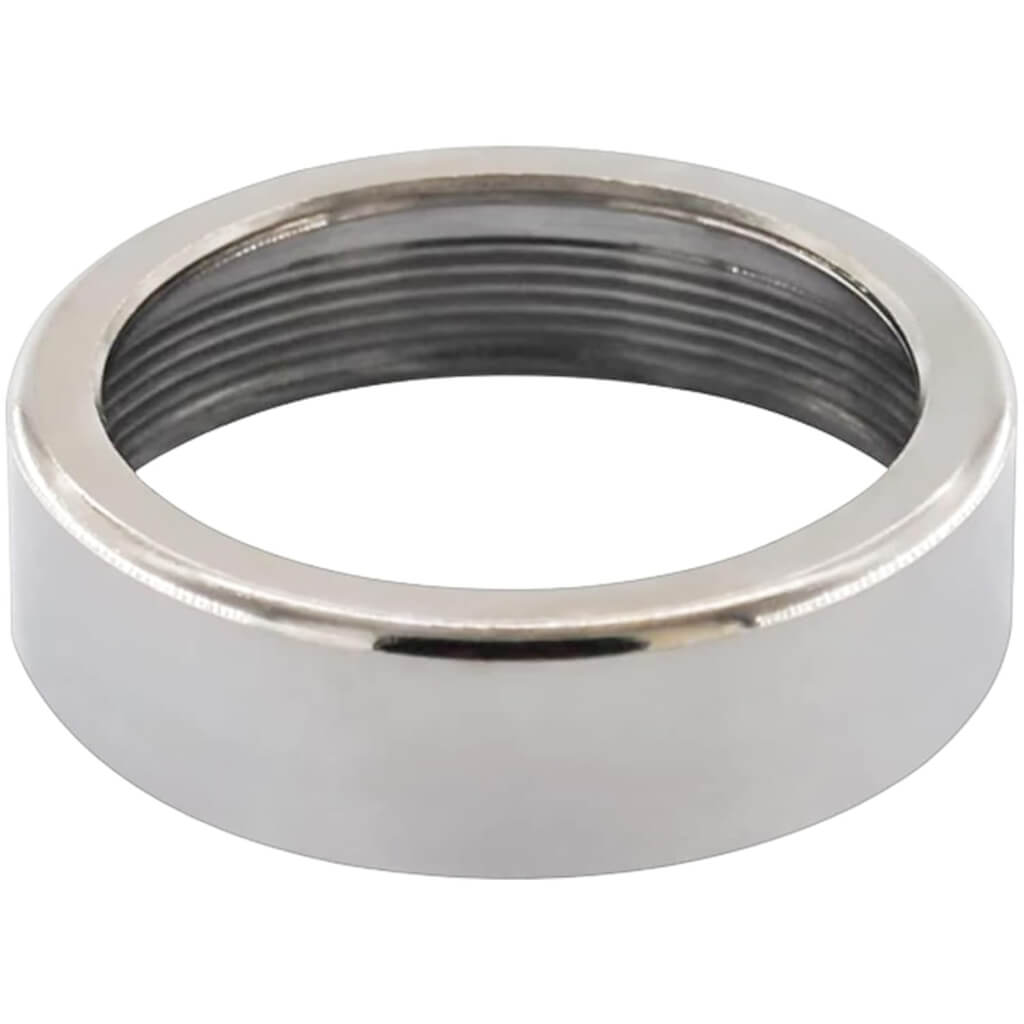
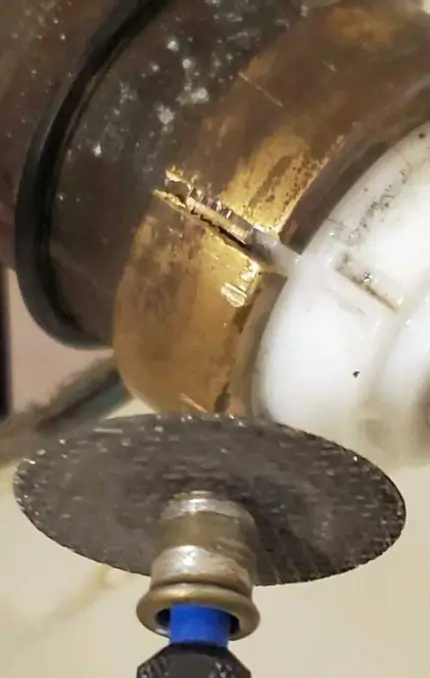
Wearing eye protection, use a fine hacksaw blade or carefully controlled rotary tool to cut a slot across the ring’s width.
Cut almost through the bonnet, leaving a thin layer above the valve-body threads. Insert a flat-blade screwdriver into the slot and gently twist to split the weakened ring.
Splitting releases circumferential tension. Remove the broken bonnet, protect the valve from debris, and inspect the threads before installing the cartridge. If you cannot control cutting depth or the body already moves, have a plumber complete removal.
But don’t do this! This DIYer got carried away with his Dremel cut off wheel and cut right through the threads of the shower valve. The valve is now permanently damaged and must be replaced 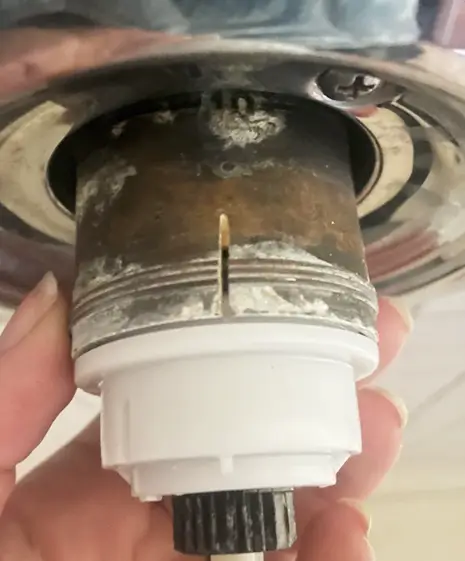
Tips for Installing the New Bonnet Nut
To prevent sticking in the future, apply silicone plumber’s grease to the threads on the valve. Load in the new cartridge. Spin on the bonnet nut and tighten until it’s snug. Then stop. There’s no need to crank down on the bonnet nut.
©, 2026 Rick Muscoplat