
How to remove mold from car carpet
The best way to remove mold from car carpet
You’ll find all kinds of advice online about how to deal with the problem without removing it and padding. That advice is not only WRONG, but the smell will come back even worse on the next hot day. Here’s the best way to remove mold from car carpet.
The padding has to go
Look, this is no different from what happens if water enters your home’s carpet. The first thing the remediation experts do when they’re called in to fix flood damage is to remove the carpet and toos the padding. The carpet can be cleaned, but not the padding. You cannot get mold out of carpet padding; not in your house, not in your car.
What condition is the carpet?
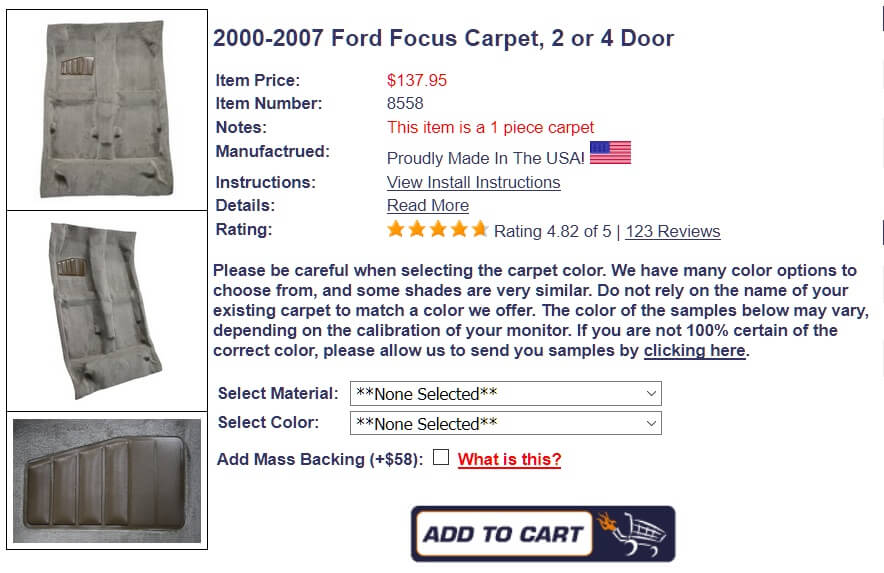
If your car’s carpet is worn, torn, stained, or in otherwise bad shape, now is the time to replace it. It’s not that expensive. Here’s an example of custom molded carpet for a 2000-2077 Ford Focus from Stockinteriors.com. See, it’s only $138 for the entire carpet with the padding attached to the back of the carpet.
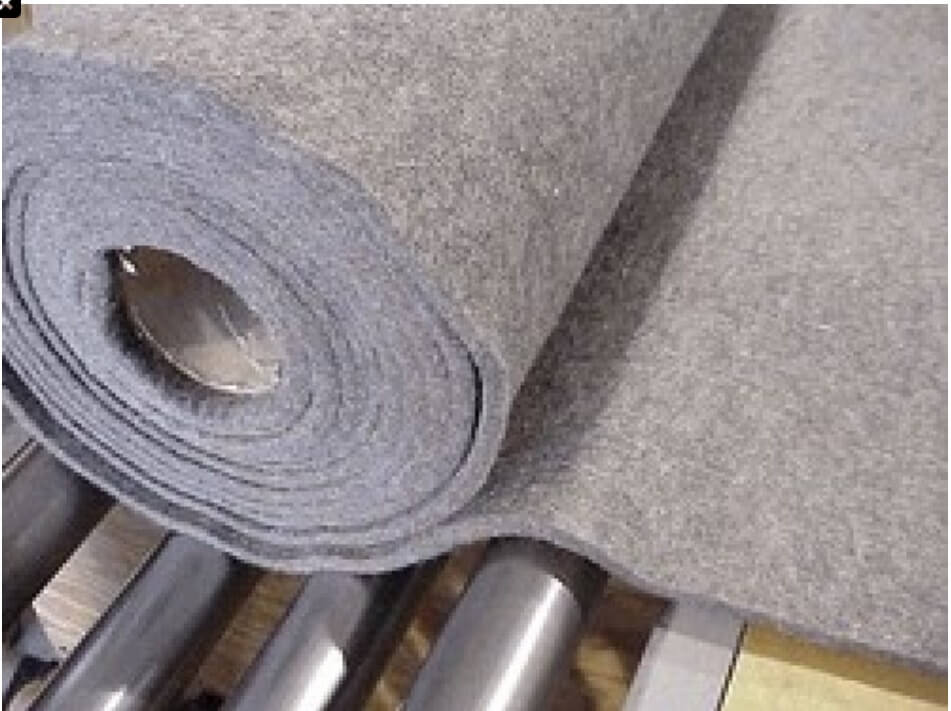
Or, just purchase new carpet padding
The padding shown here is $20 for a piece 3′ x 6′ from Stockinteriors.com.
How to remove carpet and padding from your car
Most late-model cars and trucks have electrical connections to the seats, and those have to be disconnected. Here’s what to look for:
1) Power down the airbag system, especially if you have seat airbags
Disconnect the negative battery terminal and leave the vehicle for at least 15 minutes to drain all the reserve power from the airbag system
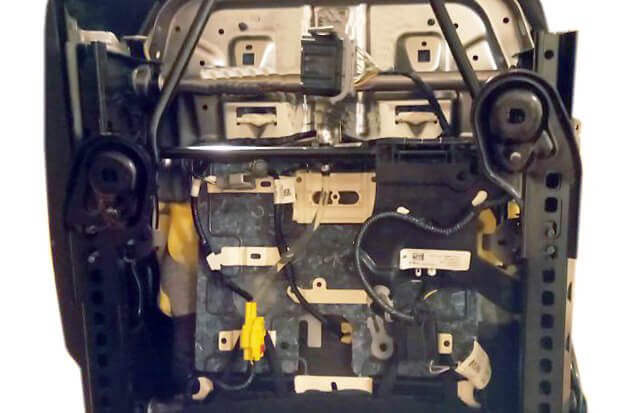
2) Disconnect the power seat electrical connectors
Power seats may have several electrical connectors. Each must be 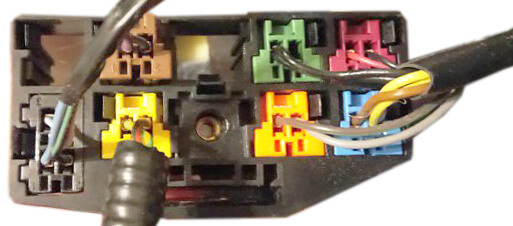 disconnected before trying to remove the seat. Mark each connector or take digital images with your phone so you know where they go when reinstalling
3) Disconnect the airbag connectors
Most airbag connectors are bright yellow or green. They have locking mechanisms that take some time and patience to figure out. Do NOT just break off the locks. They either depress or slide. They can appear confusing, but it’s not rocket science. Be patient and figure it out.
4) Remove the trim covers on the seat rails
Car makers use plastic trim covers to hide the seat rail bolts. Some of the covers unscrew while others unsnap. The screws may be rusted, so use a rust penentrant before removing.
5) Remove the seat rail bolts
Use a socket and ratchet to remove the four seatrail bolts.  Mark the bolts so you know where they go. THEY MAY BE DIFFERENT lengths or diameters. Don’t screw this up. It’s a safety issue. Then lift the seat out of the vehicle.
6) Pry off the rocker panel trim. It comes off easy. Set it aside.
7) Remove the carpet from the vehicle and shampoo with a mold-killer additive and a deodorizer.
8) Put the carpet out in the sun and let it dry.
9) Remove all the carpet padding from the vehicle and discard it. Do NOT use bleach ANYWHERE inside your vehicle. Bleach is an oxidizing agent and will accelerate the formation of rust.
10) Wash the entire floor with a disinfecting cleaner. Rinse. Then dry the entire floor with a hair dryer.
Reinstall the padding and carpet. Move the seat back in place and reconnect the electrical connectors. Then install the seat rail bolts and torque to car makers specifications. Reinstall the trim caps.
©, 2019 Rick Muscoplat
Posted on by Rick Muscoplat