
Replace a Leaking AC Schrader Valve Without Discharging the System
Replace Your AC Schrader Valve Without Losing Refrigerant
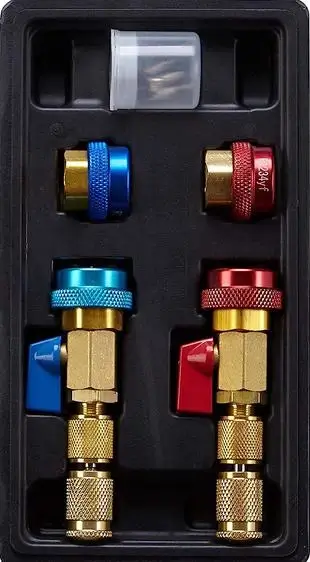
A valve core removal kit has fittings for low and high-pressure ports
I’ve replaced countless AC Schrader valves over the years, and I can tell you this: you don’t need to discharge the entire AC system to fix a leaking valve core.
If your AC system is losing refrigerant, one of the first places I always check is the AC Schrader valve on both the high and low-pressure ports. Dirt, corrosion, and wear can cause these valves to leak. Fortunately, using the right AC Schrader valve tool, you can swap out the faulty valve core quickly and efficiently, without blowing out the refrigerant charge.
The Right AC Schrader Valve Tool Makes All the Difference
The secret weapon I use is an AC Schrader valve tool kit that’s designed for in-line core removal. These kits include adapters for both the low-side and high-side service ports, allowing you to isolate the system pressure while removing and replacing the valve core. The AC Schrader valve core removal kit shown here allows you to replace the valve cores on both the high and low ports of your car’s AC system. Find it on Amazon.com
To make the job even smoother, I recommend buying a complete valve core assortment kit. You can remove the old AC Schrader valve, match it at an auto parts store, or simply pull the correct size from your assortment kit so you don’t have to run around hunting for parts.
You’ll need the kit and replacement valve cores. You can remove the old one and take it to any auto parts store to find a replacement. Alternatively, you can purchase an assortment kit, which includes everything you need, eliminating the need to run to the store.

Step-By-Step: How I Replace an AC Schrader Valve Core Without Discharging the AC System
1) Close the valve on the tool so it’s perpendicular to the tool.
2) Using the quick connect, lift the ring and push down on the AC port. Then release the locking ring.
3) With the valve still closed, insert the removal shaft down into the tool until it touches the valve.
4) Open the valve and push the removal tool down onto the flats of the valve core. Unscrew the valve core until it disengages. Then lift up the removal tool.
5) Close the valve to block off refrigerant.
6) Swap in a new valve core to the removal tool and reverse the process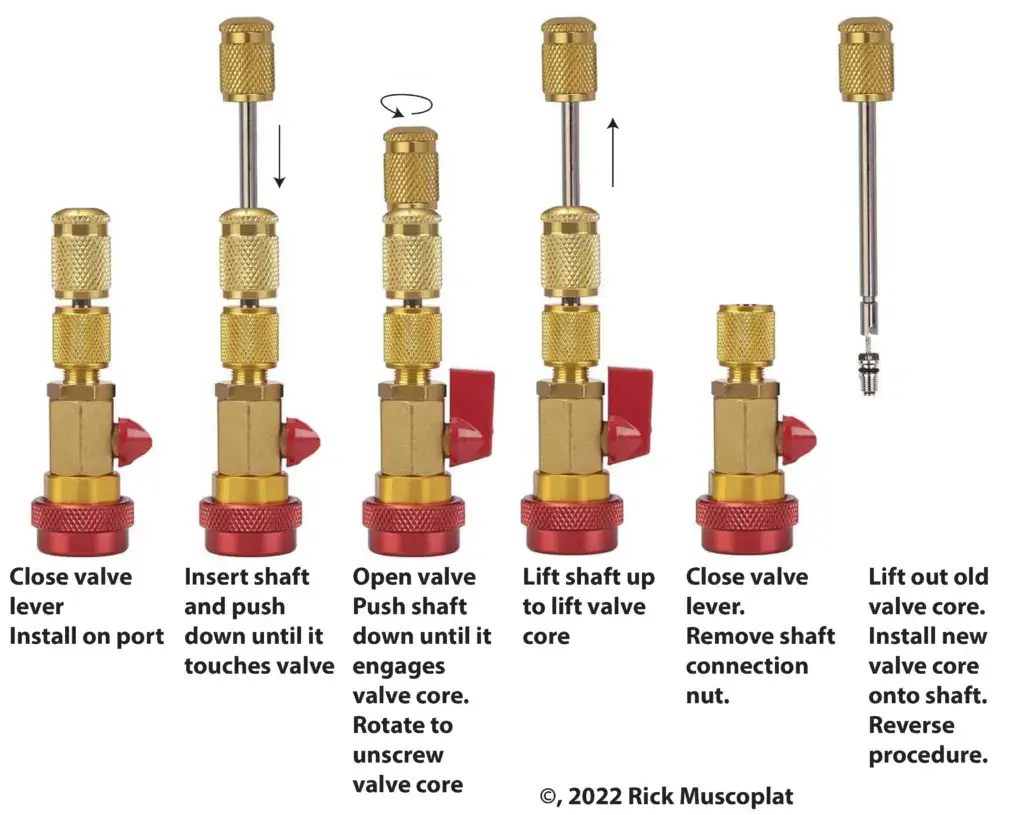
Don’t Skip This Step: Verify the Repair
After replacing the AC Schrader valve, always check for leaks using a refrigerant leak detector or a soap solution. A simple mistake, such as leaving the valve core slightly loose, can cause another leak.
© 2022 Rick Muscoplat
Posted on by Rick Muscoplat