
Strut Replacement: Tips and Tricks for a Smooth Ride
Strut replacement tips and tricks for DIYers
There are two ways to do a strut replacement. You can purchase just the strut, a new strut mount, a strut boot, and a new bump stop and reuse the old spring. Or, you can purchase a fully assembled strut assembly that includes all those parts. Which route your choose, here are some great strut replacement tips and tricks for DIYers
Avoid these common mistakes when replacing struts
1) Not measuring vehicle ride height before doing just a strut replacement— Springs sag over time, and worn springs will wear out your new struts faster as well as give you a less comfortable ride. If you’re replacing just the strut and planning on reusing the springs, make sure the springs are still within specifications. It makes no sense to reinstall sagging springs with new struts.
You’ll need to refer to a shop manual to get the ride height measurement and the exact location to measure. You can reuse your old springs if your vehicle’s ride height is within specs.
2) Not paying attention to the orientation of the strut mount to the strut tower— Some carmakers evenly space the strut mount holes in the strut tower, even through the strut mount must be installed in the correct orientation. If the mount isn’t in the same orientation, it’ll make noise from that point on.
Before you remove the strut assembly from the vehicle, mark the forward-most strut mount stud with a marker so you can duplicate the orientation when you install the new strut assembly.
Notice the orientation as you remove the strut mound from the vehicle so you can duplicate that orientation when you install the new strut mounts.
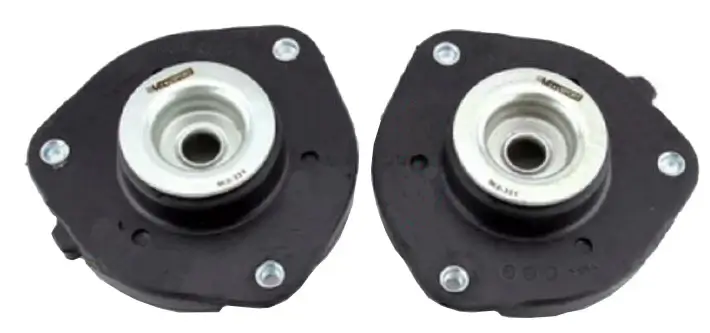
3) Reusing the old strut mount— At 100,000 miles, the struts on a typical vehicle have cycled more than 180 million times. The rubber cushioning inside the strut mount has also flexed many times. Reusing the old strut is an example of false economy, and the used strut mount will fail long before the new strut.
The strut mount also contains the bearing plate that allows the strut to turn. Reusing an old strut mount can create a dangerous situation if the old bearings ever fail.

Notice the condition of the bearings in the used strut mount
4) Reusing the old bump stops— If your vehicle bottoms out, it’s the bump stop that prevents damage to the strut. At least check the condition of the old bump stop before you even consider reusing it. If it’s soft, worn, or missing chunks, replace it with a new bump stop

5) Reusing a torn dust boot— Just about every plunge shaft on a vehicle incorporates a dust boot to prevent road grit from being forced into the seal. A brake caliper piston has a dust seal. So do the caliper slide pins. And you would never think of replacing a rack and pinion gear and installing the old torn dust boots. Yet DIYers routinely reinstall old strut dust boots. Then, they wonder why the strut fails early. The dust boot provides protection against grit, which damages the strut piston seal. Don’t go through all the trouble performing a strut replacement and then skimp on cheap parts like a dust boot.
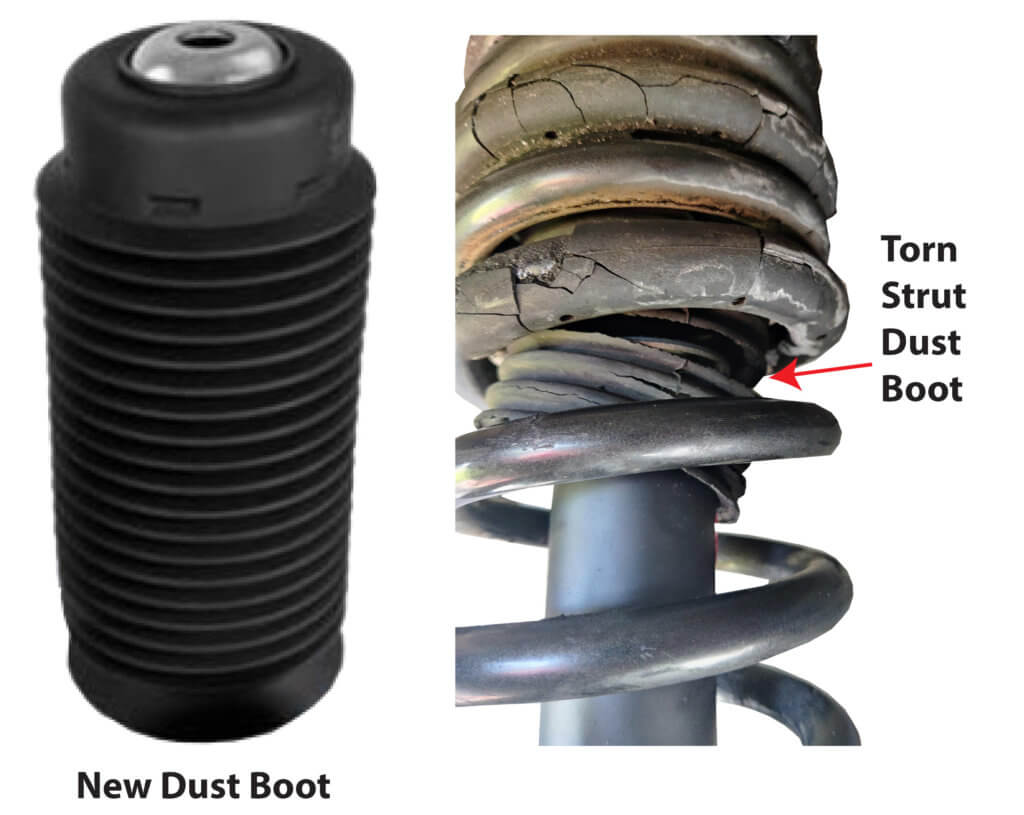
Always install a new strut dust boot with a new strut
Strut replacement installation tips
1) Prime the new struts—
When you remove the new strut from the box and cut off the strap, try compressing the strut piston a few times. You might notice it’s easier to compress or extend at the top of its range. This is normal for some units, especially twin tube shocks, and struts that have been stored horizontally during shipping. In this position, oil and gas can mix between chambers, potentially causing irregular damping.
Priming the unit restores proper function by separating the gas and oil. This process occurs naturally once the strut is installed vertically in the vehicle. Most struts are self-priming, so manual intervention is usually unnecessary.
However, if you encounter a unit with inconsistent damping, you can manually prime it. Simply hold the strut vertically and cycle it through its range of motion a few times. This should resolve any irregularities in its performance.
2) Don’t fully torque the strut mount bolts with the vehicle still in the air—
If you want noise and creaking, you’ll do what most other DIYers do; tighten the strut mount nuts while the vehicle is still on the jack stands. DON’T! The strut mount is designed to be tightened and torqued with the full weight of the vehicle on the mount.
3) Tighten the strut rod nut with a torque wrench, not an impact wrench—
An impact wrench can spin the piston rod after it hits the bottom. If the stru
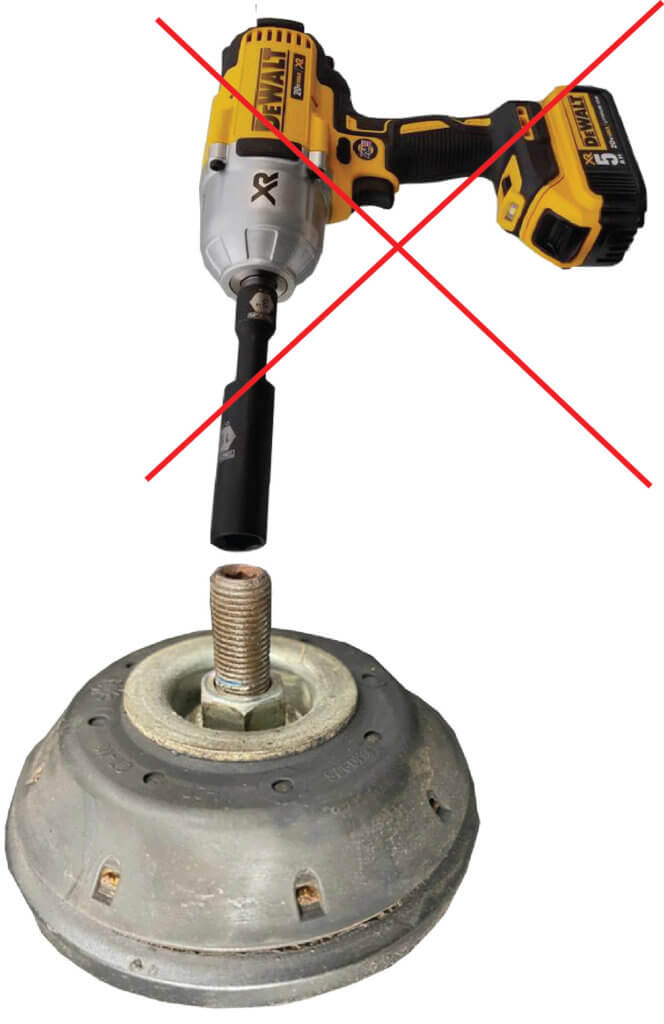
t rod spins, it can damage the rod, valves, strut rod piston seal, or even the upper strut mount. Professional technicians do this all the time. But it’s NOT the correct method.
©, 2022 Rick Muscoplat
Posted on by Rick Muscoplat