
Visual Timing Belt Inspection Guide
Signs of Timing Belt Wear and Tear
Quick Summary
If you’ve bought a used vehicle or inherited a car with incomplete maintenance records, one of the first questions you should ask is, “How old is the timing belt?” Unfortunately, if you don’t know the answer, you’re taking a gamble every time you start the engine.
In this guide, I’ll show you how to perform a visual timing belt inspection, what signs of timing belt wear and tear to look for, how to identify timing belt tooth wear patterns, and how to perform a DIY timing belt check at home. I’ll also explain why a timing belt that looks good isn’t necessarily safe to keep using.
Timing Belt Inspection: Don’t Trust Unknown Maintenance History
One of the most expensive engine failures I’ve seen is completely preventable—a broken timing belt.
I’ve inspected countless engines over the years, and the common denominator is almost always the same. The owner simply didn’t know when the belt had last been replaced and assumed it was fine.
That’s a dangerous assumption.
Unlike a serpentine belt, a timing belt usually gives very little warning before it fails. When it breaks, the engine stops instantly. On many vehicles, especially interference engines, broken valves and damaged pistons follow within a fraction of a second.
If you don’t know the belt’s age or mileage, your safest assumption is that it’s overdue until proven otherwise.
Why Timing Belt Failure Is So Serious
The timing belt keeps the crankshaft and camshaft perfectly synchronized. Every valve opening and piston movement depends on that precise timing.
Engine repairs due to a failed timing belt typically range from $3,500 to well over $6,000. Replacing the belt on schedule is almost always one of the least expensive insurance policies you can buy.
If the belt slips only one or two teeth, you’ll often notice:
• Rough idle
• Hard starting
• Loss of power
• Check Engine light
• Engine misfire
If the belt breaks completely:
• The engine immediately stops.
• The vehicle requires towing.
• Interference engines often suffer catastrophic internal damage.
When to Replace a Timing Belt Based on Mileage
Every manufacturer publishes a mileage interval for timing belt replacement, usually between 60,000 and 100,000 miles. Honda, Toyota, Lexus, and Acura often specify the upper end of that range, while VW, Subaru, and Hyundai frequently fall toward the lower end.
If you don’t know the mileage since the last replacement, assume the interval has already passed. Guessing wrong is the fastest way to destroy an engine.
When to Replace a Timing Belt Based on Age
Rubber degrades over time. Even if you drive very few miles, the belt still deteriorates due to heat cycles, ozone exposure, oil vapor saturation, and simple aging. Most professionals (myself included) consider the timing belt condition unsafe after 7-10 years, regardless of mileage.
DIY Timing Belt Check at Home
If you’re comfortable removing the upper timing cover, you can perform a basic visual timing belt inspection.
What you’ll need
• Socket set
• Flashlight
• Inspection mirror
After removing enough of the timing cover to expose the belt, rotate the engine by hand so different sections of the belt become visible. Inspect the entire belt—not just the portion you can immediately see.
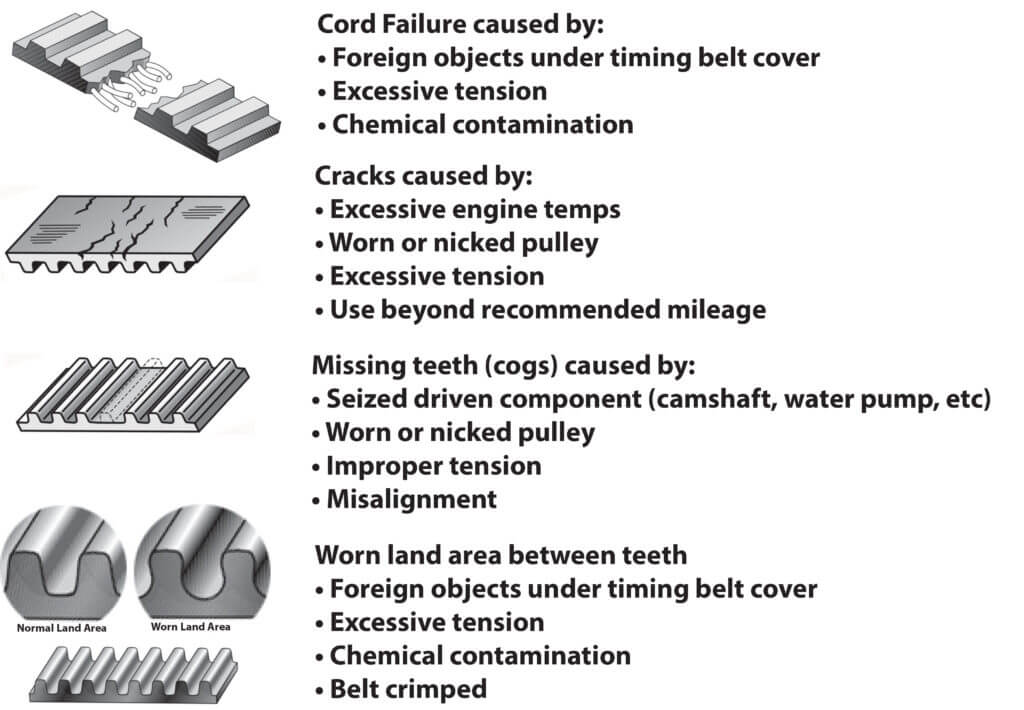
Signs of Timing Belt Wear and Tear
During your timing belt inspection, carefully look for:
Cracks — Small cracks on either the smooth back of the belt or around the teeth indicate rubber deterioration. Even minor cracking means replacement is approaching.
Edge Fraying — The edges should be straight and clean. Edge damage almost always gets worse with continued driving.
Fraying often indicates:
• Pulley misalignment
• Worn idler bearings
• Improper belt tracking
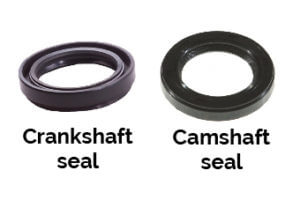
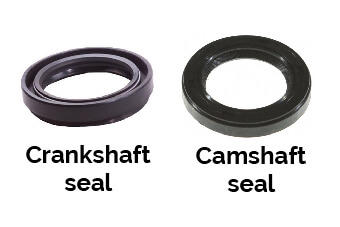
Oil or Coolant Contamination— Timing belts are designed to run dry. If oil or coolant reaches the belt, the rubber softens and weakens. Before installing a new timing belt, always repair:
• Camshaft seal leaks
• Crankshaft seal leaks
• Water pump leaks
• Valve cover gasket leaks
Otherwise, the new belt may fail prematurely.
Glazing — A shiny, polished appearance usually indicates excessive heat or slipping. The rubber should have a dull, slightly textured finish.
Rubber Dust — Fine black rubber dust inside the timing cover often indicates accelerated belt wear or pulley misalignment.
Don’t ignore it.
Timing Belt Tooth Wear Signs
Many people focus only on cracks. In reality, timing belt tooth wear signs are just as important. Healthy timing belt teeth have crisp, square edges. Rounded or worn teeth increase the chance that the belt can jump timing. Even one skipped tooth can seriously affect engine performance.
Inspect every tooth for:
• Rounded edges
• Uneven wear
• Missing chunks
• Cracking at the base
• Missing teeth
• Tooth separation from the belt body
Conditions that require you to replace a timing belt outside of the mileage recommendation

Notice the cracks on the backside of the timing belt. Regardless of time or mileage, this belt must be replaced immediately.
Belt Tension Matters Too
A loose belt isn’t always caused by belt stretch. More commonly, it’s caused by:
• Weak automatic tensioner
• Failed hydraulic tensioner
• Worn idler pulley
• Bearing failure
If the belt appears loose, don’t simply replace the belt. Replace the entire timing system.
Age Is Just as Important as Mileage
Many drivers assume timing belts wear only from mileage. That’s not true. Mileage alone doesn’t tell the whole story.
Rubber deteriorates from:
• Heat cycles
• Oxygen exposure
• Ozone
• Moisture
• Oil vapors
• Time
Even a vehicle driven only 3,000 miles per year may still require timing belt replacement after 7–10 years.
Can a Timing Belt Look Good and Still Fail?
Absolutely. This surprises many people. The fiberglass or Kevlar reinforcement cords inside the belt can weaken long before the outer rubber shows damage.
I’ve seen belts that looked nearly perfect snap without warning because they had simply aged out.
That’s why a visual inspection should never replace the manufacturer’s maintenance interval.
Interference vs. Non-Interference Engines
Knowing your engine type helps you understand the risk.
In an Interference Engine, if the belt breaks:
• Pistons strike valves
• Bent valves
• Damaged pistons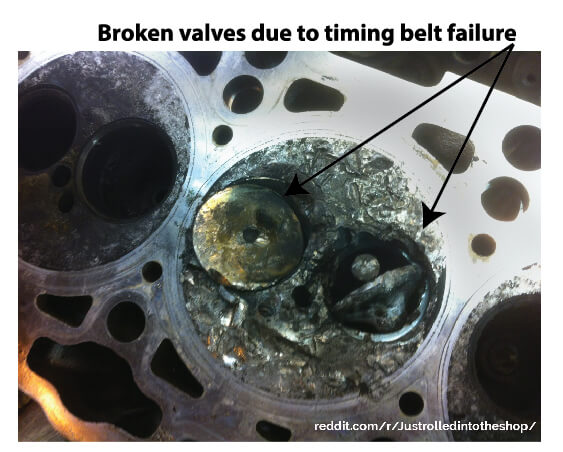
• Possible cylinder head replacement
• Engine rebuild in severe cases
In a Non-Interference Engine, if the belt breaks:
• The engine stalls immediately
• Internal engine damage is unlikely
• Vehicle still requires towing and timing belt replacement
Either way, preventive replacement is far less expensive.
What Should Be Replaced Along With the Timing Belt?
Whenever I replace a timing belt, I strongly recommend replacing every wear component behind the timing cover.
1. Tensioner — A weak tensioner can let a good belt slip, jump timing, and cause the same damage as a snapped belt.
2. Idler pulleys — All idler pulleys have a center bearing that wears with age and miles. If a worn bearing seizes, it will damage the belt and your engine.
3. Water pump — If the timing belt drives your water pump, replace it. If the pump fails later, you’ll have to redo the entire job, paying twice for the timing belt labor.
4. Camshaft and crankshaft seals — The seals are cheap, and they’re easy to replace while the belt is off. If they’re leaking, replace them. If not, they’re optional—but still recommended.
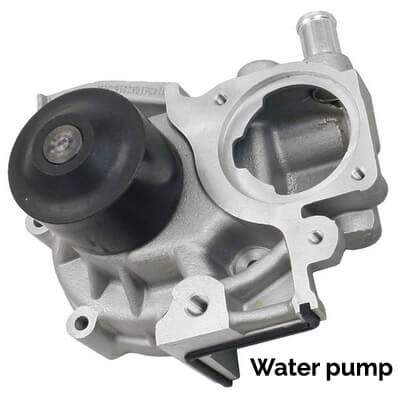
This is a typical timing belt-driven water pump. The smooth backside of the timing belt drives the round black pulley.
5. Coolant service — If the water pump is replaced, you’re already paying for a cooling system drain. A discounted coolant flush is a smart add-on.
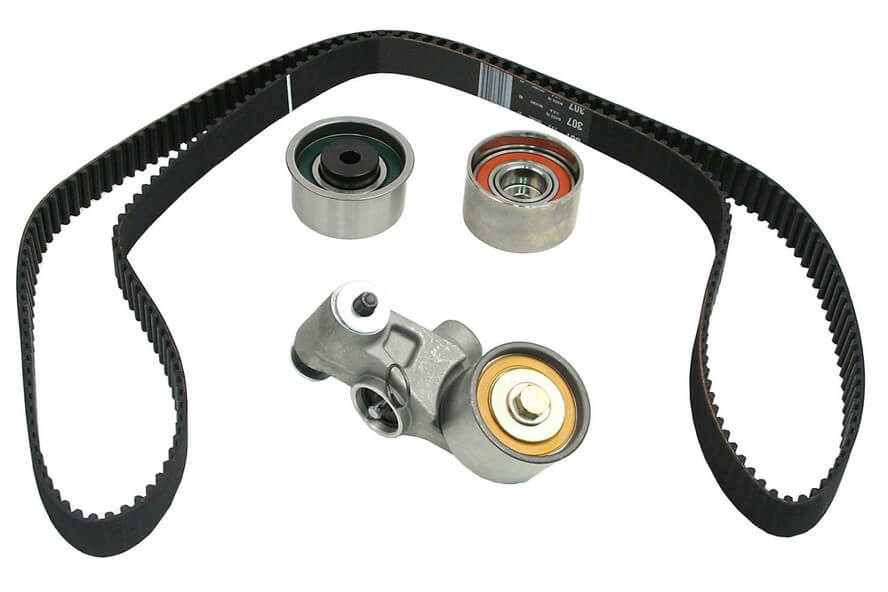
This is a typical timing belt kit. The kit includes the belt, idler rollers, and a new belt tensioner.
 How to Avoid Being Overcharged for Timing Belt Work
Some shops double-charge for overlapping labor. For example:
• Replacing the water pump with the timing belt should add 0.7 hours, not 3.0 hours.
• Replacing serpentine belts during the timing belt job should not include extra labor—they must be removed anyway.
• Always ask for a printed labor breakdown. A reputable shop won’t hesitate.
• Replacing a timing belt is costly; get a second quote from a reputable shop
How to Avoid Expensive Timing Belt Repairs
If you’re paying a repair shop:
• Ask for a complete parts list.
• Request a labor breakdown.
• Replace all timing components during one repair.
• Don’t pay twice for overlapping labor.
If the water pump is driven by the timing belt, replacing it during the same service usually saves hundreds of dollars later.
Final Thoughts
Whenever someone asks me whether they should inspect or simply replace an unknown timing belt, my answer is almost always the same.
Perform the inspection to look for obvious damage, but don’t let a good-looking belt give you false confidence.
If you don’t know its age or mileage, replacement is usually the smartest investment you can make.
Timing belts are designed to wear out. Engines are not designed to survive when they fail.
A proactive timing belt inspection, combined with timely replacement, can easily save you thousands of dollars and prevent one of the most catastrophic engine failures you’ll ever experience.
©, 2016 Rick Muscoplat
Posted on by Rick Muscoplat