
The Ultimate Guide to Clutch Replacement and Installation
Step-by-Step Guide for Clutch Replacement
Quick Summary
A clutch replacement is one of the more advanced repairs you can tackle on a manual-transmission car or truck, but it’s completely doable for an experienced DIYer with the right tools and patience. When I perform a clutch replacement, I rarely replace just the clutch disc alone. I also inspect or replace the pressure plate, flywheel, pilot bearing, throwout bearing, and sometimes the rear main seal while the transmission is out. Understanding how to replace a clutch means carefully removing the transmission, inspecting every wear component, and installing the new parts with proper alignment and torque. If done correctly, a clutch replacement can restore smooth shifting, eliminate slipping, and extend the life of your drivetrain for another 100,000 miles.
For more information on when to replace a clutch or the symptoms of a bad clutch, see this article.
Article
Clutch Replacement: How to Replace a Clutch in Your Car or Truck
Over the years, I’ve done a lot of clutch jobs, and if there’s one thing I tell people learning how to replace a clutch, it’s this: most of the work isn’t the clutch itself—it’s removing and reinstalling the transmission.
Once the transmission is out of the way, the actual clutch replacement process is fairly straightforward. But to do the job properly, you need to inspect and often replace several related components simultaneously.
The First Step in Clutch Replacement: Removing the Transmission
Any time you want to learn how to replace a clutch, the first step is gaining access to the clutch assembly by removing the transmission.
This usually involves disconnecting the shifter linkage, disconnecting the exhaust system, draining the transmission fluid, and removing the driveshaft. Once those components are out of the way, it’s time to remove the starter and ground cables. Then you can support the transmission with a jack and start removing the transmission bolts, so you can slide the transmission back and down from the engine.
Once the transmission is out, the clutch assembly is fully exposed, and you can begin the actual clutch replacement.
Removing the Clutch and Pressure Plate
The clutch disc is sandwiched
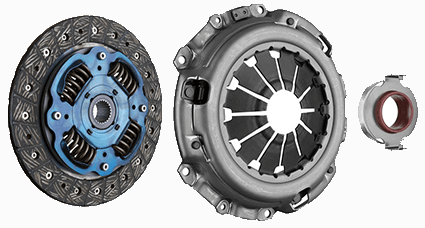
Clutch disc, pressure plate and throwout bearing
between the pressure plate and the flywheel. The pressure plate is typically held to the flywheel by six bolts around the perimeter.
Before removing the pressure plate bolts, I like to spray the clutch with brake cleaner to wash off surface dust. Clutch dust, which contains asbestos, can be harmful to breathe, and wetting it prevents it from becoming airborne. Then re-wet the clutch disc with water to reduce dusting during removal.
Once the bolts are removed, the pressure plate and clutch disc can be pulled away from the flywheel.
Examine the clutch disc for clues
A worn clutch will often have friction material worn down to the rivets, which means the clutch disc must be replaced. If the rivets contact the flywheel, it can cause serious damage.
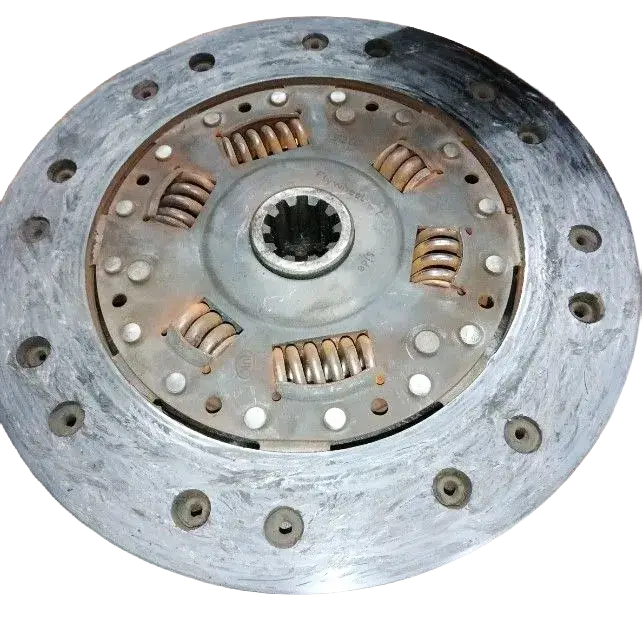
Completely worn-out clutch disc
Inspecting the Flywheel During Clutch Replacement
The flywheel must have a smooth, flat surface that contacts the clutch disc. If you see heat discoloration, deep grooves, or cracks, the flywheel should either be resurfaced or replaced.
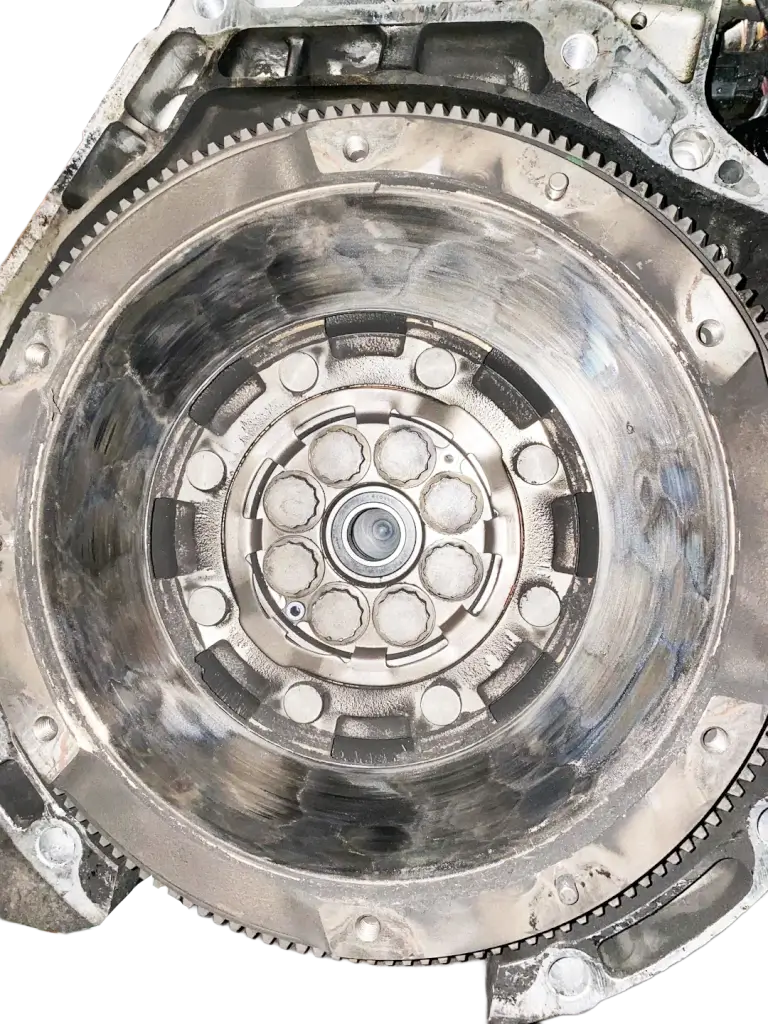
The blue spots on the flywheel indicate overheating, causing clutch chatter
In many clutch replacement jobs, resurfacing the flywheel is similar to machining a brake rotor. A machine shop removes a small amount of material so the surface becomes perfectly flat again.
Some performance builds even replace the stock flywheel with a lightweight aluminum one to reduce rotational mass and improve engine response.
Replacing the Pilot Bearing
The pilot bearing sits in the center of the crankshaft and supports the transmission input shaft. If it fails, it can cause noise, vibration, and shifting problems.
Removing the pilot bearing usually requires a special puller tool, but there’s also an old mechanic’s trick using grease and bread to create hydraulic pressure that pushes the bearing out of its bore.
Replacing the Rear Main Seal
One of the smartest things you can do during a clutch replacement is replace the rear main seal. This seal sits at the back of the engine crankshaft. If it leaks oil, that oil can contaminate the clutch and cause slipping.
Because removing the transmission and flywheel to access the seal is required, this is the perfect time to replace it. In fact, when explaining how to replace a clutch, I always tell people that replacing the rear main seal while you’re there can prevent future labor-intensive repairs.
Installing the New Flywheel and Clutch
Once everything is cleaned and inspected, the clutch replacement installation begins. Install the flywheel first and torque to specification using a crisscross pattern to ensure even clamping pressure. Next comes the clutch disc and pressure plate.
This is where a clutch alignment tool becomes essential. The tool centers the clutch disc perfectly, so the transmission input shaft will slide into place later. This step is critical—if the clutch isn’t properly aligned, reinstalling the transmission can be extremely frustrating.
Once aligned, tighten the pressure plate bolts in a crisscross pattern and torque to specification.
Installing the Throwout Bearing and Clutch Fork
This bearing presses against the pressure plate when the clutch pedal is pressed, allowing the clutch to disengage. If the bearing becomes worn or noisy, it should always be replaced during a clutch replacement. In many cases, the clutch fork and pivot stud should also be inspected and lubricated.
The transmission input shaft splines also receive a very light coat of high-temperature grease to ensure smooth movement.
Reinstalling the Transmission
With the clutch aligned properly, the transmission should slide back into place with minimal effort. Once installed, torque the transmission bolts, install the driveshaft, and refill the transmission fluid. Finish by reconnecting the shifter linkage and exhaust.
Some vehicles use a mechanical clutch cable that may need adjustment or replacement. Others use a hydraulic clutch system that requires bleeding to remove air from the system.
Breaking in the New Clutch
Most manufacturers recommend driving normally for several hundred miles before aggressive driving. This allows the clutch surfaces to seat properly against the flywheel and pressure plate. If you skip this break-in period, the clutch may wear prematurely.
Why a Complete Clutch Replacement Is Important
A proper clutch replacement isn’t just about installing a new clutch disc. It’s about inspecting and refreshing the entire clutch system.
When you understand how to replace a clutch correctly, you’ll replace or inspect:
• Clutch disc
• Pressure plate
• Flywheel
• Pilot bearing
• Throwout bearing
• Rear main seal
Doing the job thoroughly the first time ensures reliable operation and prevents having to remove the transmission again.
©, 2026 Rick Muscoplat
Posted on by Rick Muscoplat