
CV Boot Clamp Installation Procedure
CV Boot Clamp Installation Procedure: How the Pros Do It
Over the years, I’ve performed numerous CV boot clamp installation procedures, and I’ve learned that using the right tools and techniques makes all the difference. Whether you’re dealing with band-style clamps or Oetiker-style clamps, understanding the proper CV boot clamp types and how to work with them ensures a reliable, leak-free seal that protects the joint and keeps the grease where it belongs.
Understanding CV Boot Clamp Types
Before you can tackle any CV boot clamp installation procedure, you need to know the two most common CV boot clamp types:
• Band clamps – These work much like a belt, tightening securely with a winding mechanism.
• Oetiker clamps – These rely on a pre-formed crimp for their tight seal.
Each style has its strengths, and while you can technically install either one without specialized CV boot clamp tools, I’ve found that investing in the proper tools saves time and frustration — and yields a more professional result.
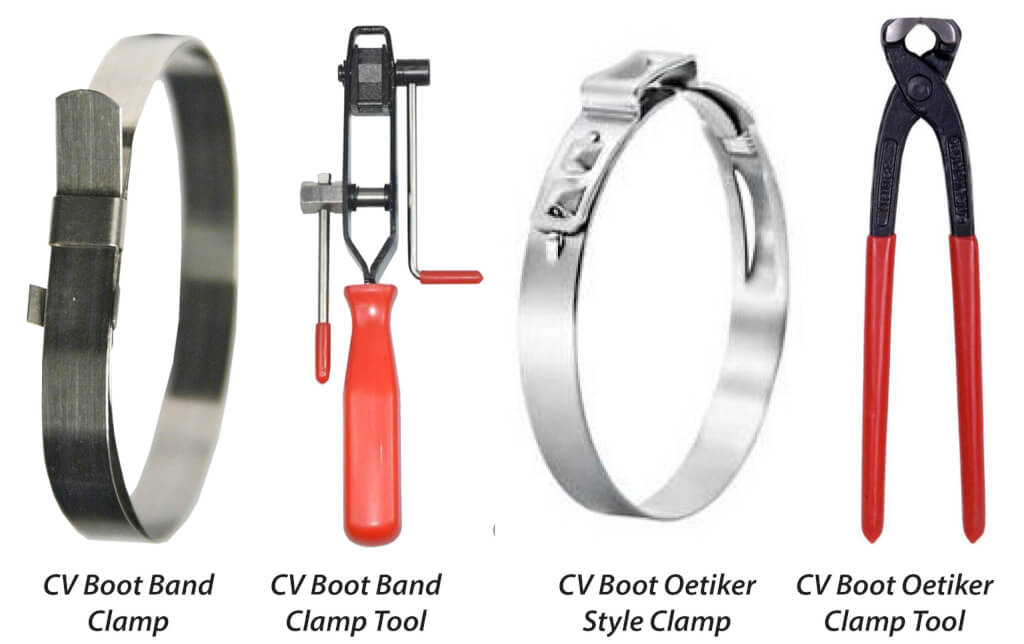
Examples of CV boot clamps and installation tools
How to install a CV boot band clamp
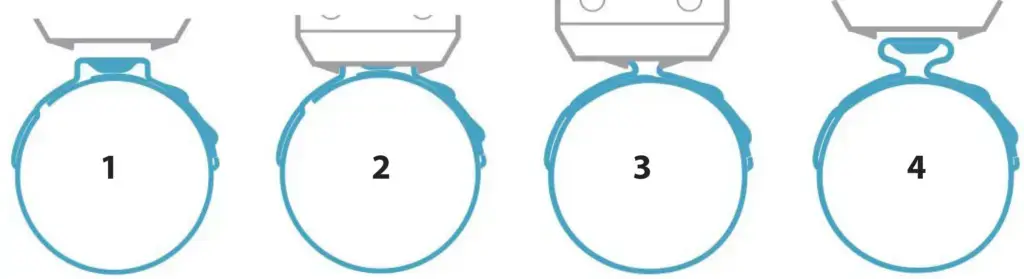
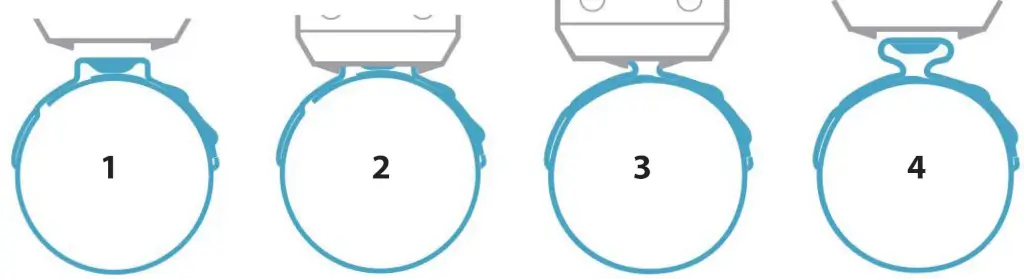
When I’m working with band clamps, my CV boot clamp installation procedure follows a clear process:
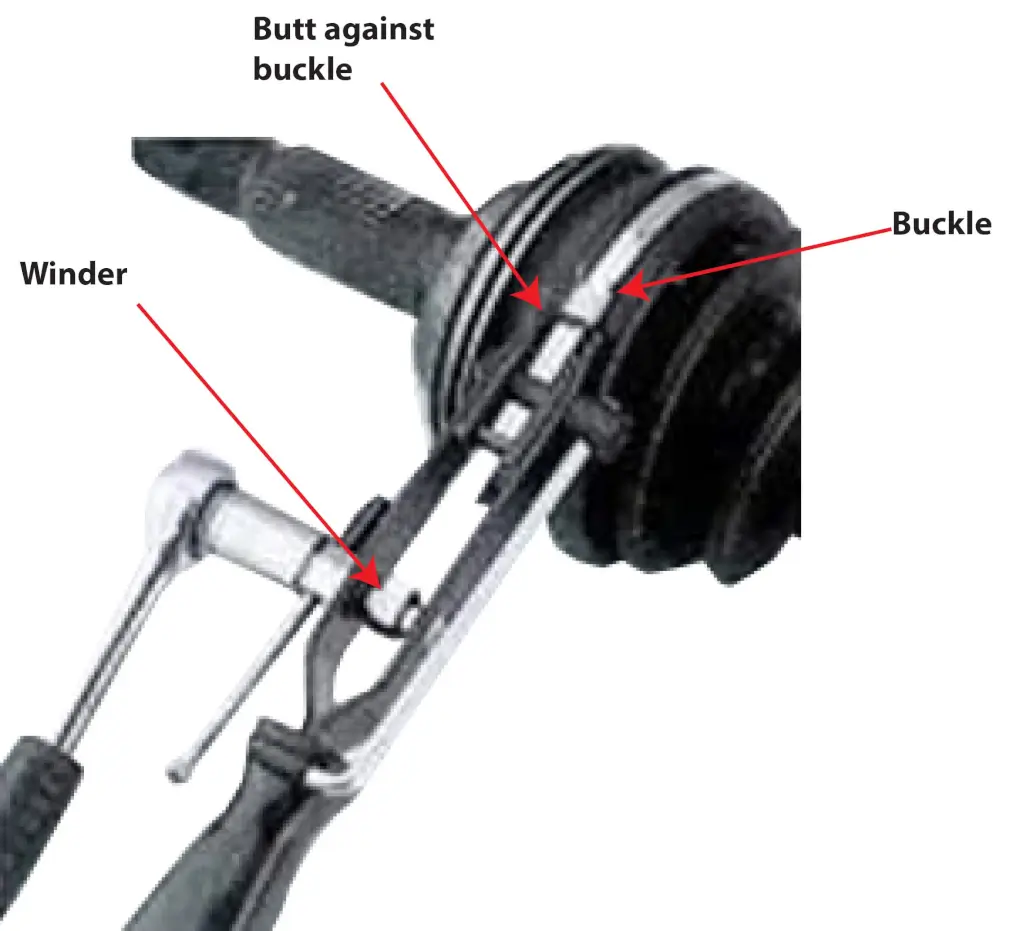
• Wrap the clamp around the CV boot and thread the end of the band through the buckle.
• Load the end into your winding tool. Most CV boot clamp tools have a lever or allow you to use a socket and ratchet on the winding mandrel.
• Tighten the band until it’s snug. The back end of the tool will rest against the buckle as you reach proper tension.
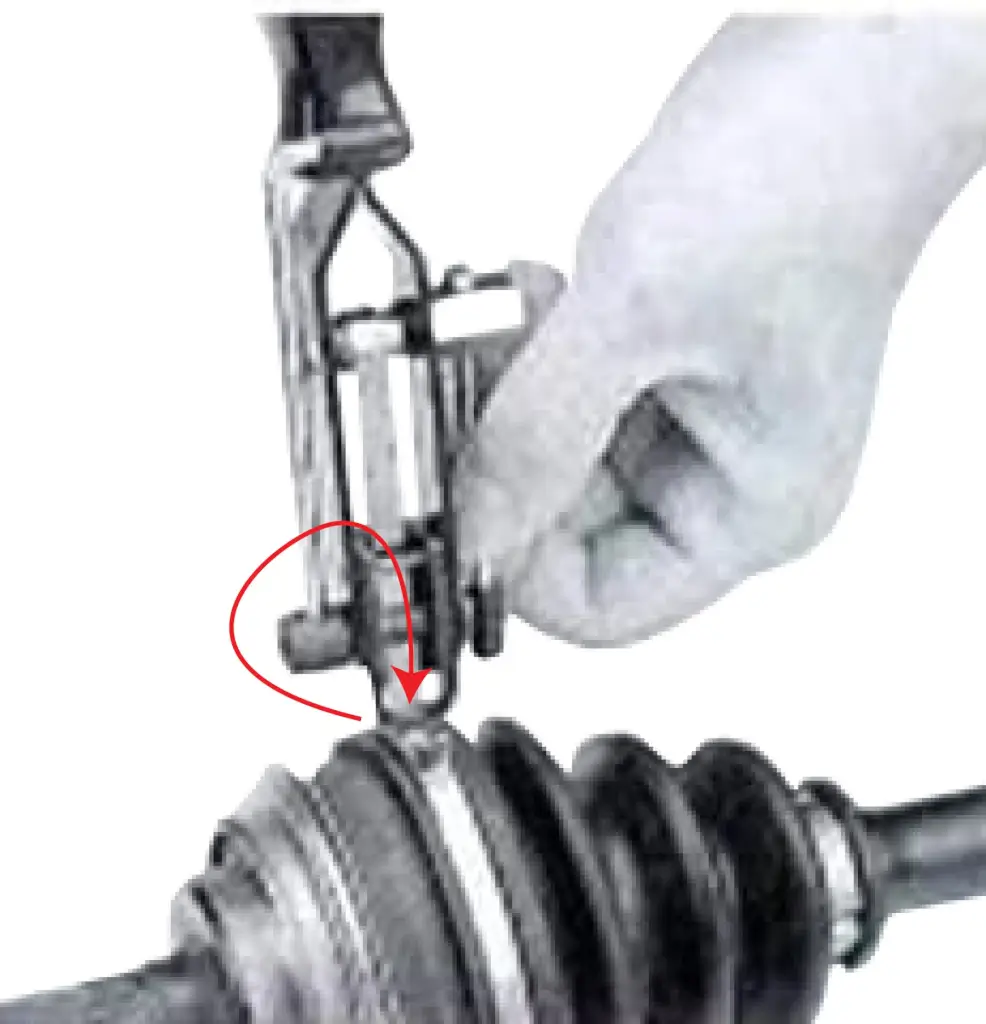
• Lock it in place. Rotate the tool 90 degrees to bend the band, preventing it from slipping back through the buckle.
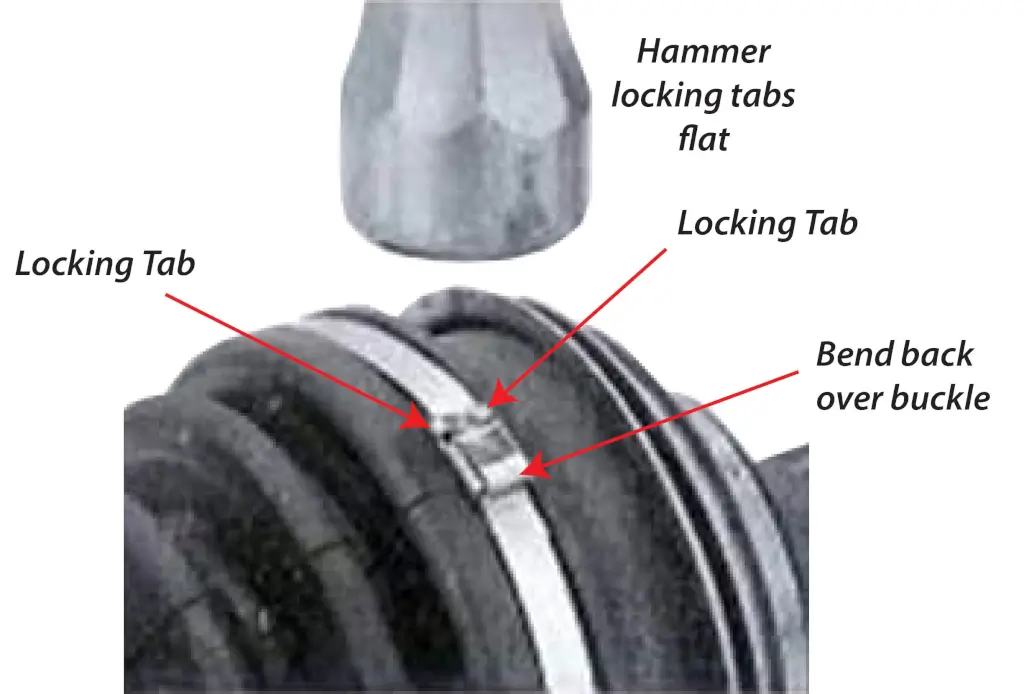
• Finish the seal. Fold the band back over the buckle, tuck it into the locking tabs, flatten the tabs with pliers, and trim any excess band with side cutters.
This method creates a tight, secure seal that keeps grease in and dirt out — exactly what you want from a reliable CV boot clamp installation procedure.
Once the band is tight, rotate the tool 90° to bend the band so it can’t slip back through the buckle
To complete the installation, remove the winding tool and fold the belt over the buckle so it’s made a 180° turn. Lay the belt into the locking tabs. Then flatten the tabs to lock the belt in place. Cut off any excess belt using a side cutters.
How to install an Oetiker-style CV boot clamp
When I encounter Oetiker clamps, I follow a slightly different CV boot clamp installation procedure:
• Unhook the clamp from the prongs so you can open it up and slip it around the CV boot.
• Snap the clamp back onto the prongs to get the tightest possible initial fit.
• Use a proper crimping tool to compress the pre-formed crimp until it’s fully tight.
While some people try to improvise without the correct CV boot clamp tools, using the right crimping tool ensures a precise and long-lasting seal. Trust me — this is one area where the proper tool pays for itself.
Why the Right Tools Matter
Regardless of the CV boot clamp type you’re using, proper tension and alignment are crucial. Cheap or makeshift tools can leave the clamp too loose or crooked, which eventually leads to leaks and contamination. By using the right CV boot clamp tools, you’ll make your installation faster, cleaner, and more reliable.
The Bottom Line
A proper CV boot clamp installation procedure isn’t just about keeping the grease in; it’s about protecting the joint, extending the life of the axle, and saving you money on future repairs. Take the time to identify the correct CV boot clamp types and use the appropriate CV boot clamp tools. A carefully installed, professional-quality system today will prevent premature wear and costly drive axle repairs down the road.
©, 2024 Rick Muscoplat
Posted on by Rick Muscoplat